31 January 2013

5 minute mini.

I'm not much of a 12 x 12 scrapper but my scrapping passion lies in making mini albums especially ones created with clever folds.

This little mini is the quickest, easiest and involves the least amount of stash you'll ever need.  So here it is;


All you'll need is one sheet of 12x12 paper, ( I used a sheet of Yours Truly by Glitz design) and that's about it! Well, apart from all the yummy embellishments of course.

Here's how to fold it first of all.


The folding plan can be followed for any size of paper and can also be used on an A4 sheet.  

Here's my finished book. I lightly swiped over the pages with some white acrylic paint and added some small spots of Tim Holtz text washi tape. I stamped with Dylusions How does your garden grow and used some more small bits of the Glitz papers to add some extra colour and to write my journaling on.


 Thanks for looking

Jaine 

30 January 2013

Home

Hello!
For my project to share with you all today, I thought I'd go a bit more 3D..... so I made a house on a spool. With wings. As you do......
The main item I've used to create my house is a small altered art matchbox from Graphic 45. These boxes are fab, so many different things you can do to them! I knew I was going to cover the whole of the outside with old book paper, effectively sealing it up, so I needed to work on the inside first!
The inside of my house has three Prima Genie Stones hanging from the 'ceiling'...
These were hung from wire, then I poked the wire through holes in the box. This pic shows things better...
 To create the roof shape, I simply cut some chipboard triangles, and stuck one to the front and one to the back of the box using masking tape. Some more chipboard to create the sloping sides,then book paper was stuck down all over to hide the tape and create a seamless look.
 All of my house was coloured in the same way, using Tattered Angels Glimmer Glaze, in Island Spring . I love this lots, although I wouldn't call it a paint by any means, despite what it says on the bottle! I also wouldn't use the word 'glimmer' either, whilst you can see the mica shimmer in the bottle, once the product is applied its so subtle you can't really see it! It DOES give a gorgeous glossy translucent glaze effect, and the little brush applicator (think nail varnish bottles!) is absolutely perfect for creating splats! Everything got a coat of the glaze as you can see, and the splats were blasted with a heat gun so they bubbled up to give a teeny bit of texture.
I also stamped a harlequin (Jenni Bowlin) using black ink here and there, just to add a bit of distressed detail.....
My figure, (Midge, by Stampotique) was stamped onto card, cut out and then glued to a bead so she would be seen! If I had put her directly on the floor of the box, half of her would have been hidden, she needed that extra bit of height the bead gives.
Once I'd added the spool and wings to my house, the finishing touch was this fabulous Prima Type Bulb embellishment...
I removed the word that was printed on the bulb (it just scratches off), and glued on a word cut from the book pages.
So, a blue book paper house, on a spool, with wings and dangly bits inside. Just what you need to look at on a Wednesday! I'll be back soon with something a little more sane perhaps!!!
Love Trish xxx


29 January 2013

Recycled birdie!

Thank you, thank you, thank you for everyone's lovely comments last week when I shared my 2nd creation.

I seriously recommend you following the blog if you aren't doing so already, goodness there is lots of  fabulous inspiration from the Design Team.. 

This week I have a small decorated canvas to share with you.. with lots of recyling going on!


The background was created using a piece of kitchen roll I had used whilst mopping up ink sprays.. I can't bare to throw them away.. some of them are just too pretty.

The gorgeous bird is from Prima you can find it in the shop {HERE} I coloured the bird using blue and purple Distress Stains.. see {HERE} then overstamped onto her with a text stamp using black archival ink.. see {HERE}.

The word sentiment on the canvas is from my craftbox.. I actually borrowed it from the front of one of my old craft journals it seemed just perfect!

I think this little birdie must be a magpie (just like me)... I recycled some wire for her to stand on along with the most gorgeous embellishment ever!!! My first time using one of the fabulous {Prima Junkyard Findings}.. just PERFECT!

I painted a full moon onto the canvas using a silver acrylic {Paint Dabber}

Thank you for calling today and leaving a comment if you get the chance.. 

  Happy creating, Gez oxox
 

28 January 2013

Blog Hop time!

Hello! 

Just a quick reminder that the
 Craft Stamper Blog Hop starts this Friday! 

As you may have realised already some of our creative design team are also regular contributors to Craft Stamper Magazine, and the blog hop promises lots of good things, including some fabulous prizes from the various sponsors supporting the event. 

Hope you'll find time to hop! 

playing with glue


Hello everyone!

Today I would like to show you very interesting technique using all purpose craft glue. I'm not a fan of glue when I'm making cards or layouts. I prefer to use a double sided tape. Why? Please don't lough. Every time I use a glue my fingers are sticky but of course I always forget about this...and after a few minutes my eye is itching and than I have a swollen eyelid. That's why I'm trying to avoid glue but not when I'm working on my mixed media projects! I love using glue because it gives a lovely texture when is mixed with paint.

I can only give you some ideas. This is an easy technique but what effects you can get! There is so many textures when you use glue + paint! Please try different brand glues, different paints – not only colours but also making companies.


Here you can see four different backgrounds. You can paint your surface or decorate it. Whatever you will choose you need to wait and allow it to dry!
For my backgrounds I used a red paint, a Stampotique stamp, a piece of newspaper. I also leave an empty space – you will see for a moment what I'll do with it. Oh, nearly forgot, please remember to use a waterproof ink for your stamp! We don't want to have a smudgy background, do we? For sure, not this time! But you can try maybe you will achieve a great effect. I used Ranger Archival Ink.

I applied a layer of glue with my brush. I did the same on the empty space on my paper.


And now a funny bit! I took a clean brush and applied the paint. The glue need to be wet! Don't allow the glue to dry without a layer of paint!


When you will apply your paint the first crackles will appear very quickly but let the glue and paint dry. You can try to use a hairdryer or Heat It Up! to speed up the effect. Too much hot air in one place and you will have bubbles ( or whatever you call it ) , be careful!
On first three backgrounds I applied the paint only in one direction, on the fourth one I changed directions. It's not a perfect image, when you will try on a bigger size paper, effect will be better.

And one more thing - the thicker layer of the glue the bigger cracks will appear. On top – the thick layer of glue. Bottom – the thin layer of glue.


I hope you will have a lot of fun playing with glue and paint!

This is my project using a lot of glue to make a texture background.


I used:

27 January 2013

You + Me = Us

Hi there, it's Arnlaug with you today:-)

A quick post today to share a way of dressing up this great Kraft Classine Envelope from Tim Holtz.
I've never tried this product before and must say I love it! It's got a great look and quality and I'm sure you can find many ways of using it.


For my envelope I started out culing it a bit before gluing some cheese cloth down using multimedium and gesso. Then I dropped some turquoise Bombay Indian Ink and some Orange Crush Glimmer Glaze. I just love the two colours together!

I embellished my envelope using some Glitz Design Whatnots from the Yours truly collection. I also added some Prima Say it in Crystals - Rounds and a Art tile also from Prima.

I love how it all came together and find it perfect for hiding a special message or maybe a concert ticket for someone special:-)

Supply list:

Tim Holtz - Kraft Classine Envelope
Bombay Indian Ink - turquoise
Tattered Angels - Glimmer Glaze Orange Crush
Glizt Design - Yours truly Whatnots
Prima: Say it in crystals Rounds and Art tile.

26 January 2013

Really?


Well, I know.....it's another LO but have to admit I'm loving the 12x12 space now - When I saw this sheet of paper by Jenni Bowlin, I knew what photo I wanted to use. I spritzed some Dylusions Ink Spray in Fresh Lime, I then blew in to the ink so it flared out making the runs a long the page. I then used Black Soot Distress ink  through a Dylusions 5x8 Number Jumble stencil, then I used a piece of sequin waste as a stencil, I rubbed through some lime green coloured ink along the edges, as shown.
The light bulbs are by Prima - they have pre printed words on them but I removed the words from mine and added some rub-on wording I had in my own stash. The word 'Really?' is made up using some Jenni Bowlin Black Skinny Alphas.


I realise a lot of scrapbookers out there might be thinking (or not!) Where's the journaling? Well, I've written the place, month and year a long one of the ink runs but I don't feel the need to write much, mainly because this is for Nick and I, we have no children and I shan't be passing the LO's on to anyone....so, this piece is for the here and now.


Right, this is my last post of this month.....so, see you in February!

Paula x

25 January 2013

Wooden Heart...

Hello again!
My last post was all about the stencils on your mixed media pieces, this one is all about the stamping! I thought I'd share some of the ways I use stamps in my work, and just to change things up a little, this time I'm using a 3D wood piece rather than a flat bit of card!
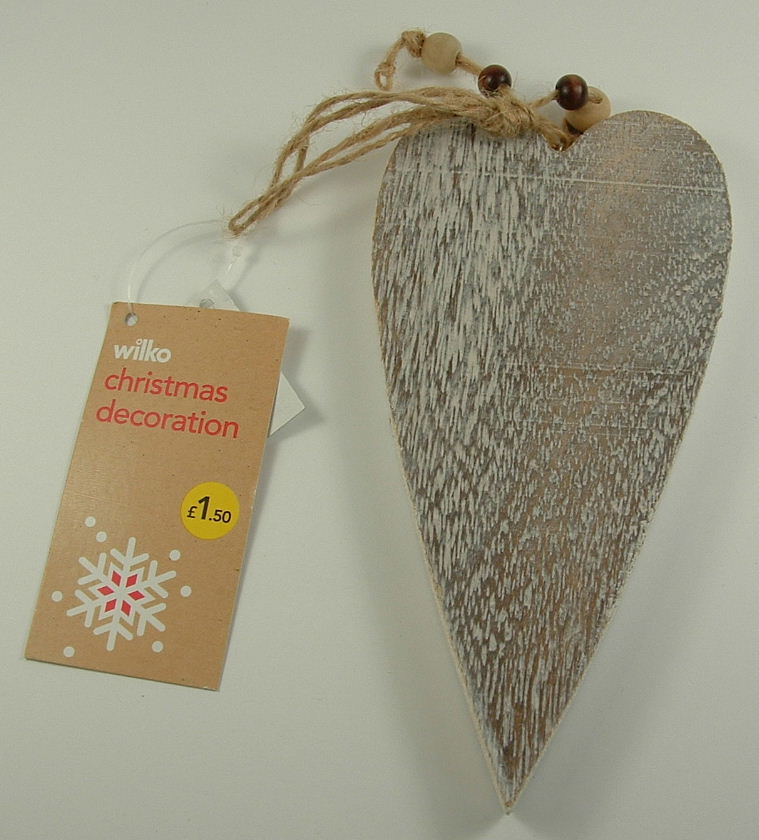
The wooden heart is one of my 'keep your eyes open you never know where you might find something cool' purchases, it started off like this..
I covered the whole thing with a couple of coats of Gesso, then roughly coloured it with Pool Adirondack Paint Dabber. The first lot of stamping is done with white paint (or gesso if you still have some on the desk!)
I've used a dot background stamp, and a star, as you can see. Paint is great to stamp with when you don't have to have a 100% perfect image, bits missing here and there work wonderfully for background layers! Don't forget to clean the stamps straight away, if the paint dries you'll never get it off!
Next I edged the heart with some Watermelon Adirondack paint, and added more dots too!
All my stamps so far have been unmounted, and I've used them like that, no block. This is the best way to get random, tiny areas of stamping, and of course if the stamp is flexible it can go round corners! Don't forget to stamp the edges!
Next, I moved on to stamping with ink, as I wanted my lines to be a little crisper. Black ink and a mesh/grid stamp to be precise. Again, do the edges too!
All this direct to substrate stamping is all well and good if you're not after a perfect image, but if you are, ( and especially if the substrate doesn't have a nice flat surface) then we need to try a different trick.
Stamping onto tissue is a wonderful way of transferring an image without losing any clarity whatsoever, and once its on, it looks like you DID stamp it directly!
Stamp the image onto a scrap of white tissue....
Then glue it to the piece. I've tried many many glues for this, but I still swear by Mod Podge! You need a layer both under and over the image, make sure it it firmly smoothed all over...
You can go round corners with this technique too...
Once its on, it looks really messy and white..
But around 3-4 hours later, hey presto the glue is transparent!
One of the very 'me' things to do is add a black and white stamped image to things. Lots of people colour the images in, I prefer not to!
LOVE this little Stampotique lady!
Glue her on...
and that's nearly everything. My final touches were a Dymo-ed word and some black pom pom yarn through the hanger..
I hope you like my project today, I'll be back soon with another!
love Trish xxxx


24 January 2013

Smashin' style.

A week ago I let you into my art journal and today I'm going to "show and tell" my smash style.

I became fascinated by Smashbooking only a few short months ago but once I'd got my teeth into it I absolutely loved it.  At last I had somewhere to stick all those little bits and pieces I had stashed away and combining my ephemera with scrapbooking supplies gave me so much pleasure.

I experimented with several different styles but eventually settled on the style you see below.


I make my own books from watercolour paper so I'm still able to paint, spray or glue as I would with my journal.  I usually start with a quick spray or wash of paint to add a colour to the page, then I lay out my ephemera and pull out papers and journaling spots from my scrapbooking stash which co-ordinates with the images. (I'm not into the just stick it in, random look.  I need order and design).


I collect a lot of magazine words and phrases in a small box which I use frequently in my smash pages.


Here I've also used magazine images which is another favourite of mine.

On these pages I've used:

See soon

Jaine x

23 January 2013

The story of Grandpa

As soon as I got my hands on this Die Cut & Perforated Bank statment from Jenni Bowlin, I knew I had to make a page for my grandpa! I love the vintage feel of it and wanted to make a vintage layout.


 In my first DT-kit I got a Claudine Hellmuth Sticky-Back canvas sheet. I loved playing with it using paint and inks but unfortunately I didn't get a useful result this time;-) But then I decided to do some stamping on a piece of it and distressing it with som instant coffe and water. I also used some Tattered Angels Glimmer mist here. I ruffled the edges and stiched it down using a French Kiss - Paper layer from Glitz Designs, as a mat. As I can't throw anything away I used the thorned thread from the canvas sheet to embellish the page.


I had one piece of the canvas left and  thought I give it a go in the printer! And I just love the result! 


 I made some flowers from a newspaper and coloured it with instant coffee.  I also embellished my page with some old buttons, washi tape, Jenni Bowlin Printed flag tags and printed tags, and Grey Skinny Alpha also from Jenni Bowlin. I also used some Teeny Alphas from Glitz designs for my title.
To finish the page off I used Tim Holtz Distress ink around the page.


supply list:
Claudine Hellmuth:

Glitz Designs:

  Tattered Angels:

22 January 2013

If only.... lying in bed all day was an option..!!

Good morning, from a very snowy Lancashire, England! I am delighted to be sharing my 2nd DT piece of artwork with you today.

I have been having tremendous fun with the fabulous Bombay Inks from Dr Ph. Martin. The colours make me soooo happy!


The ink colours I used for my page are.. Teal, Magenta & Yellow Ochre.. 
they are all available individually as well as in a set.

I created my page in one of the brand new creative journals from Dylusions.
 I quite like the size and the elastic fastening is a superb idea.


 So here are some sneak peaks..


 Stamps from Stampotique Originals which are ALL available for order.


Here is my finished page!


 Thank you for calling today and leaving a comment if you get the chance. 
Keep warm & craft! Gez oxo

21 January 2013

Some people...

Hello again!
I hope you had a great week and you are inspired by my lovely DT friends! The Ladies made amazing projects, didn't they?

Today I would like you to meet Jasio ;) Jasio is a very shy boy but he likes to show his face in my art journals. I've made a new art journal specially for him. Ladies and gentlemen...please meet Jasio!


I've made my journal with old brown envelopes. I know that some people haven't got good thoughts about brown envelopes maybe that's why you should recycle them and make something nice with them?

First I used a stamp from Stampotique and clear embossing powder. It's a great technique if you want some texture in your project. Than I sprayed Dylusions Ink Sprays – Postbox Red and Vibrant Turquoise. I wiped my embossed stamp faces, I wanted them nice and clean. When sprays were dry I put a thin layer of white gesso.


You don't know that yet but I love black paint. A project without black paint is goes to a bin. I'm joking ...but it's really very close to true. You can see a Stampotique stamp and a black paint around a gesso which I applied using a kitchen towel. After that I draw Jasio's faces using Derwent Inktense – Bark and than I putted some Ranger Liquid Pearls Pastel Raspberry on his cheeks using my finger. Than I cut crowns from a lovely Glitz Yours Truly Chevron paper.

I wanted some texture on Jasio's clothes. I decided to use a white tissue paper which I sprayed using Dylusions Spray Inks and stamped using Stampotique stamp. The buttons on Jasio's clothes are Prima's Say It In Crystals. A pen around clothes and crowns is Sakura Gelly Roll – White.


The last step: print and stick some words to my project, I choose Bob Marley's quote.

See you next Monday!
Magda x