31 May 2013

Little sailor - step by step

Happy friday everybody! The summer has finally arrived here in Norway and we can start to enjoy life at sea;-)

Today I'm going to show you a layout step by step. Hope you have time and patience because there's a lot of photos here:-) First a little sneek peek of the final layout;-)


Step one: Start out by spraying a lot of water on your page, then use the mist of your choice and blend together using more water. I guess I used a bit to much water here and forgot to put the page inn press, so it really curled up. But I knew there were suppose to be many layers on top so I didn't mind starting over.
You should note that the page will curl a bit most of the times, but once placed in the album it will look great either way:-)

Also create some drips of mist by tapping it on to the paper.


Step 2: cut up your papers. By layering them on top of the background you choose the size you like. For this project I used papers from Glitz design Uncharted Waters and a piece of Bazzill Antique Book Paper.


Step three: for this page I made some embellishments from an old book page. Doodle and use some stamps to make them stand out. I also saved the product strip on my pattern paper since it really fits the theme. 


Step four: adhere your pattern paper to the background. I like using staples, then I can sneek in more elements between the layers. I also stapled the background to another cardstock to make it curl less. 


Step five: paint your bookpage embellishments with ink and water.

 
Step six: Add molding past trough a stencil and also some paint on top before removing the stencil. Here I have used a stencil from The Crafters Workshop. Also add more mist in drips and paint some of the paper with mist and water. 


 Step seven:  Add embellishments like the bottle from Tim Holtz, the boat from Studio Calico and the book paper embellishments.


 I really wanted to use these wooden letters but didn't have any S left, so then a reversed Z had to do the job;-)


So are you still with me?

Here is my final result! A bright, fun and happy page just like the first summer day of the year when a shoot the picture:-)


Thanks for looking:-)

30 May 2013

Mini Day Book


I've put together another mini for you today which is essentially made from one and a half sheets of patterned paper and decorated with scraps. 

This particular mini will become a day book but as yet it's looking pretty on my shelf waiting for pictures and journaling to be added. 

The basic construction is very simple and is as follows;

Cut one 12 x 12 sheet of patterned paper into two then with each piece fold in half.  Fold in the two side pieces so they're just about 1/4 inch from the centre fold and snip off the corner. Simple use this piece to measure and cut the opposite side.


I stitched the bottoms closed to form pockets in the pages. I used a sheet of Glitz Uncharted Waters for my book as I love the contrast of patterns. 


My cover is a 12 x 6 piece of Glitz Yours Truly wood grain paper which I folded around the book pages and folded in the extra side pieces. I stitched the bottom of this page closed too then with each page lying on top of each other I stitched up the centre.


I used scraps of paper to decorate the pages along with a Jenni Bowlin Alphabet sticker sheet called  Black Tiny Dots and a K and Co Smash roller Stamp to add some extra interest to the pages. 

It might only be made from one and a half sheets of cardstock but you certainly get a lot of room to put a small photo, some journaling and pocket for tags, extra pages or tickets collected along the way. Make one to take on holiday or give as a gift to a friend. 

Have fun and see you next time,

Jaine x


29 May 2013

Orient Express ..........


Well here I am for my last post as Guest Designer for this month.  I have really enjoyed my time here and being part of such an inspiring team.  Thank you for making me so welcome and thanks again to Vicki for inviting me.


So here is my last project – a bit of a challenge as  I wondered whether I could do a scrapbook layout with oriental papers but without an oriental style photograph!  These Graphic45 Bird Song Papers are really lovely and full of lots of tags, stamps and strips which makes for some great layering. 

Sometimes I find it refreshing to do a clean and simple scrapbook page – no inks or messy fingers to mess up the photograph! The further challenge was I only had one and a bit sheets of the Bird Song papers, so I cut a border from the reverse of the Shanghai Girls sheet which left me with some pieces for the corners and the flowers.  I then cut as many strips and labels as I had left from the Tranquility sheet.  A Graphic45 butterfly also managed to sneak in there too!


I needed a background and this Teresa Collins  Now and Then Woodgrain  sheet was just perfect, although I darkened it down a bit with some Antique Linen Distress Ink.  The flower was made from the Tim Holtz Tattered Florals Die with a rolled circle in the centre. 


So a simple and quick layout of two of my old school friends, taken at the beginning of the month when five of us met for our annual get together – hopefully people might think we were in the Orient rather than at Centre Parcs in Thetford!!

Thanks again for a lovely month x


27 May 2013

Beauty&Silence


Hello!

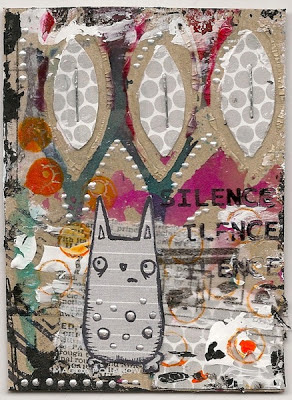
Today I have for you two ATCs. I love this small form and after a few months break I am back to make them.

There is not a lot to say about these ATCs because I can't tell you what I used first and what second. There are a lot of different product and one of my favourite is glue+paint technique.


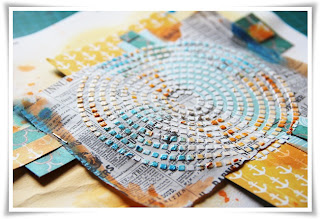
I used an old envelope for a background. I sprayed some Dylusions Spray Inks using Donna Downey Studios stencil and The Crafter's Workshop Balzer Designs stencil. I glued some pieces of paper including Bazzill Basics Paper – Antique Newsprint and Tim Holts Tissue Paper.


I stamped some Stampotique stamps and Glitz Roller Doodles using Ranger Archival Ink Jet Black. I also used Ranger Liquid Pearls – white dots, Tattered Angels Glimmer Glaze – for turquoise dots and Dr.Ph.Martin's Bombay India Ink – orange dots and circles. At the edges of my ATCs I put a black gesso from Claudine Hellmuth.

ATCs are a great fun and you can swap them with people around the world!

Magda x

26 May 2013

Shabby vintage tag by Gez

I am delighted to share a tag with you today, here on the Creative blog.. lots of inky goodness went into making this tag, it was sooo much fun!


I started with a plain No.8 Ranger {manila tag} and a couple of {Distress ink} pads used to create the background.. (I must remember to take along the wayy pics.. being a midnight crafter the light is always very poor!)

I stamped {Midge} onto vintage paper using {jet black} Archival ink. Used some scraps of music and patterned paper for the background and embellishments and machine stitched around the edges..

I then added some acrylic paint to help bond the different elements and used one of my most favourite, favourite stamps from {Stampotique Originals}..  {Honeycomb background (8116)} Here I swiped the stamp with a gold  {Ranger Paint Dabber} to add texture, making sure I cleaned the stamp as quickly as possible..

Thank you for calling today and stopping to look at my tag.. wishing everyone a lovely weekend.

Happy creating, Gez

25 May 2013

Windows Ten

Hello!
When you work with printers trays, the natural thing seems to be to attempt to fill every last space with 'stuff'. Whether its random ephemera or stamped images, the general way of doing things is definitely 'more is more!' I want to share a printers tray with you today where I've knocked that idea on its head....to show you that concentrating on the tray rather than the contents can be just as interesting!
The Tando printers trays come in pieces, a back panel, three layers of apertures and a cover (which I didn't use in this case!)
 I worked on the back panel first, covering it with book pages and a few strips of washi tape (black dot SMASH tape). I smeared yellow, red and turquoise paint over the background, then did lots of black stamping, including the fab grid stamp by Jenni Bowlin...
I then glued all three of the aperture inserts together, then covered the lot with more book pages. I then painted and stamped them, just as I had done with the background. Doing this BEFORE you glue it to the background means you have much easier access to the inside parts of the apertures.....
Once it was all painted and stamped, I glued it to the background, then covered all four sides with more book pages to give a seamless look. The edges were then painted and stamped...

Once the actual tray was done I added the embellishments, few as they are!
I clipped the ends of the Prima bird clips, then glued them to a book page. I then filled in the centres with Glossy Accents. Once dry, I cut them out and adhered them to the tray...
I added a few small stars, punched and wooden....
and a red clay heart....
As this tray has 10 apertures, or 'windows', it seemed a little obvious what to call this piece.....

So that's it...a printers tray without all the extra 'stuff' !!!
Have a great weekend everyone!
Love Trish xxxxx


24 May 2013

Experimenting tag


Hello!

Today I will show you a very easy tag, my small experiment. This time I wanted to try some products on my tag, especially white pens and Derwent pencils. I wanted to see how they cover a brown tag and what differences are between them.


As a background I used Ranger Tags - Kraft. I glued a piece of Glitz Design paper using it for a hill. I draw houses ( I will tell you about this in a moment ) and for roofs I used Bazzill Basics Paper – Antique Newsprint.

The left house I draw using Montana Acrylic Marker. As you can see white is bright and you can see it very clearly. For the right house I used a Posca Pen. The tag is absorbing the colour from a pen. I drew lines twice to achieved this effect. If you use dots to draw the line the effect will be better. For the fence between houses I used Sakura white pen.


First time I used Derwent Graphitint and I love it! It's a great pencil. I drew clouds using White (24) Derwent Graphitint and trees using Storm (18) Derwent Graphitint. For drawing leaves I used Tattered Angels Glimmer Glaze. This Glimmer is turquoise (All That Jazz) but the background is brown, so the colour of medium has changed.

For the windows and other blue details I used Light Blue Posca Paint Pen. It's really great, very bright colour.

I love all these products!

Magda x

23 May 2013

Dress up dolly time

Who can remember the comics with the dress up dolly on the back page, and who spent hours cutting them out and fiddling with the clothes? - me!!  Ooh I loved it, maybe a bit too much..... because I still love it.

Ok that sounded a bit weird but what I mean is, creating my own art dolly's for journal pages by drawing them, cutting photo's and mostly using magazine clothes as templates.

I had already painted my page pink and glued on pieces of Tim Holtz tissue paper on the page below, then the starting point to my design was the fabulous looking dress which I cut from a fashion magazine.

I used it as a template to draw a second dress from gorgeous Glitz Uncharted Waters scallop paper making the skirt a little bit bigger and a different pattern for the middle panel.


The rest is a little bit of doodling with a Posca pen and my title die cut from the reverse of the Glitz paper.

This is a great cheaty way of creating art dolly's and if you're not confident with a pencil just use a magazine head and body too.

See you next time

Jaine x

22 May 2013

Mr. Toad

Hello everybody! Finally we had a beautiful weekend with a taste of summer in Norway, and me and my girls were out gardening for a whole day:-) Sometimes gardening can get pretty exciting for little girls, especially when Mr. Toad shows up! My oldest was ready to get a zoo started, but after a while we came to the understanding that Mr. Toad had to go out in the woods to find Mrs. Toad;-)

I loved how the pictures turned out so I just had to scrap them right a way. And what papers could be more perfect than Glitz Design: Color Me Happy Bits & Pieces. I cut up the paper to make small cards and I also had a sheet from the Color Me Happy 8x8 Paper Pad


I placed a bunch of tags around the page, some from Ranger and some from an unknown manufacturer. The page is simply embellished with a few buttons and some sticker words.


Hope you've enjoyed my page:-)

19 May 2013

A Simple Birthday Card


Paula here again, today I'm showing a really simple and quick birthday card........


Products that can be bought from the shop:

  1. Tim Holtz Idea-ology Alphaparts - Ransom and Newsprint
  2. Distress Ink Pads - Salty Ocean and Peeled Paint
  3. Stampotique Originals by Janet Klein - Rabbit (9230)


How to create this......
 
I basically, placed the Alphaparts/Letters on to the card, then stamped the rabbit. I then used marker pens to create the background as well as an ink spot stamp. I stamped the rabbit again on some stamping paper, coloured it, cut it out and adhered over the first stamped image. Finally, I got my old Dymo out and printed the word 'Wishes' out. See, I told you it was quick and simple!


18 May 2013

Lying in bed... tag!

It's been a while since I posted on the Creative blog... life and all that seems to be catching up with me at the moment.. I would love nothing more than to spend some time lying in bed..... but.. read on!!!!


I used one of the Ranger Inkssentials Giant Craft Tags No 12 Size Manila Ranger Inkssentials Giant Craft Tags No 12 Black for my art tag..

The background was created using different colours of Tim Holtz Distress Paints and toned down using some white acrylic.. I then stamped the Journey Collage stamp by Stampotique Originals onto the background using Jet Black Archival Ink..


The gorgeous girlie is from Stampotique Originals and is called Arty.. she has to be one of my all time favourite stamps along with the sentiment.. Lying in bed!! Also, stamped on my tag is Jo Capped-Sandon's gorgeous stamp called Splatter long.. Please note Vicki can order you ANY Stampotique stamp!

To colour in the image I used a combination of Derwent Graphitint and Inktense pencils.. I can see me using these a lot.. I love how you can mix them with water to give a gorgeuos watercolour effect.. I couldn't finish a tag off without using some gorgeous Washi tape.. this one is one of the Smash, black dots tape!

Right, off to find a very long pencil!

Have a lovely day, thank you for calling, Gez

17 May 2013

Free

Hello!
Today I want to share another experiment with texture....
I cut an 8 inch square from a cardboard box, then stripped back the top layer to expose the corrugations underneath. I then added some torn book pages, and some texture paste through a stencil. Once all that was dry, I got busy with the paint.......
 Gorgeous shades of purple and turquoise from Golden, to be precise! I also splatted a little white, and edged in black...
Once the background was done, I decided it looked a lot like prison bars.... (or is that just me?!), so I thought an escape/fly free theme would work. I stamped the butterfly (Jenni Bowlin ) onto a scrap of painty card, and also onto a scrap of acetate. I cut both out and glued them together....
My word is made from Ideaology letters...love these!
hope you like it!
Have a great weekend everyone!
Love Trish xxxxx