Showing posts with label Ranger foil cardstock. Show all posts

25 July 2015

Back to the small journal.


I'm back creating in my hand made 15 x 15cm journal for this piece. I find the size so much easier to work on sometimes plus I found my small Crafters Workshop Stencils were just the right fit on the page.


The colours I've chosen for my background are not ones I'd normally reach for but I'm trying out my Dylusions paint and loving the vibrancy of colours.

For my background here I used a brayer to cover the page with this London Blue. The blue was so bright I thought why not add some red on there and see what it looks like so I did another thing I don't normally do and  used the stencil like a stamp. I just brayered the Postbox red onto the stencil and printed it down onto the page intead. What I ended up with was not only the negative but a much more distressed and grungy finish like I'd just sanded some of it back. 


This piece of doily has been in my stash for ages now and tearing it apart seemed like the most natural thing to do with it.


To finish it off I cut the word Courage from a piece of silver Foil card stock by Ranger and added a circle of Prima's wire thread. I raised the word up on foam pads to give it more depth.


See you soon

Jaine x

24 January 2014

Metal Heart....

Hello!
I'm still on my 'use techniques you haven't played with for a while' kick..... so today I want to share a little weathered metal...

(This entire blog post is also a frustrating exercise in how difficult it is to get a good picture of mirrored card...especially a picture that didn't have me reflected in the surface!)
Now, I usually do this with metal foil, never tried it with cardstock, so it was a bit of an adventure! Worked brilliantly though!
Here's how...
Cut a shape from sturdy chipboard or greyboard. I drew around a big wooden heart I have in my 'things to alter' box!
Cut this out, then get the mirror card ready. (This is Ranger foil card)
We need to stick it to the greyboard, but my usual glue n seal/ gel medium approach is not going to work this time. Wet glue will leave a dull, non shiny residue on the surface, however carefully we apply it. I used a sheet of double sided adhesive, Wonder Tape sheets work very well. Once the adhesive sheet is on the back, cut the card into squares and rectangles of varying sizes.
Next, stick the shapes to the big heart shape, making sure they overlap slightly.
(that pic *almost* has me in it at the bottom lol!)
Trim the edges, and add a large eyelet if you want a hole to hang it up!
Next bit is where the 'magic' begins! Using a small balled embossing tool, press hard into the cardstock, and create dots and lines...
Scary bit time.... cover the whole thing with a layer of black alcohol ink...
Mine has a definite dark brown look....not a clue as to why, but I like it!
Next, take some wire wool (from the DIY shop), and rub away at the dried ink...
You will need a little elbow grease here, but remember not to rub too hard. This is cardstock remember, not actual metal! Once done, wipe down with a soft dry cloth to remove any wire wool residue...
So, background done! I've not gone overboard with the finishing touches as I wanted to show off the 'metal' not cover it up! A red clay heart....
and black cord tied through the hole...

So...get out that mirrored cardstock and give it an industrial look!
Trish xxx


20 January 2014

out of a comfort zone

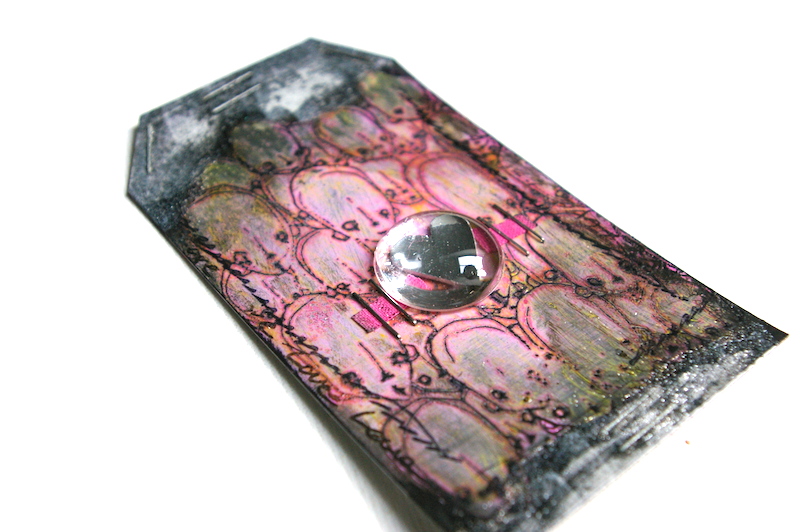
Sometimes Vicki sends me some stuff which I don't know or even have never heard about. This time it was Ranger Foil Cardstock.

I really didn't know what to do with it. It is shiny and slippery...it only means one...gesso, acrylic paint etc. will be easy to scratch. And it's true! I checked some acrylic paints and inks.

Ok...what now? I'm sure alcohol inks will be great for it but I haven't got any. How to make a texture? I haven't got embossing machine either but I found embossing powder in my drawer.

I used Stampotique Original stamp which is made from a good quality rubber and it's harder then acrylic stamps. I won't be able to smear it when I will push it too hard. I used Ranger Archival Ink for stamping. Than I applied some RangerDistress Paint. But...it won't be waterproof and I like waterproof things especially on slippery background. I mixed Liquitex Glazing Medium with yellow acrylic paint and applied it on a pink paint. Glazing medium gave transparency to the yellow paint and made my 'Heads' waterproof!

I wasn't sure this mirror-like look of the cardstock it was too much for me ;) I applied some ClaudineHellmuth Black Gesso and then using a tissue I removed some of it. It gave me some brighter spots. Still I wasn't happy that's why I used more embossing powder.

The result...


I was pushing myself out of my comfort zone. It's not my favourite project but it was really great fun to experiment with new products.

Magda x

18 January 2014

Creating a blog banner.

I admit this is a little bit different from the normal type of blog post, but I had an urge to freshen up my blog header with a whole new look. As I was working it dawned on me that I could make it into a blog post on A Sprinkle of Imagination and maybe inspire some of you to do the same.


I started out with a piece of watercolour paper 30 x 10cms and used just the stars from an Andy Skinner stencil called Hippy Chick to spread texture paste through. 

Once this was dry I used watercolour to add the dreamy background. I simply add water to the paper first then touch the paintbrush loaded with paint to the wet paper and let it spread as it wants to. 


I am so in love with Ranger foil cardstock as it cuts beautifully. The shine on the butterfly and frame  is magical but sadly it was so difficult to capture that in my photography. The border along the bottom is Jenni Bowlin washi tape and it has a gorgeous lace pattern.

Once I was satisfied with my piece I put it into the computer and changed the size to 900 x 300px. I'm using blogger but you may need to check the size if you use a different blog host. 

I added the title and my name on the computer and hit save. Done! Now all you need to do is go into your blog dashboard and upload it onto the blog.

'Simples' as they say. 

Jaine