Showing posts with label Jenni Bowlin. Show all posts

30 August 2016

Let's Go Fly a Kite

Hi everyone, I hope you enjoyed your long weekend!  I've got a clean and simple card for you today.

This silhouette image by Jenni Bowlin looks great with very little embellishment.  I just sponged a background using Seedless Preserves Distress Ink, then l laid the Fence Frame stencil from The Crafters Workshop and sponged more Seedless Preserves.  To ground the image I stencilled Black Soot Distress Ink through the Tim Holtz Stripes stencil.


To finish off, I trimmed my panel then mounted it onto purple card.

Thanks for stopping by!

Shirley x

15 February 2015

Layout for December

By the time you're reading this, Trish and I will be at the NEC in Birmingham at the CHA UK trade show looking at all the good things coming out this spring.

Anyway, I felt it was time to do a December layout before spring comes and everyone is totally fed up with all things Christmas.


I didn't want to go down the usual Christmassy route so opted to use a kit called Freedom by Jenny Bowlin for Echo Park as I love that red and black look.


For the stars I used a Balzer Designs stencil called Punchinella  and tried out some black embossing paste by Dreamweaver for the first time and was totally blown away by it. I've usually added black gesso to my paste before but I thought I'd try out one which was black to start with and it's gorgeous. It's thick so no leaking under the stencil and glossy so you have this gorgeous shine when it dries.


The only other things I used on the page were some white gesso, Broken China Distress paint and a few bits of shiny turquoise washi tape by MME.

Have a good weekend what ever you're doing.

Jaine x

20 December 2014

12 Brands of Christmas *Brand 10* Jenni Bowlin

Ah Jenni Bowlin, just the name makes me think of days gone by and childhood re-captured.

Jenni Bowlin brings a range of Alphabets, Postage Stamp Stickers, Feathers, Vintage Decks, 12x12 Papers, Die-Cut & Perforated Papers, Star Rhinestones, Paint Dabbers, Clear Stamps, Hodge Podge Books, Charms, Butterfly Rub-Ons and Ephemera.


This little house I made last Christmas using papers from the Modern Mercantile collection.


08 November 2014

September layout


Well here we are in November already and the Christmas crafting is going up a gear, but before all that here's a layout from my Project Life album for September.


I looked in my stash for a suitable background paper to start from and found this beautiful Jenni Bowlin paper called Modern Mercantile. It fitted the mood perfectly.


For the rest of the layout I've used off cuts of other Jenni Bowlin and Glitz papers.

Jaine x

21 September 2014

acrylic paint sale...

We still have a selection of Claudine Hellmuths Studio Line paints,
in both pots, mini bottles and kits still available. Some colours are now running low stocks.

These paints have always been one of my favourites with the creamy texture of these highly pigmented artist quality acrylic paints. With a collection of 15 semi-gloss shades you can create an endless palette of colours by mixing them without them going muddy.

We do still have some stocks left of the multi-mediums and extra-time as well and you can find those here
We are now running on very low stocks of the Jenni Bowlin Dabbers which were recently added to our sale section at a bargain price. As with the Claudine Hellmuth paints once these have sold out we will not be able to restock them. 

28 May 2014

Be Still

Hello!
I love using stencils, but more often than not find myself scraping some kind of paste or medium through them to give loads of texture. I decided to challenge myself to use a stencil as a focal point, but with no texture!
I came up with this....
This falling leaves stencil is fab, love the heart shaped look! I've done a step by step so you can see how it all came together.
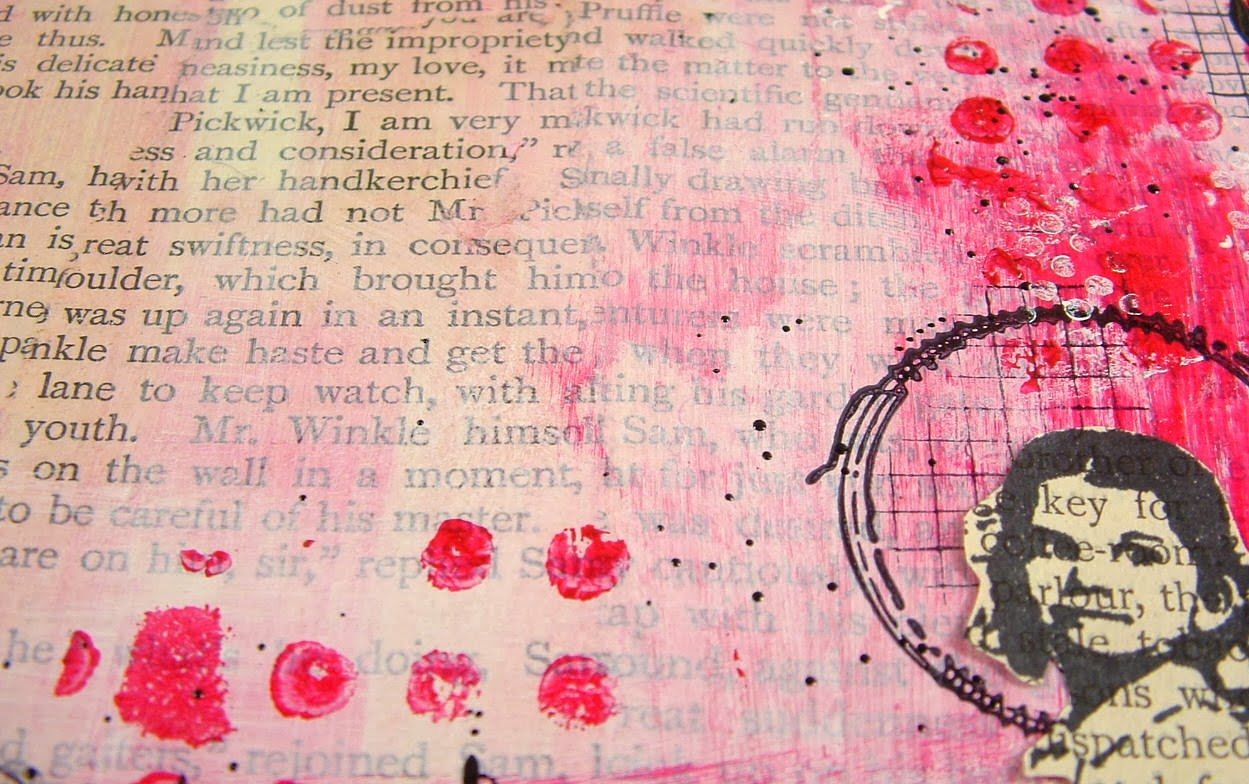
First, add the background colour. This was done by quickly brushing on stripes of green, red and purple Studio paint (with a little white added in!)
Once dry, I added a little more detail in the same colours, sponging through some sequin waste..
Black stamping next..Jenni Bowlin and 7 Dots stamps..
Next, the focal stencilling. I used white paint.
As it's acrylic paint we're using, even a lightly sponged layer of white will be opaque enough  to cover the darker colours beneath! I wanted to emphasise the leaves further though, so I doodled around them...
Once the basic background is done, you can see where you might want to add a few more details. I thought the black stamping was very 'blocky' on the left hand side, it seemed a bit isolated. I felt it needed a few extra black accents to draw it down into the lower part of the page...
I added printed lines, dots and a few more doodles here and there.
Next, add the images and text...
A stamped fairy, and some rub on words!
So.... adding multiple stamped images together, but only using small parts of them, creates a fab collaged look...
Fine line doodling can make designs 'pop'....
I hope you like it...have a great day!
Love Trish xxx


18 January 2014

Creating a blog banner.

I admit this is a little bit different from the normal type of blog post, but I had an urge to freshen up my blog header with a whole new look. As I was working it dawned on me that I could make it into a blog post on A Sprinkle of Imagination and maybe inspire some of you to do the same.


I started out with a piece of watercolour paper 30 x 10cms and used just the stars from an Andy Skinner stencil called Hippy Chick to spread texture paste through. 

Once this was dry I used watercolour to add the dreamy background. I simply add water to the paper first then touch the paintbrush loaded with paint to the wet paper and let it spread as it wants to. 


I am so in love with Ranger foil cardstock as it cuts beautifully. The shine on the butterfly and frame  is magical but sadly it was so difficult to capture that in my photography. The border along the bottom is Jenni Bowlin washi tape and it has a gorgeous lace pattern.

Once I was satisfied with my piece I put it into the computer and changed the size to 900 x 300px. I'm using blogger but you may need to check the size if you use a different blog host. 

I added the title and my name on the computer and hit save. Done! Now all you need to do is go into your blog dashboard and upload it onto the blog.

'Simples' as they say. 

Jaine 

05 December 2013

Over planning kills magic...

Hello

Today I would like to show you another project using Tando chipboard. I used a few different mediums. It's not easy for me to tell you how I made 'step by step' this project that's why I've made a video for you.


I used:


Magda x

21 October 2013

Is Hamlet a man of wisdom or he is insane?

Hello

What a weather! Normally I don't mind the rain but this morning I wore my favourite trainers and what?! I had soaked socks! There is a huge hole in the sole...A cup of hot tea with honey and lemon and I should be ok ;)
Today I have for you a project with my favourite little man. I love using Hamlet stamp especially when I use some quotes in my projects. Maybe Hamlet is not very handsome creature but he is a man of wisdom ;)


I used:
- Stampotique Originals stamps
- Dylusions Ink Sprays
- Prima stencil
- Jenni Bowlin Modern Mercantile
- chipboard sheet
- Liquitex gesso
- tissue paper
- Ranger Archival Ink

Magda x

09 October 2013

Hubble Bubble....

Hello!
Yep, still in a spooky place in terms of crafting! Not specifically Halloween this time, but more of a dark and sinister colour palette and a scary figure (which is much the same as I get when I look in the mirror, but I digress.....!)
Here is 'toil and trouble'...
I used a chipboard 6 x 6 square as my base, then covered it with gesso to make the colour layers pop. I then did a little stencilling with texture paste to give me my circle accents. Next, paint! That delicious sludgy green is 'green gold' by Golden, I smeared this all over the base, then added my stamping touches. Bo Bunny and Jenni Bowlin stamps...
I then added in a few smears of quinacridone violet, followed by printed lines of dioxazine purple. I then sprinkled the whole thing with a few grains of black UTEE. Top tip for doing this...spritz the background with water first. The tiny UTEE particles will stick to the water and wont blow away when you melt them! This only works for paint though....its waterproof! Waterbased inky backgrounds will react differently....
Anyway....once the black UTEE has melted into raised dots, they can be highlighted by dry brushing gold paint over them.....
The stencilled areas got the gold treatment too! My figure is of course a Stampotique one, no one quite does spooky like they do! Must admit, I find some images a little disturbing, but this one I love!
A little rub on phrase and it was done!
Hope you like her.....
Trish xxxxx


25 September 2013

So Beautiful

Hello!
Following on from my 'put a smidge of paint and stamping on a corner of a book page' eureka moment last week, I kind of carried it through to my project to share today.....
This is actually a really quick idea, great for if you only have a few moments to get painty!
I covered my 6 x 6 chipboard sheet with book pages, then smeared on some white paint in the corner. I then added a little red....
I initially thought the red was too dark, so spritzed with water. That's the pink wash effect you can see! Not the intention really, pink.......
Anyway, after the 'eek pink' moment, I carried on with the stamping. Red paint, white paint and black ink.
I used the Bo Bunny dots and Jenni Bowlin grid again, and also used one of the circles from the fab Prima stitched circle set. If you look at the picture of the stamp set, it appears that there is one big stamp with three circle designs as well as the two separate small stamps. Not so!!! The three are individual stamps, just one inside the other on the sheet. They can be separated to use by themselves, or you can carefully keep them together and stamp as one (watch out for a project soon where I've done this!) Brilliant stamps to use on journalling pages too!
I also sprinkled a little black embossing powder and melted it, for that fine, delicate splattered look....
My gorgeous Stampotique girl was stamped onto non painty book page, then cut out and glued to the background. Prima Sticker words to finish....
I think in the end I quite like the pink look!
Trish xxxx


13 September 2013

Cool Blues

Hello!
More experimenting with colour schemes again from me today! Or rather, a *lack* of a colour scheme..... blue and white only this time.....
I covered my chipboard sheet with tissue wrap, then gave it a wash of white paint. A wash of blue paint over the top gave me a delicate base to work on...

I then started to build up some detail in the right hand corner. Lots of layers, including stencilling with white paint, and stamping with blue ink. I used the dots from a Bo Bunny set, and a Jenni Bowlin alphabet...
I also sponged embossing ink through a stencil, then embossed it with white embossing powder.
I stamped a Stampotique heart onto white card, then embossed it using a polka dot embossing folder. I cut it out, then added some butterfly wings....
The heart stands proud from the background. I glued a bead to the heart then glued the bead to the chipboard. This gives loads of dimension!
Chit Chat stickers to finish....
A little bland for me really...but a very good exercise in restraint!!
Trish xxx


08 September 2013

Smitten....with colour!

Hello!
I've been playing with my acrylic inks again! Each time I get them out for a play I'm always amazed at the deep vibrancy of colour they give... I'm sure you could do subtle if you wanted, but this time let's go for bold!
I started off by painting my 6 x 6 inch chipboard panel with gesso. This gives a surface for the inks, if they went onto plain chipboard they would just soak straight in! Giving a white base not only makes the colours pop, it gives that coating for your surface so the inks can be moved around and blended. Once the gesso was dry, I used  texture paste through a stencil to give me some more interest. Once the white base is dry, you can start in with the colour!
I've used a mixture of brands here, Daler Rowney 'silver pearl',  Dr P H Martins Bombay Inks in turquoise and aqua, and Liquitex deep violet. I dripped colour onto a craft sheet, then used a small sponge to dab,wipe and smear the inks across the background....
I also swiped a baby wipe across the colour in places, this removes some of the colour and gives a shabby look. This works especially well over the raised, stencilled areas!
Once I'd used the bright colours, I gently added the silver pearl to highlight. Difficult to see in the pics, but the silver gives a really nice shimmery sheen!
Stamping next..... I've used the dots and chicken wire from the Bo Bunny distressed textures set, and the alphabet and tiny grid from a couple of Jenni Bowlin sets.
Ranger Archival ink stamps beautifully over the acrylic ink! You may also notice some splats there... they're the silver pearl ink, flicked on with a paintbrush.
My heart is made from clay,  it's been painted with the violet ink and a few dots of the silver ink. A chit chat sticker to finish....
Hope you're having a good weekend!
Trish xxxx