Showing posts with label Bazzill Basics. Show all posts

01 May 2014

Color Bloom Sprays (and a puffin!)

Hello!
My mojo had really gone walkabout this week...until a rather exciting package arrived, a few of the new Color Bloom sprays! Of course I had to have a little play......
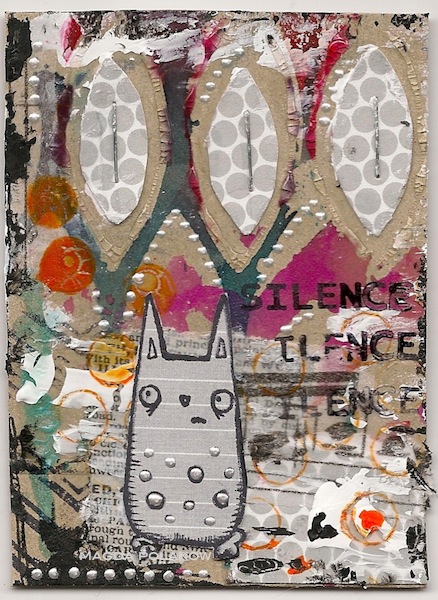
First thing I LOVE about the sprays is the spray mechanism....no more stained fingers! They say the nozzle will not become clogged, fingers crossed on that point. The sprays also have a little ball inside, so when you shake to mix up the mica you can hear the mixing going on! Squeezing the nozzle hard gives a really nice overall coverage. I used the Glistening Waves colour for the background on my panel, with the Lime Wedge as accent splats....
Squeezing the nozzle very gently gives the bigger splat effect. I found that the colour of the Lime Wedge really varied, the green was so much more noticeable when used to give full coverage, the splats (as you can see) are very gold! I added in some white splats of my own, by using white UTEE, and by stamping in white paint, using a Stampotique stamp.
The sheen of the Color Bloom Sprays is difficult to see.....it becomes a bit more obvious if I tile the cardstock...
You can really see the difference between the matt white paint stamping and the mica sheen of the sprays!
I added in a little text paper and some home made washi tape...
I didn't have any blue tape, so painted and stamped a bit of regular masking tape!
My 
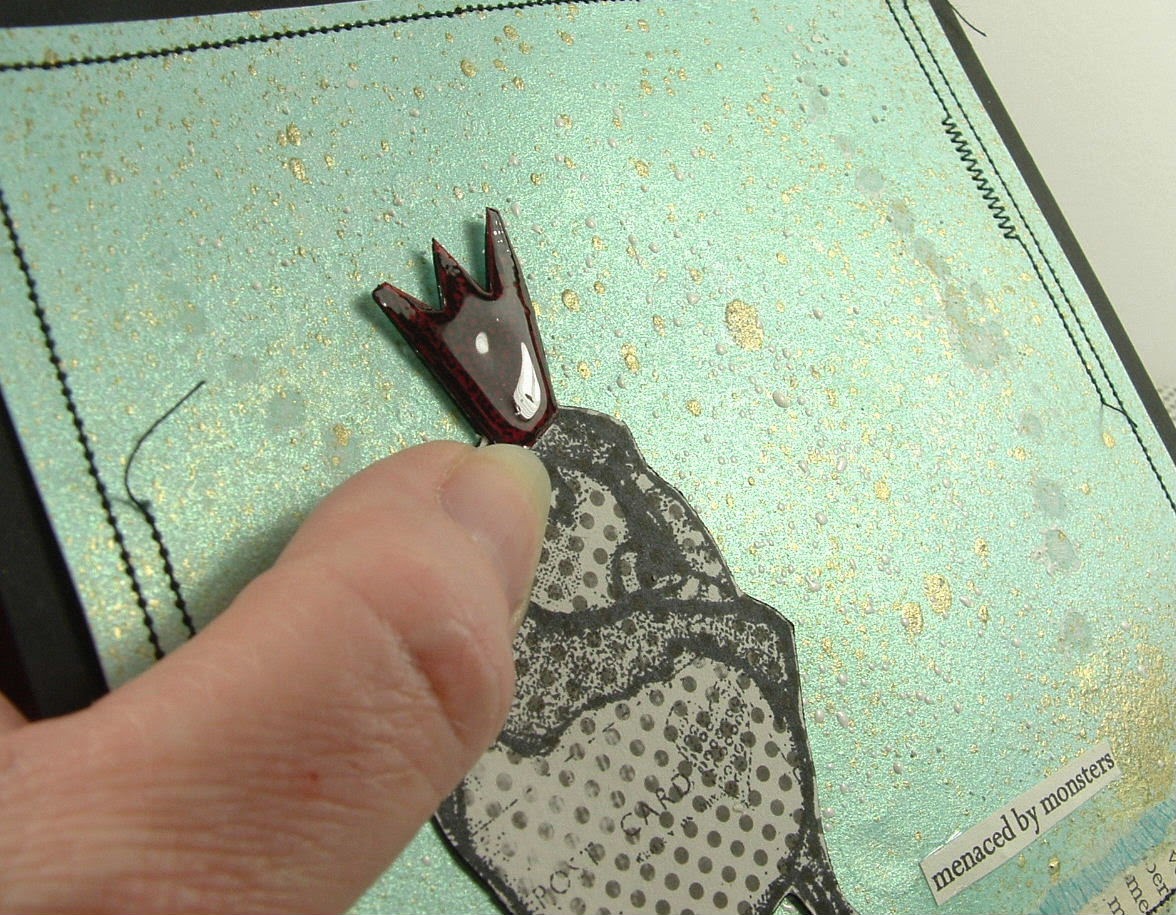
Crafty Individuals Puffin is stamped onto patterned paper. I usually use this paper as a photo prop, but I decided to see what it looks like stamped on....definitely going to do it again! The paper is a dotty one from Bazzill.
I do like adding in different coloured crowns to my creations, and this is no exception! Stamped again onto red card, cut out then glossed with a touch of Glossy Accents.
So, mojo well and truly back now, will be spraying all manner of things!
Have a great day,
Trish xxx


14 February 2014

I Love You To The Moon - GDT Riikka Kovasin


Happy Valentine's Day! Riikka here again with another guest design post and I have a little present for you - a video.

Who am I? My name is Riikka Kovasin, I'm a Finnish mixed media style scrapbooker with a passion to have my fingers inked on weekly basis. I'm happiest when I can get messy with different paint media and create a piece of memory keeping at the same time. What a perfect combination! My blog is called Paperiliitin. Please come and say hi!


For my second post I created a Valentine themed layout about my two daughters. The picture is an old one, but I really loved the topic and the angle of it. It shows them playing an afternoon tea party. 

The quote from the 7 Dots Studio "Messy Head" collection suited the layout perfectly as I love them both to moon and back. I also used other patterned papers from the collection. As one of the journaling style cards I wanted to use on the layout was purple, I added some purple details to the layout. If you want to see how the layout came to life, please watch the video underneath.


Thank you for looking! I hope I have inspired you! 


Supplies:


other: pencil, buttons, cord, stapler

06 February 2014

Valentine's Cards - GDT Riikka Kovasin


Hello there! Riikka here with a few guest design creations - first of all these Valentine's inspired cards.

Who am I? My name is Riikka Kovasin, I'm a Finnish mixed media style scrapbooker with a passion to have my fingers inked on weekly basis. I'm happiest when I can get messy with different paint media and create a piece of memory keeping at the same time. What a perfect combination! My blog is called Paperiliitin. Please come and say hi!  


I created these four cards using the gorgeous 7 Dots Studio "Messy Head" collection. It's soft tones and pink shades are perfect for Valentine's Day themed creations! The card basis are cut from sheet of Bazzill's Card Shoppe papers.

The main pieces of the cards are cut from a 12x12" paper and then layered with pieces of other patterned papers and embellishments. All of the cards have a common background style, a piece of patterned paper stamped with Finnabair's doily stamp using Prima Chalk Edgers and Archival Inks. The other thing the cards have in common are splashes of pink Glimmer Glaze.


I used different kinds of embellishments in the cards. They all have a bit of thread underneath the embellishments, but then the different cards have different moods. I used Mechanicals in some, Prima wood icons in some and 7 Dots Studio stickers and die-cuts in others. Please see the supply list at the bottom of the post, after some of the detail shots.

Thank you for looking! 


Supplies:


other: thread, paperclips, half pearls, chipboard arrow, pencil

06 June 2013

Simple colouring in the sunshine.

Hello there, I hope you're enjoying sunshine where you are because after weeks of misery the sun has finally arrived here.

With the sun shining I really didn't want to be staying inside crafting some complicated project or journal page so I simplified everything down, took my supplies outside and had some fun.
Before I went out I did glue a sheet of Bazzill Antique Book Paper which is brilliant stuff, slightly thicker than tissue but thinner than cardstock or scrap paper. So perfect for a journal page background. I also painted over this with white paint to give me a more neutral background.

Once outside I stamped Doolally Dorris from Dylusions along with some flowers and leaves from "How does your garden grow stamp set. I also felt the need just to stamp with my Glitz roller doodle. 


I used Faber Castell Pitt pens to colour her in but it could have been Posca paint pens or acrylic markers, the point is, pens are less fuss and less mess. I simply used some watercolour paint to add colour to the background. I used Posca pens for the border and cut the sentiment from a magazine.

Very simply done and very quick. 

Enjoy the sun

Jaine x

27 May 2013

Beauty&Silence


Hello!

Today I have for you two ATCs. I love this small form and after a few months break I am back to make them.

There is not a lot to say about these ATCs because I can't tell you what I used first and what second. There are a lot of different product and one of my favourite is glue+paint technique.


I used an old envelope for a background. I sprayed some Dylusions Spray Inks using Donna Downey Studios stencil and The Crafter's Workshop Balzer Designs stencil. I glued some pieces of paper including Bazzill Basics Paper – Antique Newsprint and Tim Holts Tissue Paper.


I stamped some Stampotique stamps and Glitz Roller Doodles using Ranger Archival Ink Jet Black. I also used Ranger Liquid Pearls – white dots, Tattered Angels Glimmer Glaze – for turquoise dots and Dr.Ph.Martin's Bombay India Ink – orange dots and circles. At the edges of my ATCs I put a black gesso from Claudine Hellmuth.

ATCs are a great fun and you can swap them with people around the world!

Magda x

11 May 2013

to you


Hello everyone!

Sometimes I lock in myself studio to make some projects but I can't find any inspiration. Usually I put some products on my table and start to making something not thinking about what I'm doing. Today I would like to show you one of these projects!


I used a small chipboard sheet as a background. I glued some pieces of Bazzill Paper – Antique Newsprint and Glitz Design Yours Truly paper. I used some Dylusions Ink Sprays and a lot of glue and white paint to add some texture to my picture. I wanted a lot of different textures that's why I added some microbeads and Ranger Liquid Pearls. I stamped some Stampotique stamps using Archival Ink Jet Black. For some dots I used white Acrylic Montana marker and orange Dr.Ph.Martin's Bombay India Ink. I also used a black gesso from Claudine Hellmuth. The last thing: I glued Prima bulbs – love them!


I don't know what I will do with this piece. It can be a great cover for a mini notebook or for a small art journal. I can add some ribbon or string and hang it or put this picture to a frame. I will see!

Magda x