30 March 2016

Spread your wings!

Hi there, I'm going back to my roots today.  When I first started crafting I used to be mainly a papercrafter.  I soon discovered a passion for all things inky which then led me to mixed media and all thinks painty!  Here is my make for today using Distress inks.


I inked through a circle template using Picked Raspberry, spiced marmalade and wild honey distress inks.  Using the same colours I blended through Tim Holtz layering stencils; zig zag and bubble.  Over the top I stamped the buble wrap stamp from Nathalie Kalbach set of grunge stamps and finally
stamped the vinatge lady from Finnabair don't forget to fly stamp set.


Not visible on the photo but I highlighted certain areas using a clear Wink of stella pen which gives a lovely subtle shimmer.

That is it from me today.  Thank you for stopping by.

Crafty hugs,
Clare x x x 

23 March 2016

Ranger Ink Love !!!

Morning everyone, Tracy here today with a post about one of my most favourite brands..... Ranger Ink !!!

The brand that brought you Dylusions, Dina Wakley's Media Line and of course who can forget Tim Holtz !!!!


The page above in my journal was done with a mix of paints, I just love all the fabulous bright colours of both Dina's and Dyan's amazing paints which compliment each other so well 


and of course the fully co-ordinated line of Distress products from Tim....In the picture above I've used distress markers which are one of my new favourites and I love to use them like watercolours by scribbling them onto an acrylic block and then picking up with a wet paint brush and applying to my image. It allows you to blend and build up the colours. 


This technique works equally well with the distress pads as shown on the above journal page ( I used picked raspberry, mustard seed, crushed olive & spiced marmalade) !!!


And let's not forget all those fabulous stencils....a never ending array of amazing designs with the perfect design for every project. My personal favourites are the Dylusions bubble stencil and         Dina Wakley Gears stencil both shown in the above project. They really are amazing !!!!


And of course although not technically Ranger, Tim Holtz's association with Stampers Anonymous compliments the entire range perfectly. My favourites at the moment are the Crazy Bird and Crazy Cat stamps. Perfect for colouring and perfect to add to any card or journal page but there are so many more available to suit every taste, go check them out !!!

I hope you enjoyed stopping by. Go check out all the lovely Ranger and Stampers anonymous products....I promise you will not be disappointed!!

Bright and painty hugs 
Tracy
Xxx

21 March 2016

Easter Special Offers!

Hello!

Its almost Easter but what would you prefer the Easter Bunny to bring you... 

Chocolate or Art & Craft Supplies?? 


and 

Offer lasts until Easter Monday or stocks last. 

oh - and if you're interested...
 I'd have the chocolate with the craft supplies...  I'm greedy like that! 

Happy Creating

Vicki 

20 March 2016

It's A Man Thing


Happy Sunday, peeps!  Shirley here with a trendy masculine card for you.


I started off by stamping the guy image from Dylusions Mini Couture using Tea Dye Distress ink, watercoloured the image using the same colour, then masked that with some scrap paper.  I inked up the Mix Tape 6x6 stencil by Ronda Palazzari with Distress Inks, turned it over and placed it over the masked stamped image at a jaunty angle, pressing it down with kitchen roll so that the colours mixed, and the excess was mopped up.


The scrap paper I used for masking was red and white checked, but because it got soaked by the Distress Inks, some of it ripped and stayed behind as I was removing it.  Doesn't it look cool, though?  Might have to try drawing checks on the jacket next time!


I used a stamp from Dina Wakley Textures to add some detail around the edges, then trimmed the panel, matted it onto black card, then adhered it to my card base.  On a spare piece of black card, I wrote the HB2U with a white Posca pen, and stuck a strip of the trimmed card across the bottom using 1/8 inch Wonder Tape.  It just adds that little bit of interest.

Enjoy the rest of your weekend!
Shirley x

16 March 2016

I could while away the hours

Hi I'm here today to share an entry into my large art journal.  It must be the time of year as I am feeling a tad florally at the moment and some blooms have just landed onto my art journal pages!


For this project I used Dylusion paints.  I mixed crushed grape and fresh lime with some white to
make my colours pastel.  I recently have enjoyed designing and carving some of my own stamps onto
speedball easy cut stamp carving blocks.  I used one of these to stamp onto my background with the pastel colours.  I also stamped  one of Nathalie Kalbach grunge stamps in black for a little more interest.

I pencilled on my flowers along with some free falling leaves, leaving these void I began to blend crushed grape and white linen around the pastel openings.


I added some doodling with my Black and white Posca pens.  Onto some white card i stamped a Julie Nutting mixed media doll, Megan and coloured her in.    On a clean up page,  where I had been cleaning off  my brushes I stamped  my background  stamp and then stamped Megans dress over the top and cut out to dress my doll.


I finally stamped my saying using Dylusions alphabet stamp

Thats all from me today, thanks for stopping by,
Hugs, 
Clare x x x 


06 March 2016

Happy Mother's Day!


Happy Sunday, and Happy Mother's Day!  I thought I'd show you the card I've made for my mum, using the Pomegranate Bits from Julie Fei-Fan Balzer.

There are two masks in the pack, and all I did was ink them with Distress Ink Minis, spritz lightly with water, then lay each one down onto white card, pressing with kitchen towel to ensure full contact and to make sure the inks blend.
You can get a bit of splatter/leakage as you lay the mask onto your card, but that suits me, because I add more splatter anyway!

When you remove the mask, there is still sufficient ink left on it for another quick spritz and a softer image.  You can also use either side of a mask, which helps to give a bit of variety to your composition.

To finish off my card, I defined the edges of the images by very quickly and loosely scribbling around the edges with a fine tipped black pen.  I created a matching sentiment by watercolouring the same Distress Inks onto white card, then die-cutting the Hero Arts Happy Stamp & Cut, and stamping the rest of the sentiment, then mounted the whole panel onto yellow card.

That's it from me today - enjoy the rest of your weekend!

Shirley x

04 March 2016

New Arrivals | Kelly Purkey

Hello there!

Are you a planner addict?
Or do you just like small but VERY useful stamps?

I use mine for my pocket page scrapbooking as well on my calendars and in my diary.

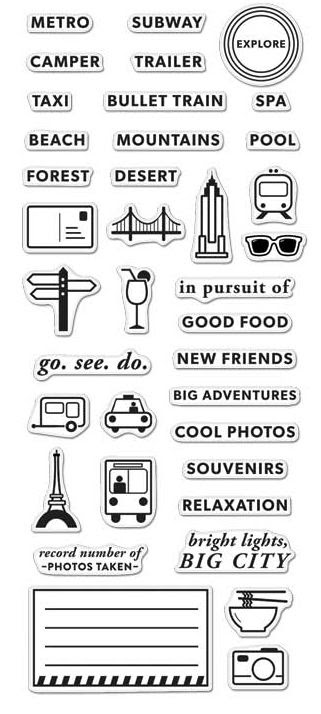
If the answer is yes, you will be pleased to hear that we have now taken delivery of the new Kelly Purkey Planner stamps.
Kelly Purkey Adventure Planner Stamps
Kelly Purkey Fitness Planner Stamps
One of my favourite products in the Kelly Purkey Line are the mini ink cubes.  I'm a fan of mini ink cubes and Hero Arts inks anyway.

You can find all of the Kelly Purkey Ink Cubes here
Happy Planner!

Just before I go, quick reminder we still have a HUGE sale section with lots of marvellous goodies still available. We have even added new lines to our paper sale!

Happy Creating!

Vicki