Hello!
When you work with printers trays, the natural thing seems to be to attempt to fill every last space with 'stuff'. Whether its random ephemera or stamped images, the general way of doing things is definitely 'more is more!' I want to share a printers tray with you today where I've knocked that idea on its head....to show you that concentrating on the tray rather than the contents can be just as interesting!
The
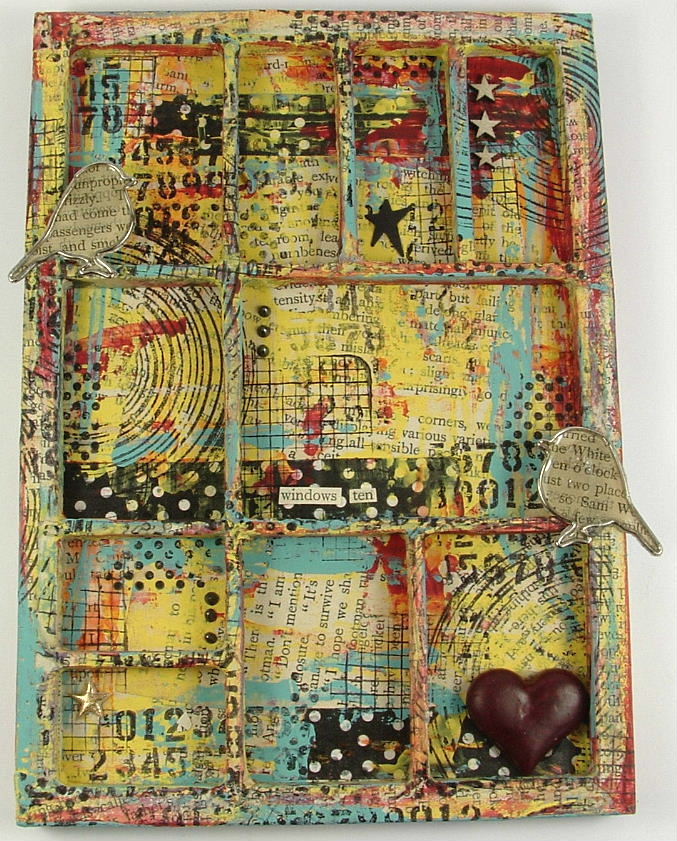
Tando printers trays come in pieces, a back panel, three layers of apertures and a cover (which I didn't use in this case!)
I worked on the back panel first, covering it with book pages and a few strips of washi tape (
black dot SMASH tape). I smeared yellow, red and turquoise
paint over the background, then did lots of black stamping, including the fab
grid stamp by Jenni Bowlin...
I then glued all three of the aperture inserts together, then covered the lot with more book pages. I then painted and stamped them, just as I had done with the background. Doing this BEFORE you glue it to the background means you have much easier access to the inside parts of the apertures.....
Once it was all painted and stamped, I glued it to the background, then covered all four sides with more book pages to give a seamless look. The edges were then painted and stamped...
Once the actual tray was done I added the embellishments, few as they are!
I clipped the ends of the
Prima bird clips, then glued them to a book page. I then filled in the centres with Glossy Accents. Once dry, I cut them out and adhered them to the tray...
I added a few small stars, punched and wooden....
and a red clay heart....
As this tray has 10 apertures, or 'windows', it seemed a little obvious what to call this piece.....
So that's it...a printers tray without all the extra 'stuff' !!!
Have a great weekend everyone!
Love Trish xxxxx