Showing posts with label bazzil. Show all posts

16 August 2013

Ephemera album part 2

Well as promised here are the inside pages from the mini album I showed you last week.  I used the bits and pieces found whilst cleaning out the house of my Parents-in-law a couple of weeks ago and while the photo's are not the main items on the pages as they're either too small, unknown or un-important, it's the ephemera which is the star in this album.


This album is also very economical too as I only used one and a half sheets of patterned paper throughout, Jenni Bowlin "Boy meets Girl" from the  collection  Red Black and White and Finnabair Sunrise and Sunset by Prima


I also had a piece of Bazzil antique paper which fitted in perfectly with it's newsprint background.


As if it wasn't distressed enough I flicked over a few drops of Mr Hueys Classic Tan ink.


The background page below is covered with Glitz Design paper layers and embellished with another Jenni Bowlin deck card


I sneaked in some gorgeous washi tape by Jenni Bowlin in this sage lace pattern.


I hope it shows you that you needn't make an album of just photo's as sometimes you may have a collection of ephemera which is crying out to be used.

Have a good week and I'll see you next week.

Jaine x

13 July 2013

Hidden Discovery...

Hello!
I've been playing with texture and 3D papercraft elements.....and came up with this.
The base is a chipboard sheet, my favourite 6" square size! I started off by cutting a sheet of dotty paper the same size as the chipboard. I ripped into the paper on both sides, then used a skewer to roll the paper around to give the rolled back look. A slip of more dotty paper under the ripped part completes the look.
 I glued all the paper down onto the chipboard sheet base. The next step was to scrape texture paste through a stencil to get the harlequin detail....
Once that was dry, I added a little gesso here and there, just to create an uneven look, then got the spray inks out!
I have to admit that I have no clue as to how I ended up with the colours I have on this panel.... I used Dylusions Calypso Teal on the right hand side, and Dylusions Cherry Pie on the left. How the top bit ended up nearly black in places I will never know!
No matter, I liked how it turned out!
I added in some little details like the stars, and the red clay heart....
A Chit Chat sticker finishes off the panel!
Have a great weekend folks.....:)
Trish xxxxx


31 May 2013

Little sailor - step by step

Happy friday everybody! The summer has finally arrived here in Norway and we can start to enjoy life at sea;-)

Today I'm going to show you a layout step by step. Hope you have time and patience because there's a lot of photos here:-) First a little sneek peek of the final layout;-)


Step one: Start out by spraying a lot of water on your page, then use the mist of your choice and blend together using more water. I guess I used a bit to much water here and forgot to put the page inn press, so it really curled up. But I knew there were suppose to be many layers on top so I didn't mind starting over.
You should note that the page will curl a bit most of the times, but once placed in the album it will look great either way:-)

Also create some drips of mist by tapping it on to the paper.


Step 2: cut up your papers. By layering them on top of the background you choose the size you like. For this project I used papers from Glitz design Uncharted Waters and a piece of Bazzill Antique Book Paper.


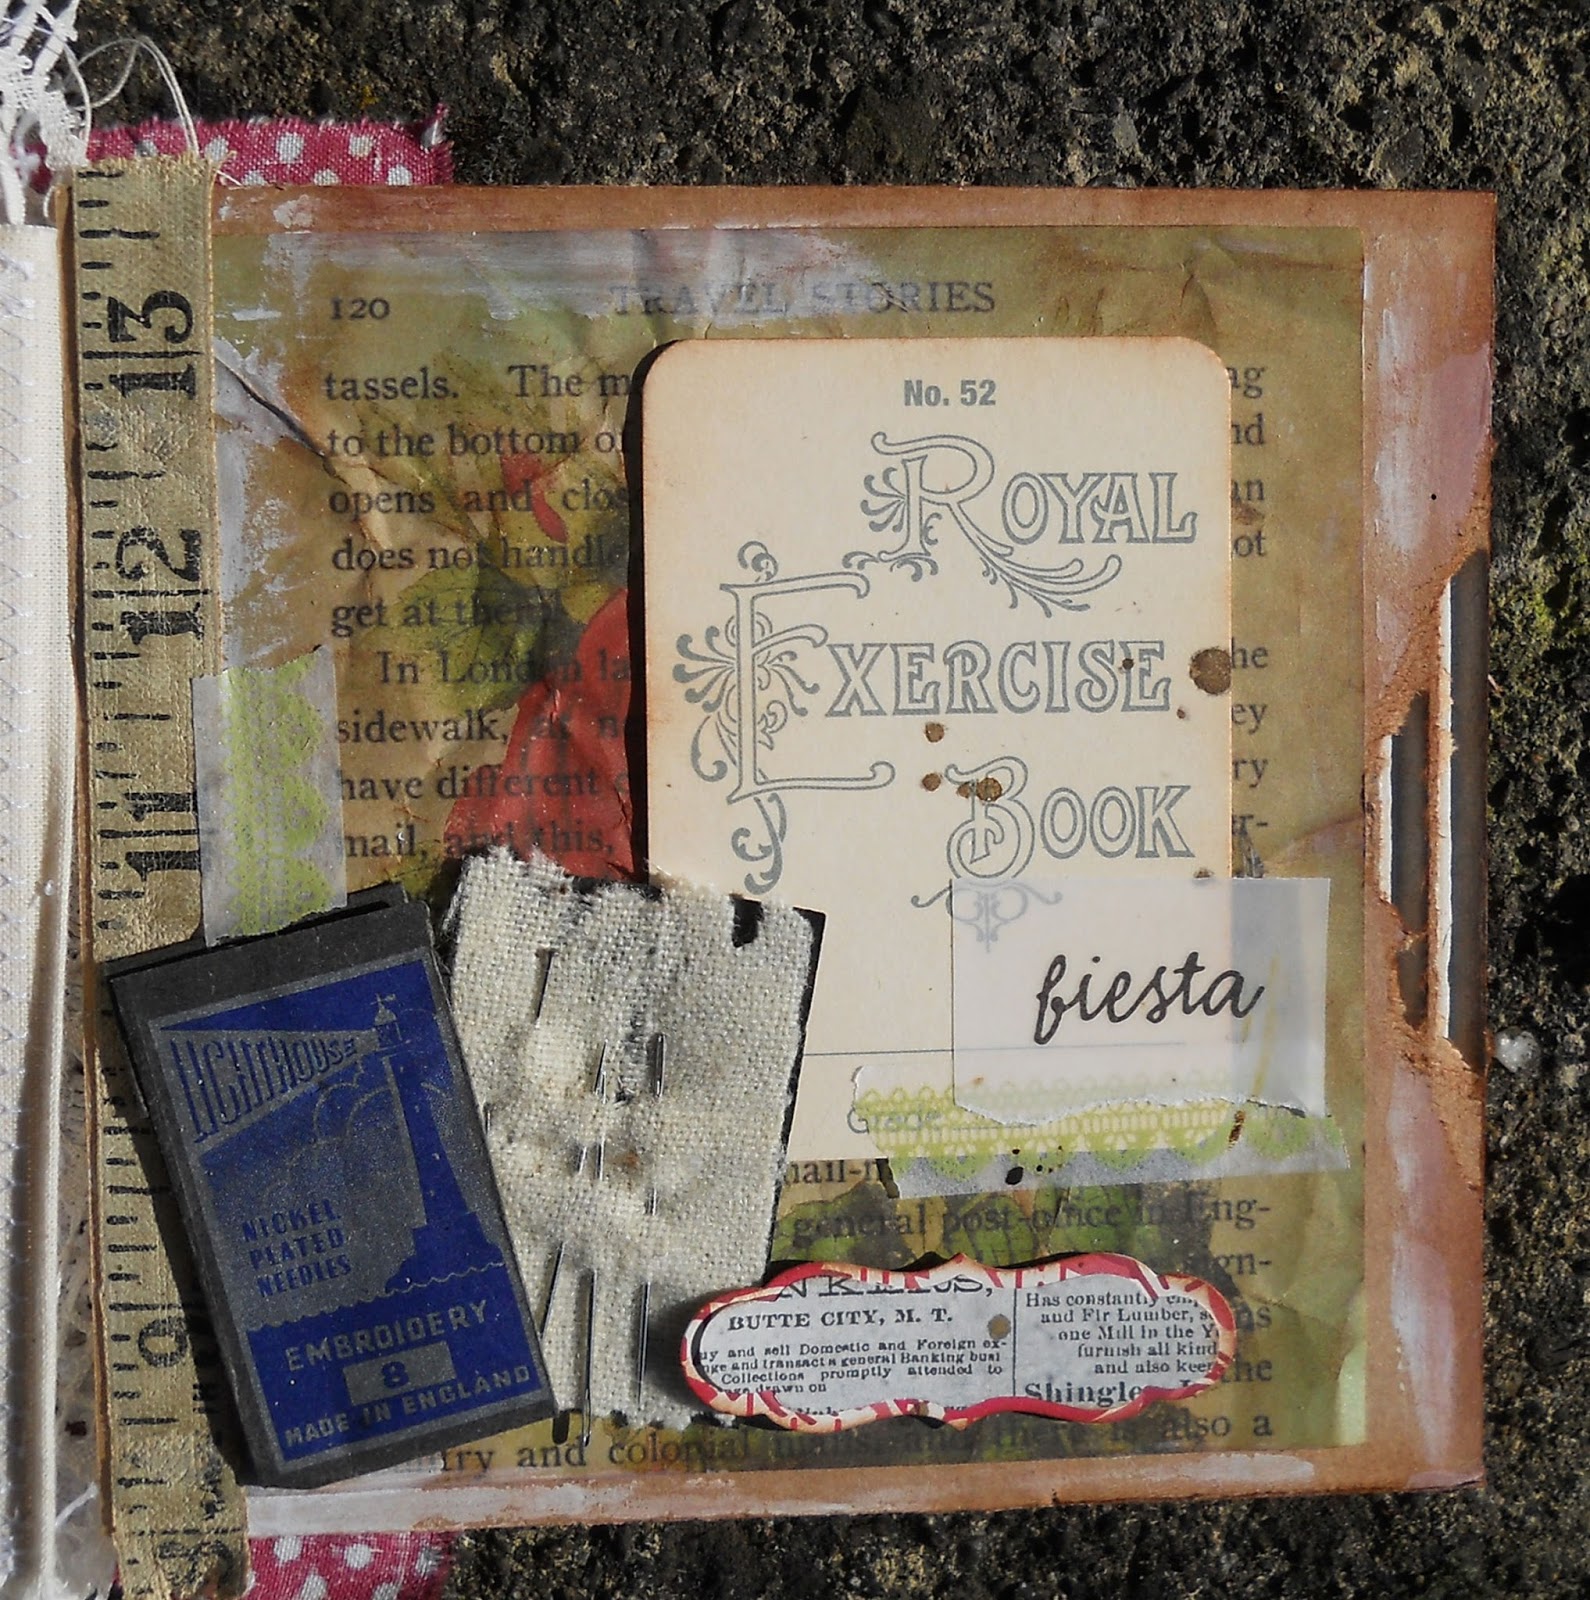
Step three: for this page I made some embellishments from an old book page. Doodle and use some stamps to make them stand out. I also saved the product strip on my pattern paper since it really fits the theme. 


Step four: adhere your pattern paper to the background. I like using staples, then I can sneek in more elements between the layers. I also stapled the background to another cardstock to make it curl less. 


Step five: paint your bookpage embellishments with ink and water.

 
Step six: Add molding past trough a stencil and also some paint on top before removing the stencil. Here I have used a stencil from The Crafters Workshop. Also add more mist in drips and paint some of the paper with mist and water. 


 Step seven:  Add embellishments like the bottle from Tim Holtz, the boat from Studio Calico and the book paper embellishments.


 I really wanted to use these wooden letters but didn't have any S left, so then a reversed Z had to do the job;-)


So are you still with me?

Here is my final result! A bright, fun and happy page just like the first summer day of the year when a shoot the picture:-)


Thanks for looking:-)

22 April 2013

Flying high


This time I've had some fun messing around with paint, stencils and mist:-) I also made my page using a Prima Build-A-Page Sketch and a beautiful colorpalette from the Color Room:-) I love challenges and they often give me the kick in the back to get started:-)


To make this page I started out by almost covering my background paper with gesso and paint to match the colors in the palette. I used some masks and stencils aswell. Then I glued down some regular tissue paper and some strips of Bazzil Antique book paper (LOVE!), and layered a few different Ranger tags on top. I continued by painting over the paper here and there and then I used a lot of mist to make it all come together:-)

To embellish the page I based it on my Prima products, both old and new. The flowers and the butterfly is from my own stash but in the shop you can get the Lady Bird paper clip, the Finnabair Vintage Machanicals
and the zipper metal trinket that are all from Prima. I also used a Prima stamp on the side of the photos.

Some closeups:


The sketch:


April 2013 BAP Lene


The colorpalette:

Picture