Showing posts with label Archival Ink. Show all posts

21 July 2016

Clock Flower Journal Pages

Morning, peeps!  I don't often do journalling, but I was in the mood for a little painty play recently.
I started off by dragging some Dylusions Paints across the double page spread using a credit card.  Lemon Zest, Vibrant Turquoise, White Linen, and London Blue around the edges.
Added a bit of stencilling in White Linen and Squeezed Orange using Tim Holtz stencils, and while the sponge applicator was still loaded with Squeezed Orange I made three circles.
When the circles were dry I outlined them and drew stems and leaves with a black Derwent Inktense pencil, then smudged it with a damp paintbrush, and added white highlights with a Sakura gelly roll pen.  I overstamped the circles with the clock image from Tim Holtz Curiosities set using Ranger Archival Jet Black ink.
I finished the pages off by adding a sentiment, butterflies and a border with a Finnabair stamps.
Thanks for taking a look, and enjoy your day!

Shirley x

13 April 2016

Colourful Masterboard


Morning, folks!  I decided to make a masterboard that I could cut up for cards.  I started by sponging my Dylusions paints onto a sheet of A4 card using Mini Blending foam.  Next came some stencilling using Tim Holtz Stencils, then then stamping with Dina Wakley Textures using Ranger Archival Ink.

Then I started chopping the masterboard up for card fronts and toppers:


148mm sq card (Dymo tape sentiment)
A6 card
Topper on A6 card - this one's my fave!
This could either be a bookmark or a gift tag.
Topper on a 148mm sq card
After I'd finished sponging each colour, I got rid of the excess paint by sponging circles (as recommended by Dyan Reaveley in one of her videos) onto another sheet of card:

Out came the circle stamps from the Finnabair Don't Forget To Fly set.  I allocated one stamp per colour, and stamped over all the circles, filling in the gaps with some of the smaller stamps:


And now I've got another masterboard!

Have a crafty day!

Shirley x

11 November 2015

Decorated Storage Jar


Hi guys, Shirley here with a decorated storage jar.  The plain empty jar was sitting unloved on a shelf in the garage so I thought I'd give it a makeover.


I started by prising off the plastic stopper on the lid, then brushed some Mod Podge on the insides and sprinkled in some Frosted Lake Mica Powder by Finnabair, replaced the stopper and gave it a good shake to distribute the powder.


Next, I pasted the outside of the jar with Mod Podge and adhered white tissue paper to provide a base for the next layer, then got my stamps ready.


Using the Finnabair Lace & Doily stamp set and Wire Net stamp, and Ranger Archival Ink in black, I covered a half-sheet of tissue paper in stamped images, leaving space between so that I could rip them apart.  You need to protect your work surface when stamping through tissue, because the ink will soak through.


I tore up the tissue then adhered it over the base layer,


then raided my stash of beads, ribbons and embellishments to pretty it up, mixed more Frosted Lake mica powder with gum arabic and water and painted around the shoulder and lower portion of the jar, and added some Frosted mica flakes around the base.  I added a light brushing of Mod Podge onto the coin charm then a dusting of Pale Silver mica powder.


Pretty, don't you think?  Think I'll have another look in the garage, see what I can find ....

ASOI products used:

Finnabair Mica Powder - Pale Silver
Finnabair Mica Powder - Frosted Lake
Finnabair Mica Flakes - Frosted
Finnabair stamps - Lace & Doily
Finnabair Stamps - Wire Net
Ranger Archival Ink - jet black
Mod Podge

31 October 2014

Happy Pumpkins !

I've got a quick and easy card to share with you this week. I love Autumn/Fall and all the beautiful colours. Inspired by the abundance of pumpkins around at the moment I made a card for a special someone. I just know it'll make him smile!


I stamped two of the pumpkins from Stampotique Originals directly onto my card. The middle one was stamped using Archival Ink onto some cardstock that was painted with acrylic paints. His googly eyes were made by drawing onto a couple of tiny circles with a Micron pen and covering them with Glossy Accents.

Thank you for calling. Happy Halloween if you are celebrating. Gez

06 October 2014

Spots of colour!

Good morning, Gez here in a rather wet & windy part of England today!!! 

Gosh, we're having some rain!

I am excited to be sharing an on going project with you today that will just keep growing & growing!

If like me when I get new supplies I can't wait to try them out... I have decided to catalogue them and keep them altogether on a metal book ring...

I've got 4 tags to share with you today using some of my favourite products from A sprinkle of imagination.

First of all I stamped a brand NEW stamp from Stampotique Originals, (it's from the Circle Cube by Daniel Torrente) Vicki stocks lots and lots of their stamps and can order any that you see online. I have used an Archival Ink Pad for stamping which are both water and fade resistant and a Sakura Pigma Micron pen for labelling.

I managed to fit the circle stamp 8 times onto one tag as you can see using various products.

On my first tag I have used acrylic paints, sometimes it is so much better to see the paint on cardstock rather by just looking at the pot or tube as you get a better idea of the finished look when it's dry.


This is true of all the different products, so I went ahead and had great fun using Distress Inks,


and also, 


 Inktense pencilsby Derwent


Here is my finished swatch...


 for now!

I can keep on adding to my ring and so on!

Thank you for calling, Gez


18 May 2014

Freedom!

Hello!
Did you see the winner of our last challenge? Alisons fabulous entry with all the butterflies inspired me to add a little 3D movement to my project for today. Of course, not having the patience Alison must have had, my 3D movement was limited to just six hearts.......
Stitching them down the middle means you can carefully lift the edges up....
The background is a quick smeared paint base, with white stencilling, black stamping and washi tape added for extra detail. I also melted in some black UTEE crystals, and stitched some decorative elements....
My lettering is some very ancient rub ons... I think I got them at the Post Office years ago! Very impressed they still worked!

I used:
Paint
Black UTEE
Stamps: Background, Heart

Have a nice Sunday everyone!
Trish xxxx


21 February 2014

Robe a la Francaise - GDT Riikka Kovasin


Happy Friday! It's soon weekend! Riikka here to share with you my third and last GDT piece. Hope you have liked my creations so far!

Who am I? My name is Riikka Kovasin, I'm a Finnish mixed media style scrapbooker with a passion to have my fingers inked on weekly basis. I'm happiest when I can get messy with different paint media and create a piece of memory keeping at the same time. What a perfect combination! My blog is called Paperiliitin. Please come and say hi!


I'm more of a scrapbooker than anything else so I decided to do another layout for my last project. The spark for this layout was my a namesake of mine who asked me an advice over at Facebook for a layout she was working on. I really liked the composition she had going on there and asked her if I could do my version of the same. So here Riikka, is my take on the two photos and vertical title! 

The topic of the page is a princess dress I sewed for my 3-year-old as her birthday present. Her big sister got one just like it when she turned three so it's kind of a tradition. I used the same patterns for this dress than to the previous one, but the color is different. My older one wanted a yellow dress (her favorite color at that time) and my younger one chose turquoise (her favorite color). The dress has a flowing back piece, like the robe à la francaise has.


I started creating the layout by gessoing an area of the background paper where my main composition would go. Then I poured some Glimme Glaze to the paper and let it dry. After that I added some stamping, pencil doodling and inking through a TCW stencil. I also inked a piece of Prima Marketing resist canvas and used it later on in the layers behind the photos. I thought canvas and lacy details would really fit the subject of the page.

After the background was finished I then layered some patterned papers, stickers and other embellishments behind the photos. I used papers from 7 Dots Studio "9th Wave" collection as it fitted the color scheme so well. The embellishments are from that collection together with some from the "Domestic Goddess".

Thank you for taking a look - it has been a pleasure guesting here! Thank you for having me, Vicki! Hope to see you all around!


Supplies:


other: gesso, pencil, thread, twine, half pearls, stapler, correction tape

14 February 2014

I Love You To The Moon - GDT Riikka Kovasin


Happy Valentine's Day! Riikka here again with another guest design post and I have a little present for you - a video.

Who am I? My name is Riikka Kovasin, I'm a Finnish mixed media style scrapbooker with a passion to have my fingers inked on weekly basis. I'm happiest when I can get messy with different paint media and create a piece of memory keeping at the same time. What a perfect combination! My blog is called Paperiliitin. Please come and say hi!


For my second post I created a Valentine themed layout about my two daughters. The picture is an old one, but I really loved the topic and the angle of it. It shows them playing an afternoon tea party. 

The quote from the 7 Dots Studio "Messy Head" collection suited the layout perfectly as I love them both to moon and back. I also used other patterned papers from the collection. As one of the journaling style cards I wanted to use on the layout was purple, I added some purple details to the layout. If you want to see how the layout came to life, please watch the video underneath.


Thank you for looking! I hope I have inspired you! 


Supplies:


other: pencil, buttons, cord, stapler

22 October 2013

Spooky altered envelope!

It's been a while since I last made an altered envelope and with the spooky season upon us I thought it would be fun to send some happy mail to my daughter away at University!


I started with a simple background using Distress Ink pads. Then I stamped the 'Abstract Foilage' stamp in the centre to form a rectangle for the address label again using Distress Ink and some white Gesso.. the 'Numeric' stamp and the 'Web' from Stampotique Originals were then stamped onto the envelope using Distress Inks for a muted look. The gorgeous Miguel Has A Gift brand NEW from Stampotique Originals was stamped straight onto the envelope using Jet Black Archival ink pad from Ranger. A little doodling with a black and white Sakura Pigma Micron Pen and my envelope is ready for sending!

 Thank you for calling, Gez
 

18 October 2013

Simple book making- part one!

Hello!
I thought I would take a little break from all the painty panels (and tags, ATCs and journal pages!) for a few weeks, and show you something that I really should do more of...book making! Loads of simple and easy ways to create books, and I thought I'd share a few...
Here is part one.... (also to be titled "It's really hard to take a decent pic of a finished book"")

 
I have kept things simple, only a few pages, and not loads of mess etc on the pages themselves. You can go as detailed as you fancy, of course!
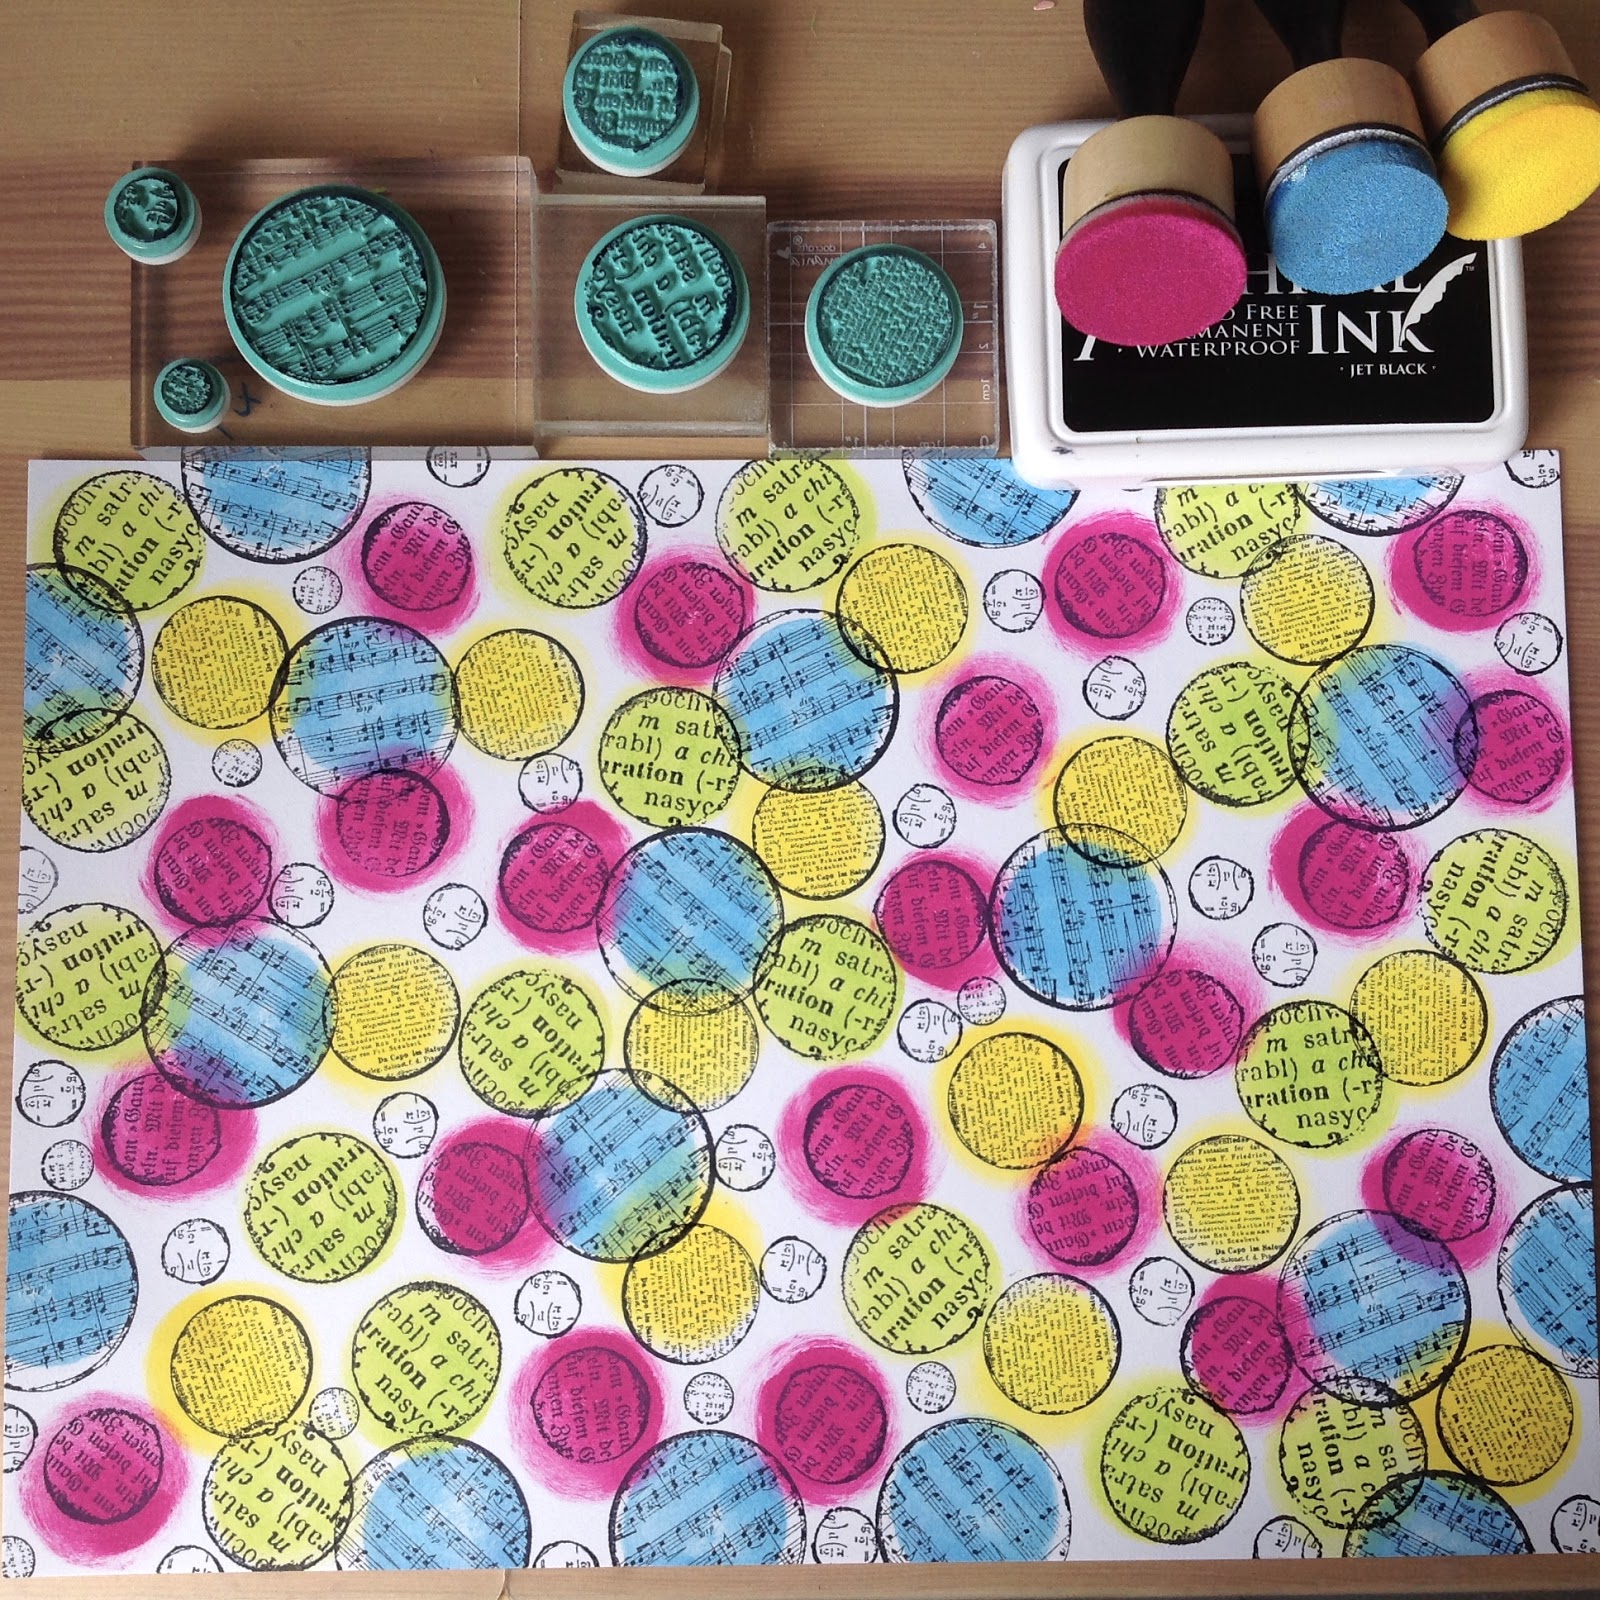
OK... how to do it. Pages first. I've started with a masterboard, this one is a 12" by 12" sheet of card....
As you can see, I sprayed it with dye inks, and then did a little printing, stencilling stamping and splattering over it. Not over much, as we can finish off each page once its cut. I have then cut my card into 10cm by 10 cm squares....
A 12" by 12" sheet will give you nine squares. My book has three double sided pages, so I need six altogether. So, choose you favourite six squares, then sew them to a black 'base' card.
I've done a little extra stitching here and there too, as you can see! Now we have our pages, we can add a little extra decoration. Here is one of mine...
I, again, haven't gone overboard here. A bit of washi tape, white paint dots and a punched out star, along with my main image and stamped word. Once you have decorated your pages (or not, you may rather keep them plain for someone else to add photos etc), its time to actually construct the book. Once the black base card is added, my pages are now 11cm by 11cm. I've cut two more bits of card 11cm by 11cm, and then scored them down the middle, like so....
The card hinges need to be the same size as your pages, so it's easy to work out how big they need to be when you make books of varying shapes and sizes. Now we need to attach the hinges together. I use strong double sided tape, wet glue gets very messy! Like this.....
So, you have stuck one side from each hinge to each other, forming what is beginning to look like a book! If you want more pages, simply make more hinges and keep sticking them to each other! Adding the decorated pages to your hinges couldn't be simpler. Again, strong double sided tape all the way....
Decide which page is to be your cover, then stick the first bit of card in your hinge to it...
As you can see, the card hinge goes halfway down the page, giving a good strong bond. Now it's time to add page two. This gets stuck back to back with your cover, with the card hinge sandwiched in between. Like this...
As you go along, remember to keep checking you are not sticking the pages in upside down! Page three gets stuck to the middle hinge....
Page four to the back of page three.... (told you this was easy!)
One card hinge left. So, page five first....
Then the back cover (or page six!)....
As the page backgrounds and the hinges were cut from the same card, you now have a seamless finish!
Books that have lots of pages need a little extra finishing, as the card hinge will be much thicker and needs to be hidden! The book will also have issues staying closed too... I'll show you next week how to deal with this!
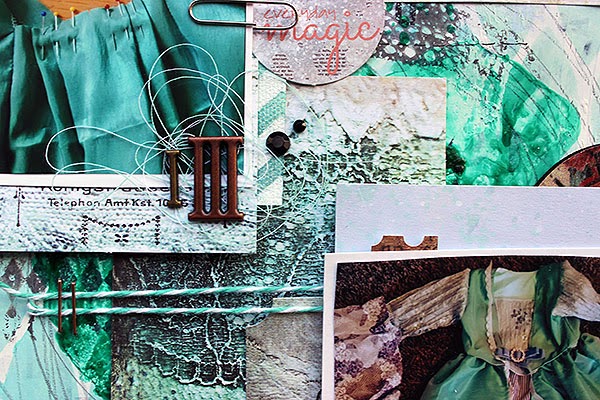
For now, here are a few closeups of my pages...
I've added glossy accents to the stars for the shiny look...

LOVE this new Ranger washi tape!
I've cut up one Stampotique image to separate my three little girls.....
Hope you like my book tutorial.... I'll have another technique next week!
Trish xxxxxx