Showing posts with label Softcut. Show all posts

23 December 2015

The 12 Brands of Christmas - Brand #12 Softcut


Ever fancied carving your own designs and making your own prints?  For our final brand of Christmas, I'm taking a look at Softcut (the cream-coloured stuff), Linoleum (the grey-coloured stuff) and the carving tools required for DIY printing and stamping.

I started with a piece of Linoleum, and drew a design using a waterproof pen.
Using a Lino Cutter with a narrow blade, I carved the outline.  (Always carve away from you with all fingers behind the blade, and outwards from the design, then if the blade does slip, you haven't gouged across your lovely image - or your fingers!)
Changing to a wider blade, I carved out the background areas.  It helps to ink the lino up with archival ink and make test prints every so often so that you can see what areas still need to be cut away.
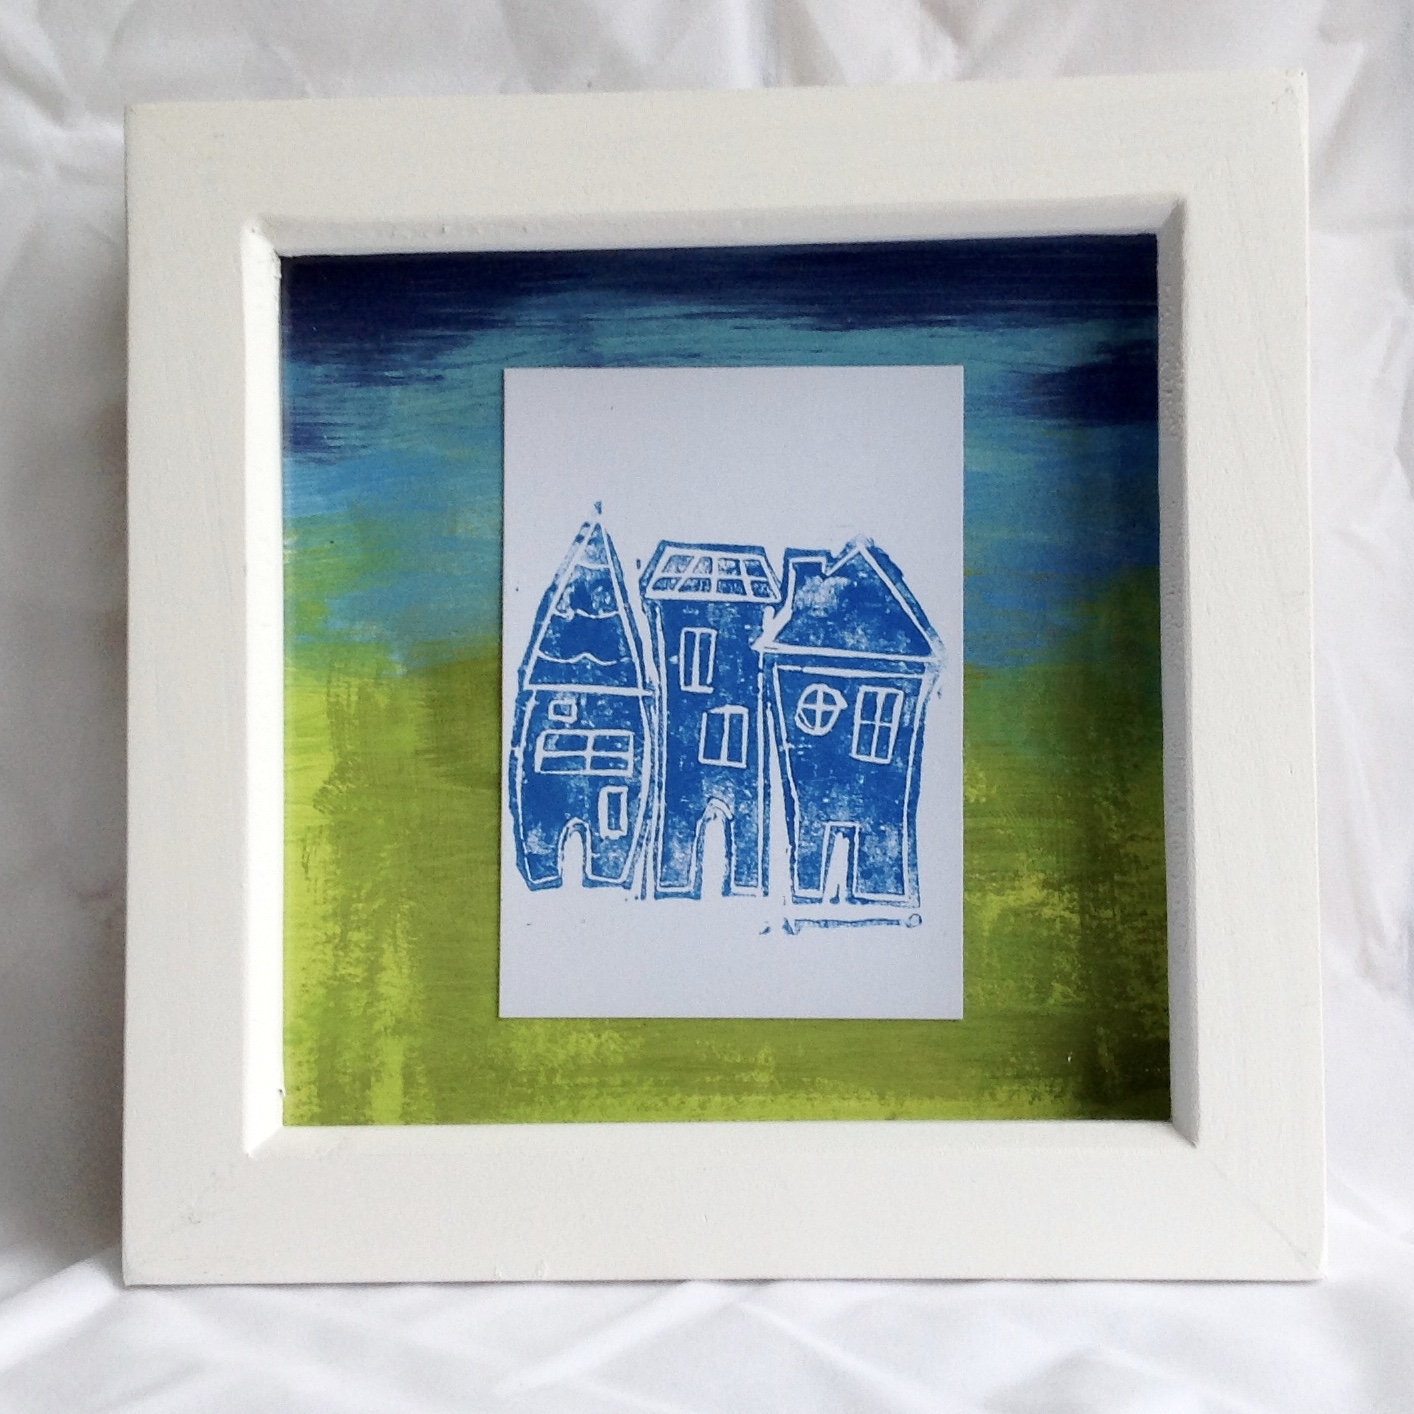
Leaving roughly carved edges gives your image a rustic feel.  And it means you don't need to be too precise ;)  I brayered Dylusions Paint onto the image and took a print on white cardstock.
I popped the print onto a background of Distress Paints, and into a box frame.  Would make a nice 'new home' gift, I think.


So next, I had a go with the Softcut.  This is more flexible than the Lino and carves slightly easier.  I decided to carve circles, but somehow it morphed into a rose...
A few test prints on scrap paper...
Brayered with Red Dylusions paint, stamped onto a Gelli plate piece from my review of Gelli Plates.
A bit of paint for a stem and leaves, a bit of stencilling, a bit of black and white pen work, and it's ready to be mounted onto a card.

I hope you've enjoyed this little review, and maybe inspired you to have a go.  Have a wonderful Christmas, and I hope Santa brings you loads of crafting goodies :)

Shirley x

07 August 2015

Lets face it journal page


I have to face up to the facts that I need to use glasses more often these days. Text has shrunk, the computer becomes fuzzy and late night crafting is almost impossible. It happens.

Just for fun I documented this change in my journal. For my background I stamped my own face stamp which I cut previously from Softcut. You can see my original blog post here where I cut the stamp.  I layered over that the Tim Holtz stencil Eye Chart of course. The circles were cut from a piece of paper left over from my Gelli plate printing play. I like the contrast it makes on the page. I found some glasses images and letter stickers for my title and it was finished.

Jaine xx

31 May 2014

Imagine

I found this striking image in a magazine and before anyone had the chance to read it, I'd torn out the page to use in a journal.

Actually I have to go back a step as it all started with the background which is a hand made stamp I'm a bit proud of. I cut it a while ago with a piece of Softcut lino cutting material but the chance to use it didn't come up until now.


I added a strip of gold metalic spotty tape from My Minds Eye which I didn't fully appreciate until I'd taken off the white backing paper and saw how cool it really is.


I painted the word imagine and cut it out to lift it up with foam pads over my background.

Have a good weekend

Jaine x

10 May 2014

A little inspiration.

I've been having a bit of a tidy and thinning out of my work room and after taking down a couple of mini canvases from above my desk which to put it frankly, were so old they bored me silly, I had a gap to fill.

I had the quote going around in my head and after going through some of my papers, I found a sheet of Glitz Design, "Sunshine In My Soul" paper with the cute bird on it and that became my starting point.


It went really well with some of the  Glitz Finnley papers which I also pulled out and used as a mat and for the bird house. The letter stickers were also from the Finnley collection tying in the colours perfectly.


When it came to the canvas itself I just sprayed over some collaged text pages, with a couple of ink spray colours and thinking I'd like to add a leaf stamp to the background I literally spotted a small piece of Softcut (the last little bit I had left) and within a couple of minutes I'd cut myself a leaf stamp.   

The finished canvas is now hanging above my desk as my new point of inspiration and a reminder that I need to buy more Softcut - LOL!

Have a good weekend

Jaine x

19 April 2014

Stamp Carving - Jaine


I think when Vicki announced she'd managed to get lino cutting tools and Softcut stamp cutting material in to the shop, there was a general feeling of excitement all round, then Vicki sent me a sheet to play with and once I'd got it on my table it just sat there looking at me. Not from lack of inspiration, I knew what I wanted from it but from fear of cutting into it. I imagined cutting the perfect stamp then slicing into it and messing up the whole thing.

So there it sat until a coversation with Magda sparked me off to just give it a go. Was I happy I did! Once I'd made that first cut I was hooked.


I wanted to create a head for using in my journals. A big enough sized head and without hair so I can add any hair-do I like.

I turned to my magazine tracing method again and found the perfect head shot and traced it out onto the surface of the rubber.


Making that first cut following the lines with the smallest cutting tool was scarey but  taking it slowly I could control the cut very well.


Now at this point maybe I should have listened to Magda because once I'd inked it up to test it, it became obvious that what I actually wanted to create was an outline stamp. This is not easy and not really recommended for beginners.

It was too ambitious for my first stamp and I made a lot of mistakes along the way but I'll know better next time.

 I cut away with a larger cutting tool testing the stamp every so often to see how it was looking. Here you can see I still had to cut a little bit on the left side of the stamp and in fact in the end I decided it was the type of stamping block I was using that didn't really help.

You can see that on the left hand side I've cut away a large portion of the face, this is because, not having an outline on that side meant I could cut away more rubber to save me having to scoop it out.


So there she is all finished. She's not perfect but I guess practice makes perfect.  I also cut the word LIFE too and used a Finnabair doily stamp by Prima as hair.


Happy Easter weekend

Jaine
Now I'm totally hooked and can't wait to