Showing posts with label Tim Holtz. Show all posts

30 August 2016

Let's Go Fly a Kite

Hi everyone, I hope you enjoyed your long weekend!  I've got a clean and simple card for you today.

This silhouette image by Jenni Bowlin looks great with very little embellishment.  I just sponged a background using Seedless Preserves Distress Ink, then l laid the Fence Frame stencil from The Crafters Workshop and sponged more Seedless Preserves.  To ground the image I stencilled Black Soot Distress Ink through the Tim Holtz Stripes stencil.


To finish off, I trimmed my panel then mounted it onto purple card.

Thanks for stopping by!

Shirley x

17 August 2016

Two Scribbly Birds

Hi there peeps!  Are you enjoying this little burst of summer?  I've managed to drag myself away from the garden for a few hours of crafty time.

I've been playing with the Scribbly Birds set from Dina Wakley.  I made a couple of background panels using Dylusions paints, then cut two panels using the Lawn Fawn Lawn Cuts Small Stitched Rectangle Stackables Dies.
I smudged the paints onto the panel, splattered some white, then once that had dried I brayered some white over the top to knock everything back.
I stamped the bird in Versafine Onyx Black, then watercoloured using Distress Inks and fussy cut the image.
Cut-down strips of Tim Holtz Idea-ology Tissue Tape were added to the panels for visual interest.
My second card was made using the same process.  I stamped some triangles from Hero Arts Stamps & Cut - Happy onto the panel.
This time I tore the tissue tape into strips to layer onto the panel.
Thanks for popping in, and enjoy this good weather while it lasts!
Shirley x

27 July 2016

Bonjour!

Bonjour bloggers,  my theme today is a little on the French side!  My Daughter, Sophie,  has just returned from a little trip across the water.  It was her very first trip abroad on her own (with school). I was a little anxious, to say the least but she is home safe and sound.

I asked Sophie to keep her tickets and leaflets etc and said that we could do something special with them upon her return.  I decided to make a memory book where she can keep her special treasures and photos.


I painted the book cover in Dylusion London blue, white linen and cherry pie.  Using Tim Holtz stencils and the above paint I stencilled over the page.  


Once dried I doodled using a Posca pen.  I used the French words and The Eifel tower to stamp directly onto the book cover.  The stamps are from Julie Nutting 'bonjour' set, I didn't use the doll from the set  but selected another that was big enough for my project.  I coloured the doll using Inktence pencils and collaged her on to the cover.


All ready to hand over to Sophie to create her book of memories.

Thank you for stopping by today.

Happy crafting,

Clare x x x 

21 July 2016

Clock Flower Journal Pages

Morning, peeps!  I don't often do journalling, but I was in the mood for a little painty play recently.
I started off by dragging some Dylusions Paints across the double page spread using a credit card.  Lemon Zest, Vibrant Turquoise, White Linen, and London Blue around the edges.
Added a bit of stencilling in White Linen and Squeezed Orange using Tim Holtz stencils, and while the sponge applicator was still loaded with Squeezed Orange I made three circles.
When the circles were dry I outlined them and drew stems and leaves with a black Derwent Inktense pencil, then smudged it with a damp paintbrush, and added white highlights with a Sakura gelly roll pen.  I overstamped the circles with the clock image from Tim Holtz Curiosities set using Ranger Archival Jet Black ink.
I finished the pages off by adding a sentiment, butterflies and a border with a Finnabair stamps.
Thanks for taking a look, and enjoy your day!

Shirley x

29 May 2016

Recycling Backgrounds

I've been recycling a piece of stamped card where the impression hadn't been as clear as I would have liked, and I didn't want to throw it away, so I painted over it to push the text to the background.


The stamp in question was the large text stamp from Tim Holtz Papillon.  I sponged Dylusions Paints (Cherry Pie and Fresh Lime) then using London Blue I scraped some paint lines.  A splattering of After Midnight and White Linen completed the background.


Once that was dry I stamped Donna Downey Poppies, masking the first one while I stamped the second one, then drew in the stems with a black Posca pen, and sponged some white around the outlines to help define the image.


Drawing stems onto flower head images is a great way to stretch your stamps.


Have a great bank holiday weekend!
Shirley x

23 April 2016

Horlogerie

Hey peeps, happy Saturday :)  Today I've been playing with one of my favourite Tim Holtz stamp sets, Papillon.  I just love the large background script stamp.


I started off by stamping the image with Versafine Onyx Black on card, then sponging Distress Inks (Spun Sugar, Shaded Lilac, Dusty Concord, Peeled Paint).  A quick blast with the heat gun to seal the inks, then I added some highlighting with a white Post paint pen.  I trimmed the panel using the largest frame from the Lawn Fawn: Lawn Cuts Small Stitched Rectangle Stackables which give a lovely stitched edge.

I wrapped some grape Prima Jute around the panel then mounted it onto my base card, and it was finished.  Or was it?  Maybe it was lacking a little something.  The moths and butterflies in the Papillon set came to the rescue!


That's better!  Have a crafty weekend :)

13 April 2016

Colourful Masterboard


Morning, folks!  I decided to make a masterboard that I could cut up for cards.  I started by sponging my Dylusions paints onto a sheet of A4 card using Mini Blending foam.  Next came some stencilling using Tim Holtz Stencils, then then stamping with Dina Wakley Textures using Ranger Archival Ink.

Then I started chopping the masterboard up for card fronts and toppers:


148mm sq card (Dymo tape sentiment)
A6 card
Topper on A6 card - this one's my fave!
This could either be a bookmark or a gift tag.
Topper on a 148mm sq card
After I'd finished sponging each colour, I got rid of the excess paint by sponging circles (as recommended by Dyan Reaveley in one of her videos) onto another sheet of card:

Out came the circle stamps from the Finnabair Don't Forget To Fly set.  I allocated one stamp per colour, and stamped over all the circles, filling in the gaps with some of the smaller stamps:


And now I've got another masterboard!

Have a crafty day!

Shirley x

17 January 2016

A Quartet of Bright Canvases


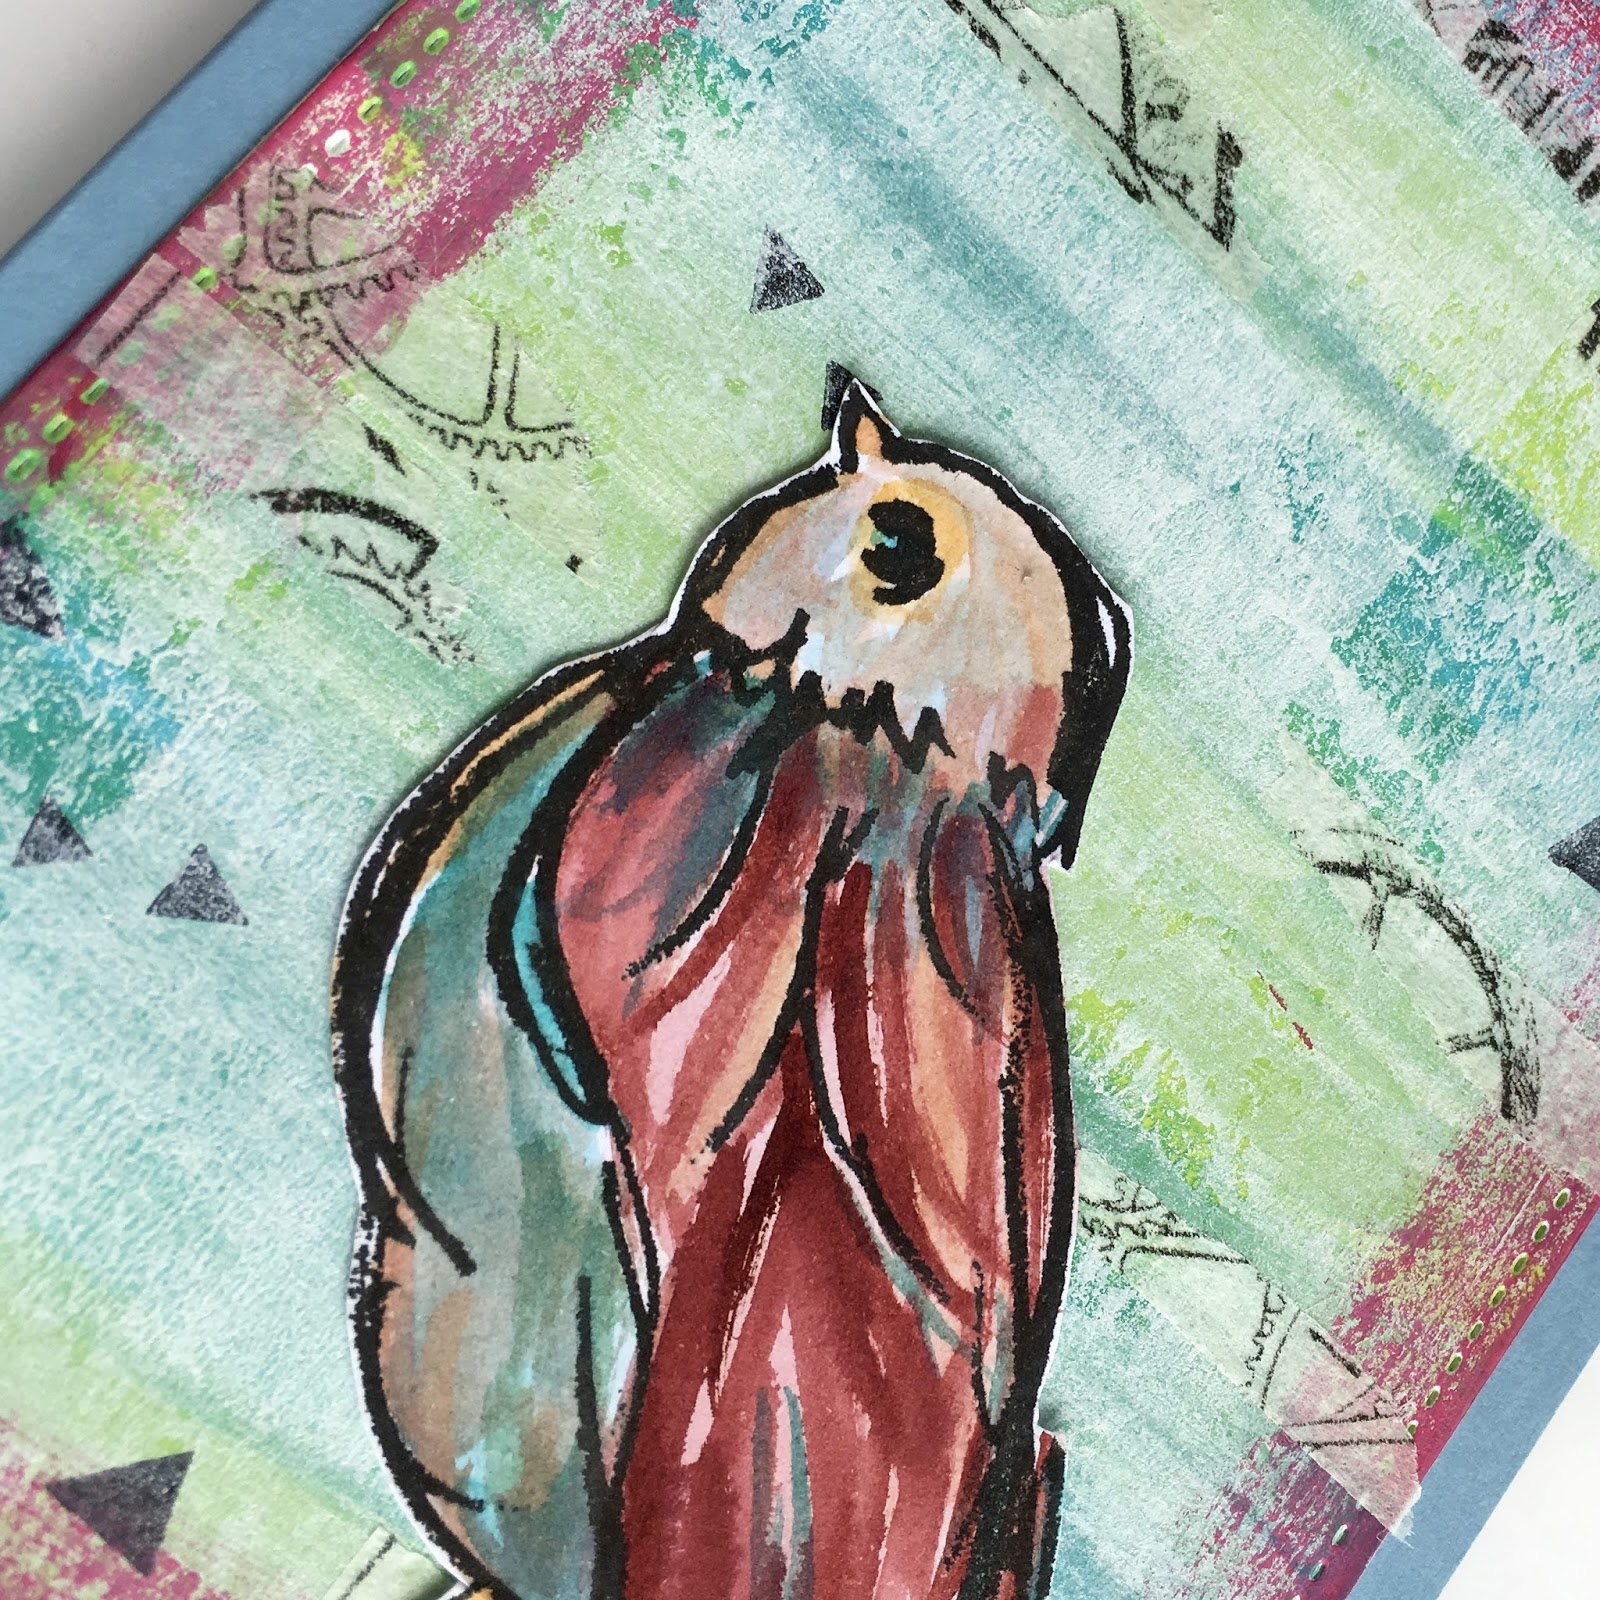
Hi peeps, Shirley here!  I thought I'd banish the winter blues today with some vibrant colours.  I had some mini canvases in my stash, so I set to work, covering them with Dylusions Ink Sprays in Calypso Teal and Funky Fuchsia.  Once they'd dried, I covered them liberally with Finnabair Art Basics Clear Gesso to seal the ink - it doesn't seal completely, but does keep leakage to a minimum.
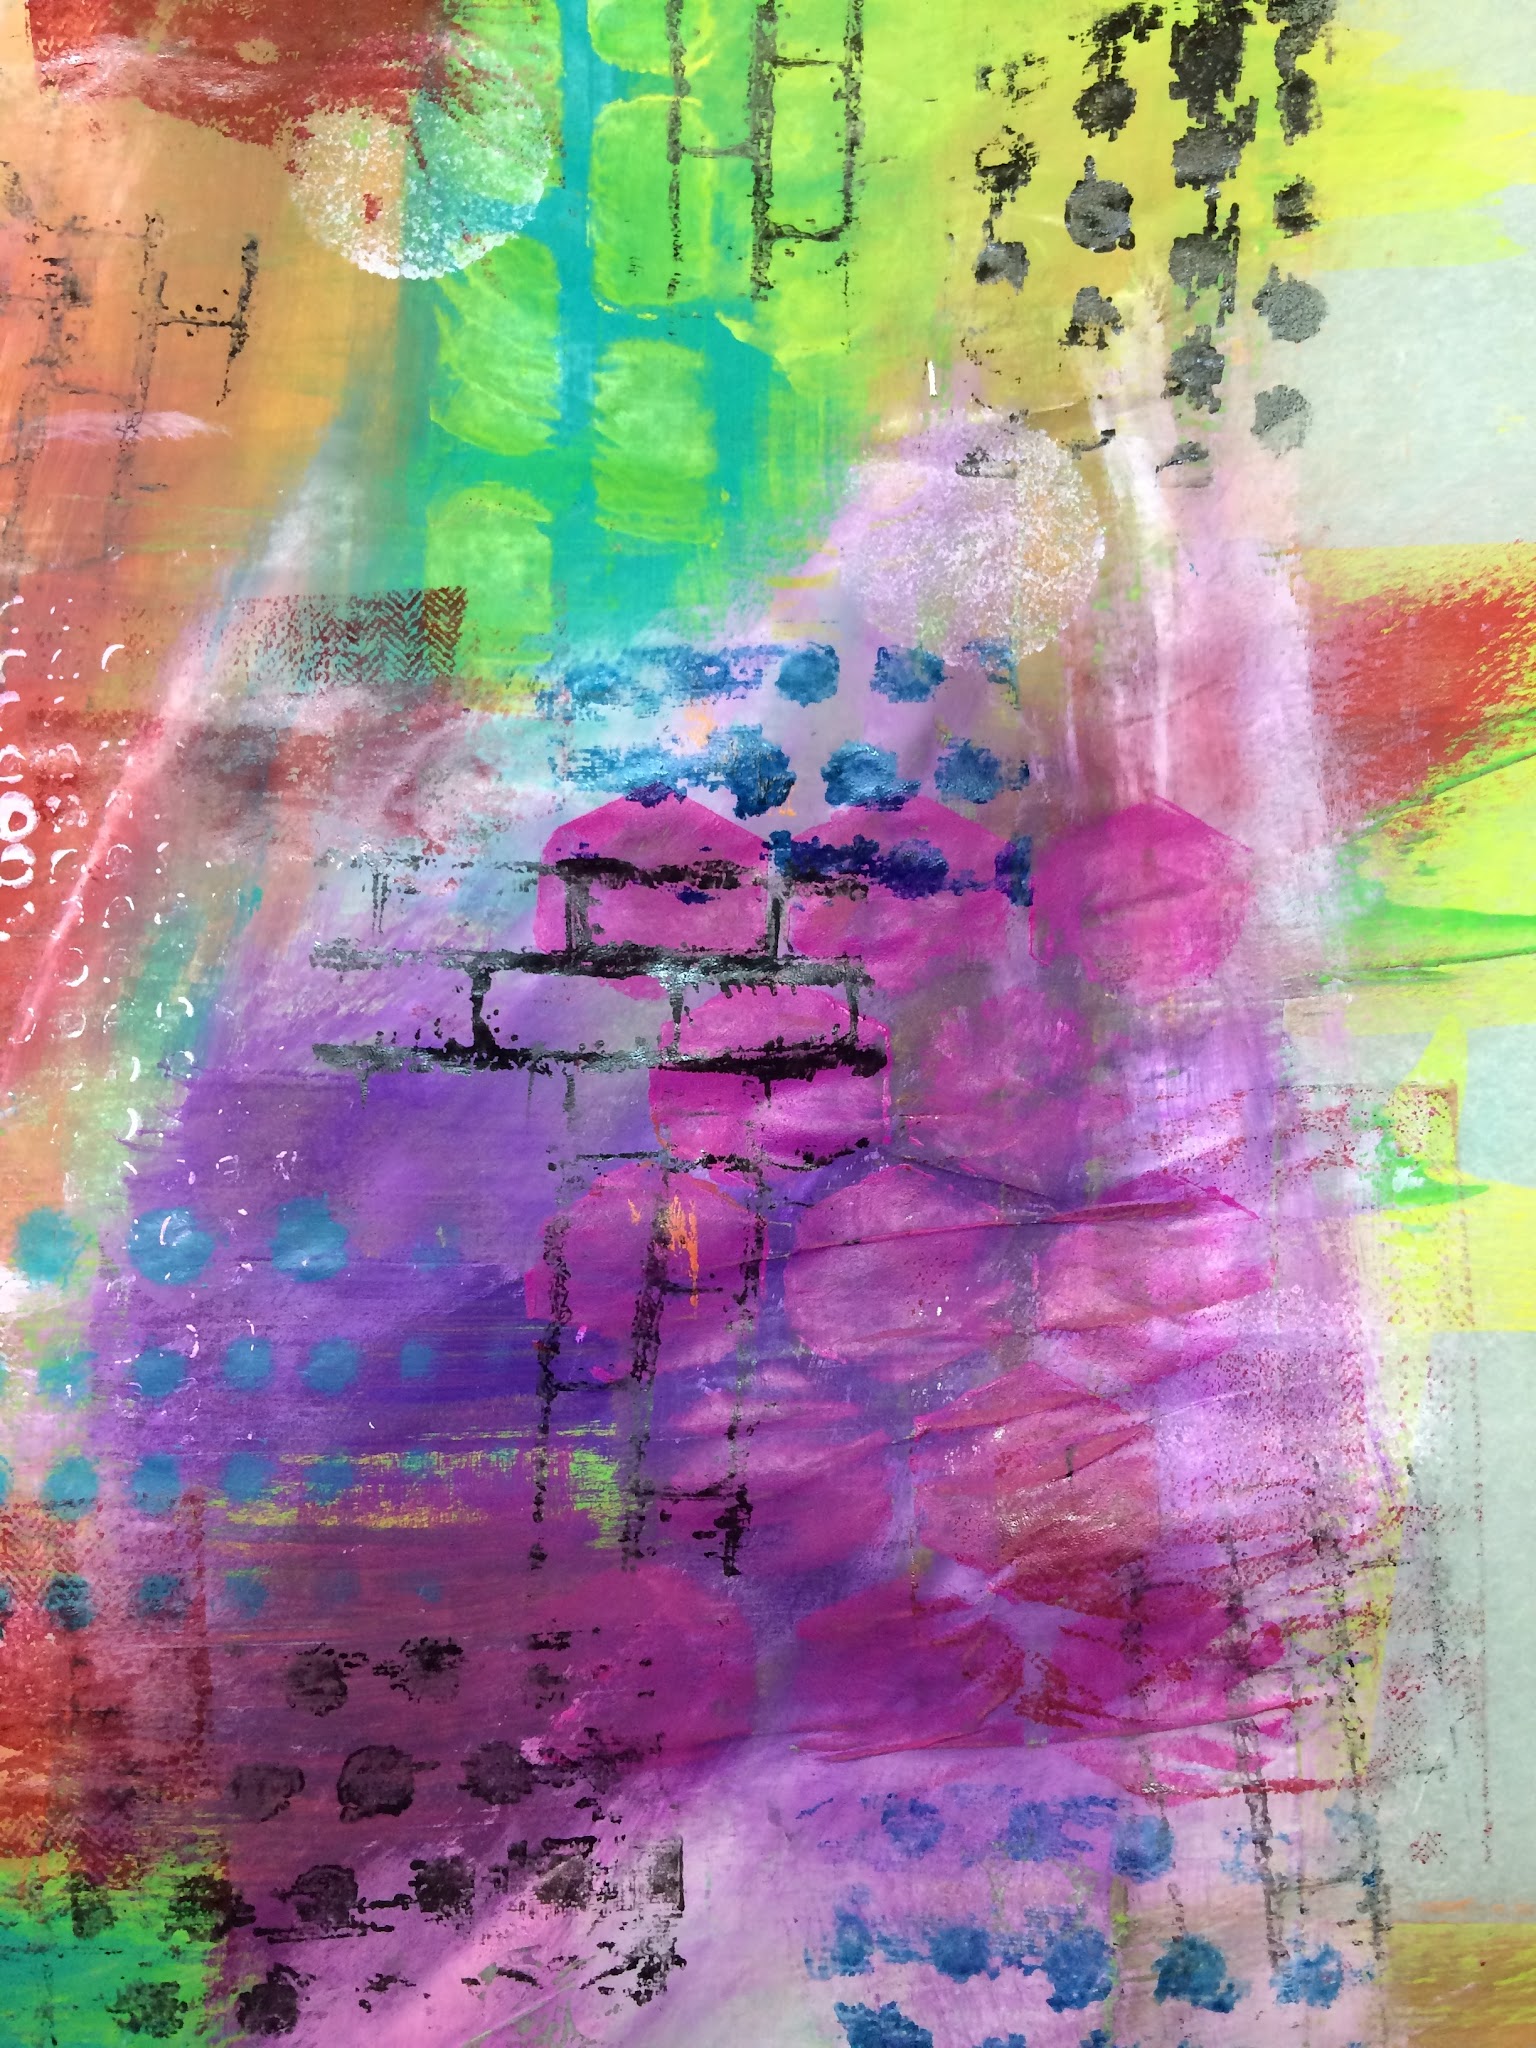
Sunglasses time: out came the lime green Dina Wakley Heavy Body Acrylic and some stencils by Tim Holtz and Rhonda Palazzari.
A bit of highlighting with a Sakura Gelli Roll white pen and a black pen to add depth.  It's only subtle but it does make a difference.
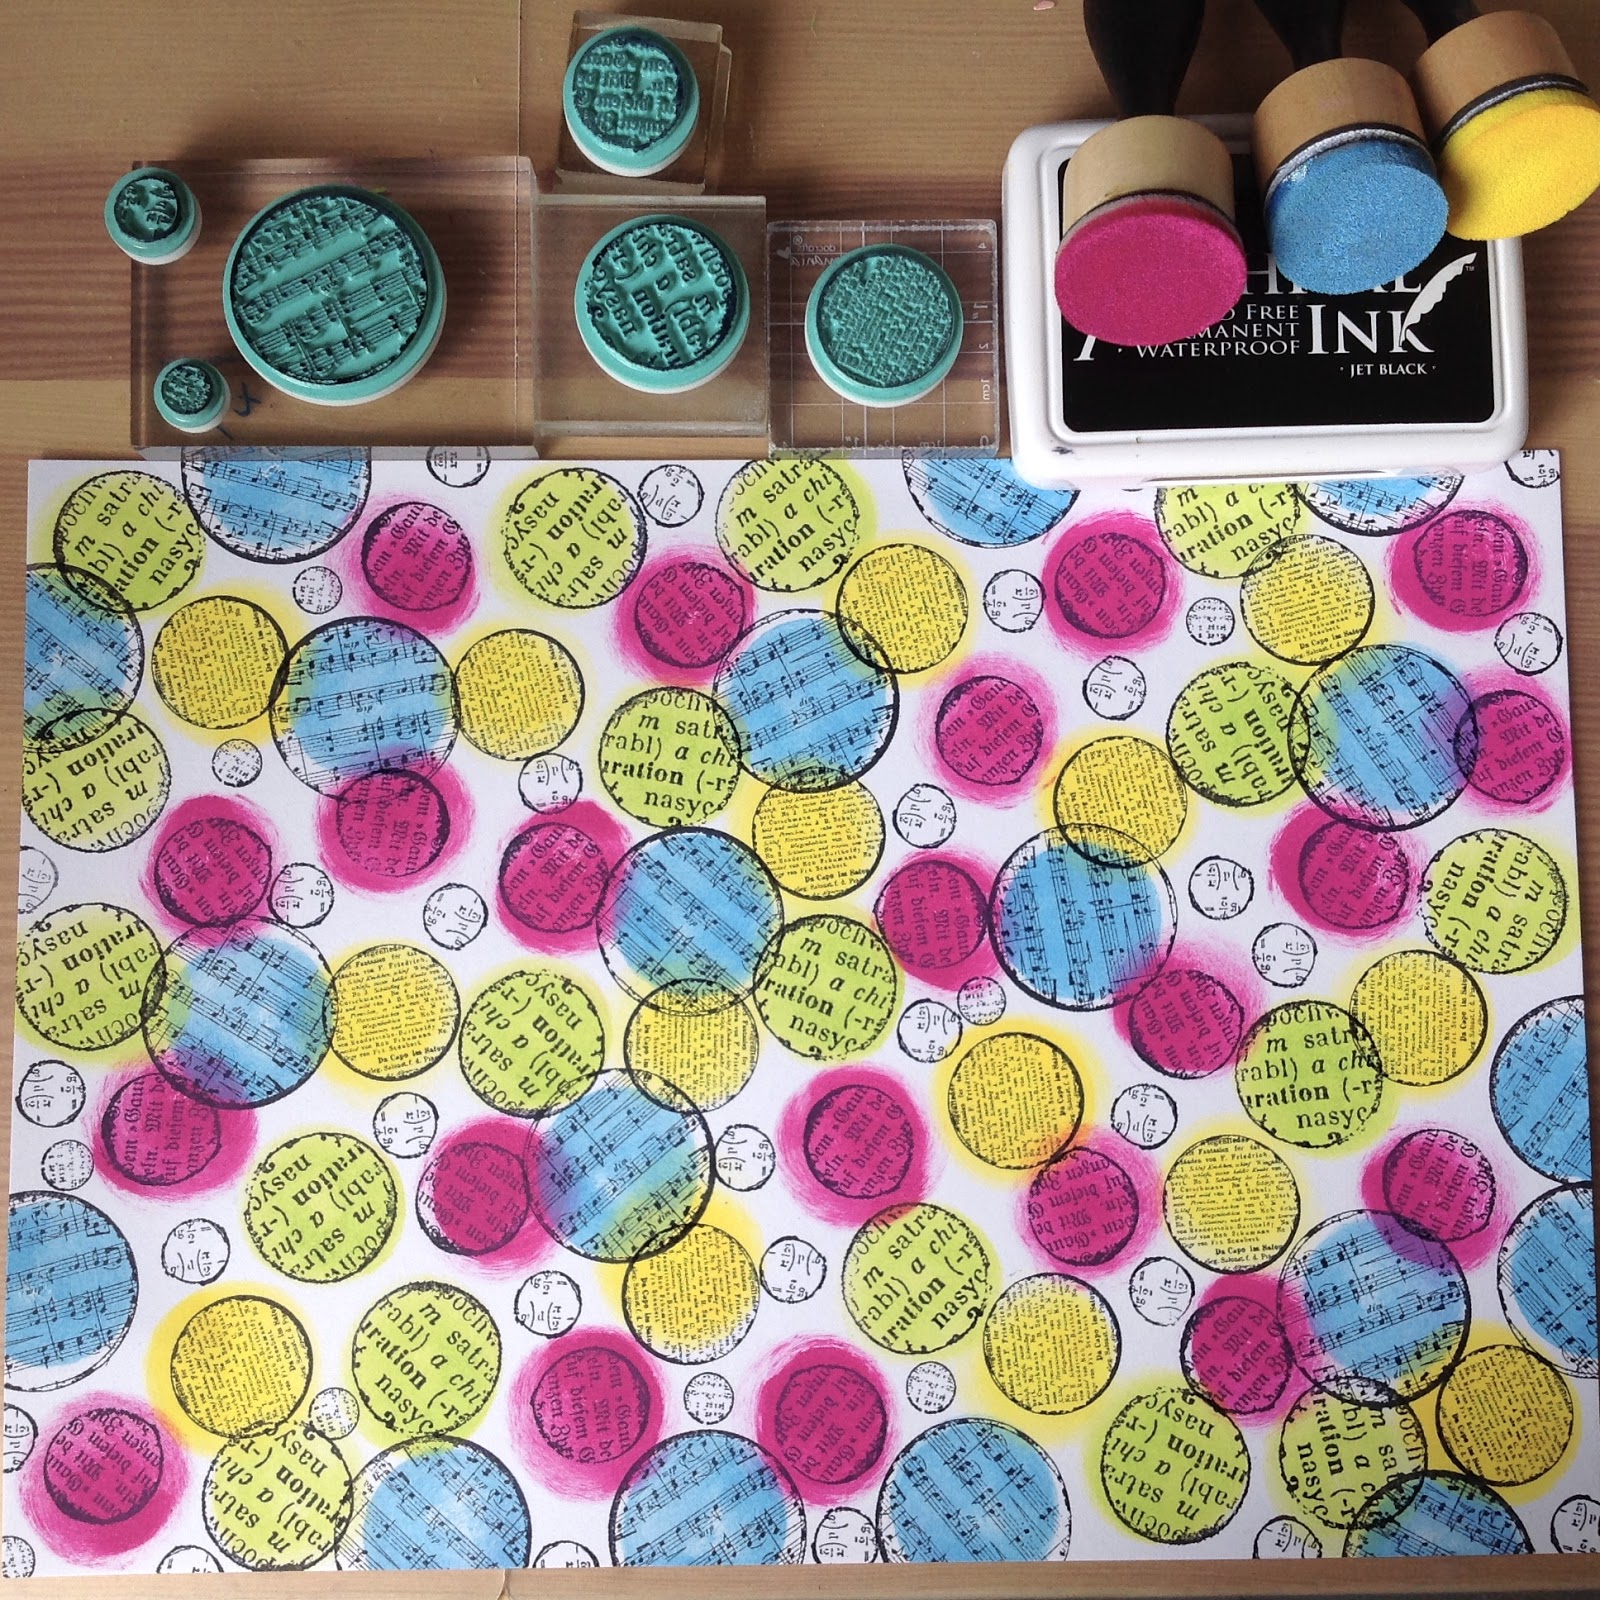
At this point, song titles sprang to mind for each mini canvas.  I wrote out the title words on black card, then wrote some of the lyrics around the edge of each canvas, photographed everything ready for my post, and decided I could be in breach of copyright, so I painted over the edges in lime and used the tiny stamps from the Hero Arts Happy Stamp & Cut around the edges.  Then I added encouragement phrases to each canvas instead.


In case you're wondering: Listen To The Music, Kissed By A Rose, The Times They Are A'Changin, Space Odyssey.

I hope they've brightened your day!

13 January 2016

Crafting is my happy!

Good morning all, it's all go go go! The new year has started and one of my resolutions is to make sure get plenty of guilt free crafting. I guess you could say I am adjusting to the fact that my children are growing up and need me a little less than before. Of course I am always on hand when they need me but I always seem to make myself feel a little guilty when I've had a couple of hours in the craft room. When I do rejoin my brood in the house it seems that they were all quite happy in the first place and are quite happlily engaged in their pursuits and probably didn't notice that I wasn't around! I guess I shouldn't give myself such a hard time sending myself on a guilt trip after an enjoyable crafting session.


Over christmas I managed to grab myself some crafty moments. One particular session I really wasnt sure what to to so I decided to have a play with some Dylusion paints and make some collage papers. This excercise really wasn't planned for anything imparticular so it was really quite random. I used Finnabair dot grunge stamp along with some of my favourite Dina Wakely stencils. Whilst I was painting a little light pinged in my head and I knew this would be my DT make for A Sprinkle of Imagination.


I decided that I would stamp one of Julie Nutting's mixed media dolls onto my jazzy background to make an interesting frock for my doll, I cut out the dress and set aside. I stamped the doll onto white card, coloured with pencils and applied her jazzy dress using Claudine Hellmuth matte medium.


I thought that my doll would great on a tag. I sprayed my background with ink and stamped the tall quote from Tim Holtz stuff to say stamp set. I applied some Finnabair art basics modeling paste through Tim Holtz splotches stencil and then added some embossing powder to random splotches. I gave my doll a coordinating hairband and balloon and gave it a shiny appearence by applying glossy accents.

Thank you for taking the time to stop by today.
Crafty hugs,
Clare x


05 December 2015

The 12 Brands of Christmas - Brand #3 Tim Holtz Layering Stencils

Hello fellow bloggers. I was very excited when asked to write a review for a product but I was soon struck with the thought 'what shall I review?' There are so many gorgeous crafting products available and I am extremely lucky to own some of them so I had a little think about what I enjoy using whilst I craft and I have to say that more often than not I end up rifling through my stencil folder.
This year I discovered Tim Holtz Layering stencils and I have managed to acumlate a small selection. These stencils are so verstatile. There is a growing collection available with lots of designs for a variety of occasions and oodles of techniques and mediums to use alongside.

Here are a few projects using these delicious stencils in a variety of different ways.

For this card I spritzed my Tim Holtz Distress spray through the Burlap and Cargo stencil. I blended some Distress inks around the edge and then sprayed water with my mini mister through the Measured layering stencil. To create a border I blended black soot distress ink through the Splotches stencil. The stamp set used for this project is Warehouse District.
This card has seen my fingers pink for a number of days now. A messy technique but lots of fun. I applied various shades of Distress inks to the Lace layering stencil, spritzed with water and brayered onto some watercolour paper. To keep the theme, on the background I dabbed my versamark pad through the same stencil and heat embossed with embossing powder. I used the Finnabair Dont forget to fly stamp over my inky background.

I love adding texture to cards and canvases and these stencils really do the job. The Woodgrain layering stencil made a fabulous bough for Robin to perch. In the background I used the Splotches stencil once again but this time for a bauble effect. I used one of Dina Wakelys Scribbly birds for the robin.
Remember to check out the remaining Brands of Christmas for this month. Also running is the 12 Designers of Christmas, if you comment on all 12 of these blog posts you could be in with a chance of a fabulous mixed media prize!

Crafty christmas hugs to you all,
Clare x x x