Showing posts with label art journal. Show all posts

03 May 2015

Sketch book project


At the end of May I'm lucky enough (or crazy enough, not sure which) to be going to Austria with my best friend on a week long hike of the Tyrolean mountains. Despite having to carry our stuff in our back packs (real hiking) there's just no way I'll be able to last the whole seven days without journaling it.

I decided the easiest and lightest way was just to purchase a small A6 size sketch book but it was just far too plain and crying out for a bit of a tart up.


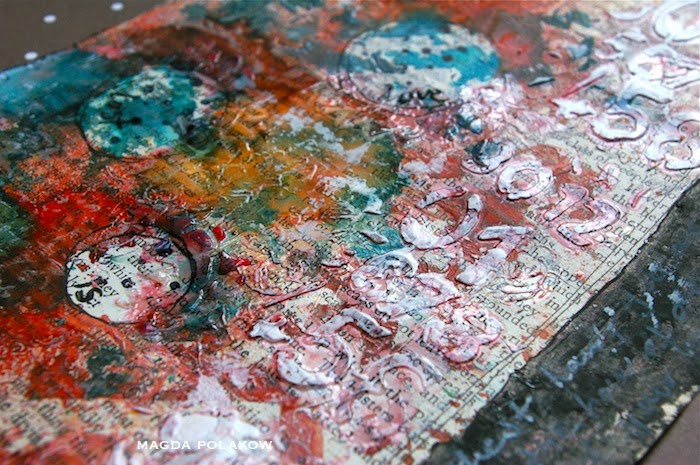
An earlier Gelli Plate session had given me some great background fodder so I chose this piece which had an amazing retro feel to it. Just created with two Distress paint colours Peeled Paint and Salty Ocean and a Dina Wakley stencil from Ranger called Mod.

I had originally planned to do lots to this one but on seeing it peeled from the Gelli Plate I fell in love instantly and was reluctant to add anything at all to it.


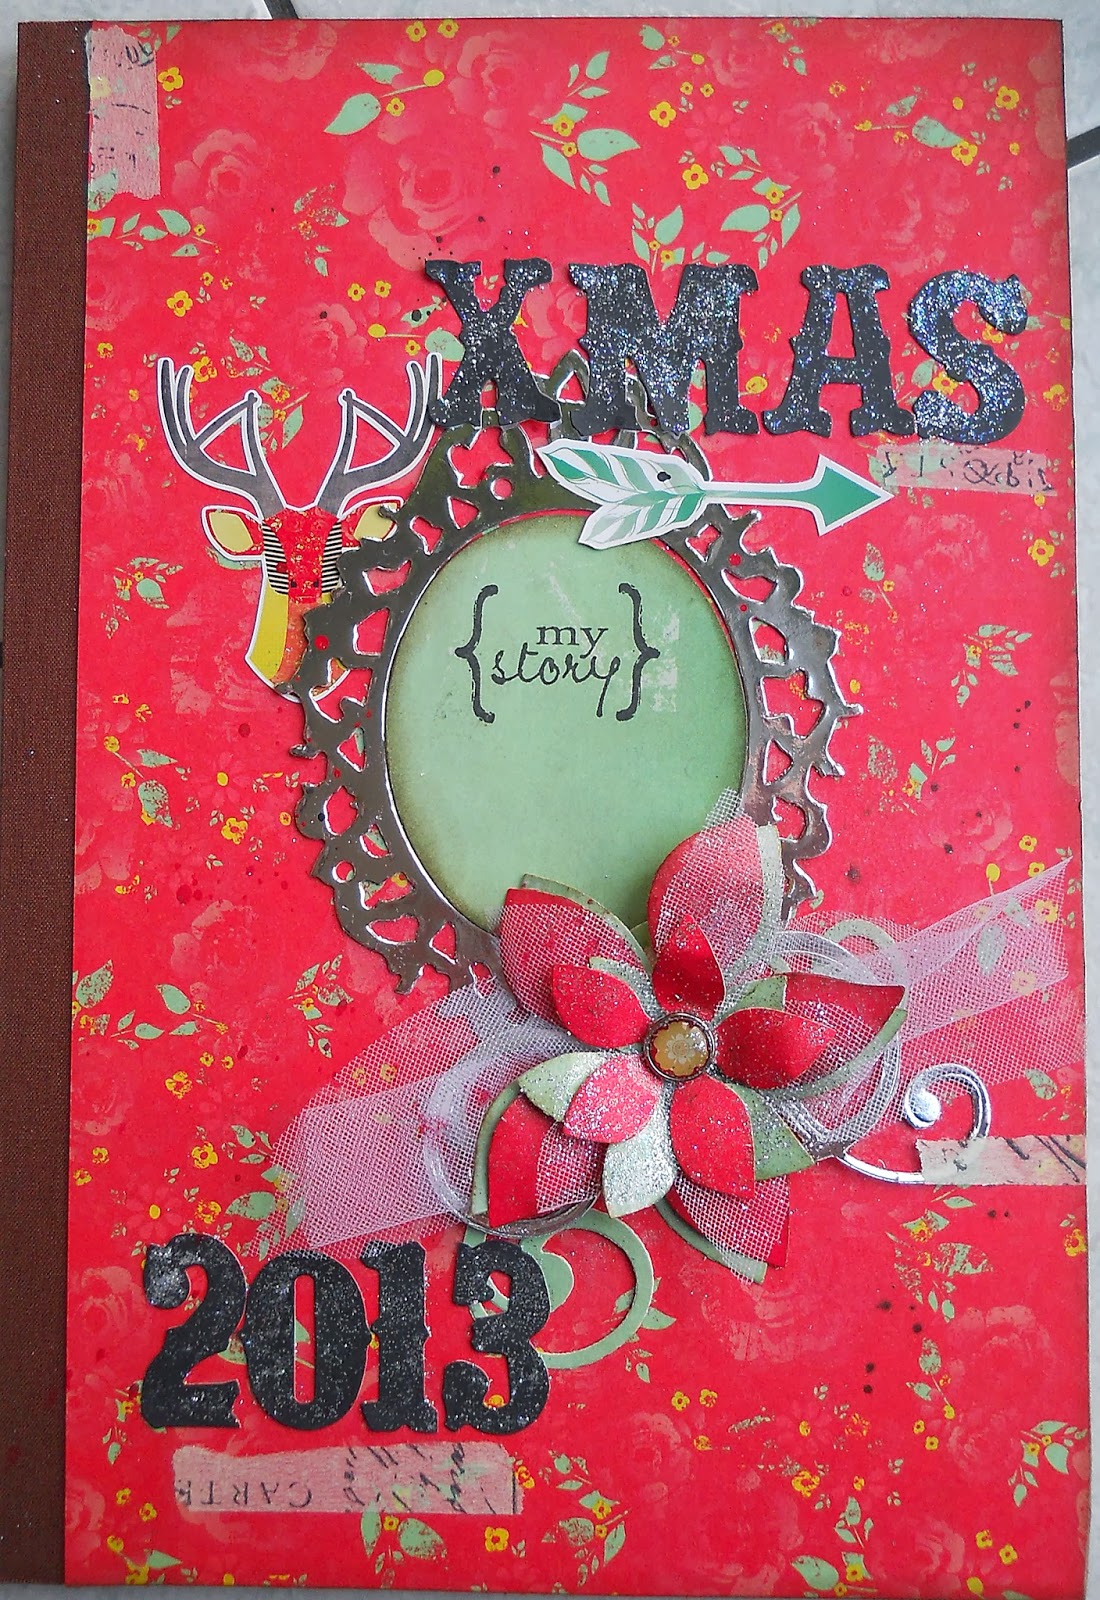
So it became my starting point to cover my book. To add some detail and interest to my cover I used the Echo Park kit Capture Life which has some brilliant stickers and great papers to layer and also has it's own retro feel.


I think this and a couple of pens will be sufficient and should take up no space at all in my back pack even if I have to throw out something else like a pair of socks!

Jaine x

26 April 2015

The Butterfly

My latest journal page was inspired by a crafty session in the garden, with the weather being so wonderful I really couldn't stay in the basement to craft. I grabbed my journal and Inktense pencils with the pages already prepared with gesso and set about adding colour.


 I created the framing around the outside with Finnabair stamps called Lace and Doily and a Prima Stencil. The texture paste is also from Finnabair and has a fantastic sparkle to it when it's dry.


For the butterfly, I drew it onto a sheet of music score paper and used the Inktense pencils to colour it in.


If you needed any convincing about how vibrant the colour is, just take a look here at the before and after adding water. I think it speaks for itself.


I put a crease in the butterfly wings before adding it to the page so it would add dimension.


Happy crafting

jaine xx

04 April 2015

Evolution of a doodle

I know I'm a bit slow on the uptake sometimes and usually I live in a little world of denial until I give in just to see if I was right all along and this is one of those very examples.

Quite a few of my friends use Inktense pencils and being a bit 'tight' when it comes to spending money, I had the view that they were just another water colour pencil of which I've quite a few. It was only after coming across a video on You Tube where they were being compared to your ordinary pencils that I thought ok, lets give them a go.

They didn't disappoint in any way and I really gave them a run for their money creating a background and colouring my main image.


I did gesso the page first to get maximum effect then used my Micro pen by Sakura to doodle the tree.


Finishing off the page with some white painty marks using a store card all it needed was a touch washi tape (Tim Holtz) here and there and that was it.


The colour of the pencil ink is very bright and delivers exactly what it promised to. If you're like me, wondering what all the fuss is about then give them a go. Vicki sells them in singles in the shop so you only need to buy a few to try them out, no need for a major expense.


Happy Easter weekend everyone.

Jaine x

28 February 2015

Nest building journal page


I'm trying trying trying so hard to bring some spring into my life. It's surely not far away and little signs of it are all around if you look hard enough. The best sign is when I hear and see the geese flying overhead in that V formation on their way to new nesting grounds.


My journal page started out with the sketch of the bird done on a book page and coloured with watercolour pencils. 

I stamped leaves around the background using a hand carved stamp from Softcut, some Picket fence Distress paint through a stencil and a few black marks here and there.


Here's my birdy.


I made good use of some pieces of washi tape namely My Minds Eye and Tim Holtz. My title is the alphabet from a Jenni Bowlin sticker sheet  and my Dymo.

Here's hoping spring isn't too far away,

Jaine

09 February 2015

Charade....

Hello!
Right...take a deep breath and be brave! (that's me talking to myself btw.....but if it applies to you as well this morning, consider yourself told!)

Today I'm sharing a first for me.... I made a video tutorial! (well, I made three, but more about that in a minute!)
I created this page using loads of colourful paints... with a few background stamps thrown in too...

Lots and lots of layers...

and a quirky figure too!

I videoed the entire process, and then split it up into three separate tutorials. The smeared paint background, the secondary layers (stencilling/stamping etc), and lastly adding in the figure.
The whole process lasts less than an hour, but it's much more accessible in three 'chunks!'

The first video is below...the other two can be found today over on my blog HERE, or you can watch them all via Vimeo (just search for Trish Latimer!)
I really hope you like them...


20 January 2015


Welcome back after the Christmas break. Thank you for the applications for Design Team, we're loving all of the entries so far and we've had some absolute crackers.

Anyway, getting back to my own blog post, since the new year I've spent a lot of time working in my journal. I think you can tell that my mood has been dark and grungy but even though this isn't my usual style, I've really enjoyed getting down and dirty as it gave me much more freedom to "let go" of certain things.


I adore this Agatha stamp by Magda at Stampotique as her little face really says it all.


In creating my page I've also used, Tim Holtz layering stencils, Dot Fade and Eye Chart.

Don't forget you still have time to enter our DT call so if you're still hesitating, just do it.

Jaine x

03 December 2014

12 Designers of Christmas *Designer 2* Jaine Drake


That's me - ha ha. I'm so happy and proud to be a part of this amazing line up, I can promise the rest of the time between now and Christmas day is a true feast. 

Anyway, for my post I thought I'd share a spread in my Christmas journal. Whether I'm doing a December Daily or not I still have a special Christmas journal which I've had on the go for a couple of years now. It has Kraft pages which is perfect for a Christmas feel and I like to keep some parts of the page free from colour and embellishment just so I can still see the Kraft paper beneath.


I started with a base layer of Picket Fence Distress paint and Dylusions White Linen ink spray. Then I added some Golden Crackle paste through a Crafters Workshop stencil called Punchinella and threw on some glitter before it dried.


I layered up a few paper off cuts, used a bit of scrap paper which had been used for spraying on to create a tree and brought in some details like the number 3 stenciled with a Tim Holtzs layering stencil called Numbered.


Here's a closer look at the details.


 I think the splash of red thread brings the page to life.


I emphasized the number with a white journaling pen. 


I hope you liked my inspirational pages. Stick around for the rest of our Designers who'll be bringing you some gorgeous projects. Leave a comment here and on the other Designers projects to win a prize.


Jaine x

07 June 2014

Looking forward.

Just a quickie from me today, the sun is calling me.


The Jamie Dougherty stamp from Prima was stamped onto text paper and glued into my journal. I intended to leave it as it was but I started adding colour and didn't want to stop. I added the lace border which is also a Prima stamp but this time from Finnabair, inking it up with a Hero Arts Ink Dauber. I used this around the edge too.

A few ink spots including the one above her head which went a bit wild but hey that's the nature of ink spots, they're totally random, and I was finished.

 Have a good weekend.

Jaine x

09 February 2014

Wish -tone on tone paint effects.

Hello!
I'm back to painty messiness today...and I want to show you how you can incorporate scraps of waste, but matching colours into your work.
I created a background using lots of layers, and added in some stencilling through some sequin waste, and splats of black UTEE. A few random painty lines too!
When I'm adding paint to cardstock, I always work on a base of white copy paper. This means when I go over the edges of the card, paint ends up on the paper. When I'm done, it means I have a piece of A4 paper with random painty mess on it too! In this case, I stamped the heart onto a section of the A4 paper, then cut it out and added it to the background using gel medium....
With a tone on tone effect like this, it can get a little lost, so I gave the heart a little shading around the edges. Everyone has their own favourite way of adding shadow, I like using a black pastel pencil and smudge with a paper stump. Whilst you want the heart to stand out, you also want it to blend in too, so it looks part of the piece and not just plonked down on the background. To do this I made sure my painty lines went across the heart too, and the UTEE splatters were on there as well!
The final touch was a simple stamped word....
You could always stamp onto tissue and glue down with Mod Podge if you're not that confident stamping directly onto the finished piece!!

Have a great weekend everyone!
Trish xx


22 December 2013

Christmas journal

For the past couple of years I've kept a Christmas journal but I'd decided early on that this year I wouldn't bother. I've seen friends posting pictures of their December daily's and journals and actually I felt quite jealous. 

As you can see I gave in and decided to make one at the last minute. As this is posting (hopefully) I'll be in the car on my way to England for Christmas and the journal will be with me. 


The inside pages are simple sewn watercolour paper and the covers are hard cardboard with binding tape. 

I used the Glitz Design Finnley collection to cover the book and cut the decorative elements. This is an absolutely gorgeous collection of papers, so bright and funky yet one or two of the papers like this red rose paper and the grungy green are perfect for Christmas layouts. I used some Ranger silver foil card to cut the frame and the stickers also come from the Finnley collection. The stamp in the frame is from Christy Tomlinson and is from the Create Your Canvas Words collection.


I think I may have gone a bit over the top with the glitter but it is Christmas, right?

Have a wonderful Christmas and I look forward to catching up in 2014.

Jaine x


02 September 2013

We should dance!

Hello!

Recently I was experimenting with a technique which I had shown you last time. It was a great fun and the best is...more to come! Today I have for you a quick art journal page.

As always I used a lot of different mediums for my background. Background is a mix of mists, Glimmer Glaze and inks including Ph Dr Martin's Bombay Indian Ink. I also put some modelling paste for a first layer.


I stamped Stampotique Originals stamps from a new release and Glitz Roller Doodle using Ranger Archival Ink.


 I drew blue spots using Posca Paint Pen. For last touches I used Sakura Pigma Micron Pen and black gesso.


Magda x

15 July 2013

2 in 1 journal

Hello everyone!

Today I have for you my 2in1 journal. I did some notes on loose sheets and I thought it would be nice to have some notebook to put them in. I didn't want to bind them it would be too easy. The great idea is to make a book from envelopes. You can put paper to the envelopes and still use the envelopes as pages for a journal.


I used:
- Ranger tag - Kraft
- Prima/Finnabair Sunrise Sunset
- Glitz Your Truly
- Bazzill Paper - Antique Newsprit
- Jenni Bowlin Grey Skinny Alphas
- Dylusion Spray Ink
- Stampotique stamps
- The Crafter's Workshop Balzer Designs stencil
- Ranger Archival Ink Jet Black

I simply made holes and used string to put them together.

Magda x