Showing posts with label stampers anonymous. Show all posts

21 April 2013

Large Tag #2


Paula here, I said in my last post that I would blog another #10 Manila Tag by Ranger in a similar style.....hopefully, I'm not boring you too much!
I've used Dylusions Ink Sprays in Squeezed Orange, Vibrant Turquoise and Pure Sunshine for my base. The Tim Holtz stamps I've used are: Spring Sprung, School Desk, Psychedelic Grunge and Steampunk. The Distress ink colours used are Gathered Twigs, Peacock Feathers, Brushed Corduroy and Barn Door, as well as Archival ink in Jet Black.


12 April 2013

Large Tag


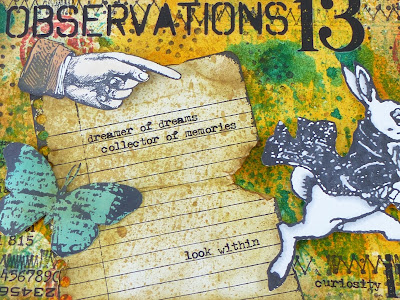
Paula here again, I'm showing a stamped tag today (will be showing another quite similar in a weeks time) - the basis is a large manila no.10 tag by Ranger and that's where the fun began for me.....I started off using Dylusions ink sprays in Vibrant Turquoise, Pure Sunshine and Squeezed Orange BUT I didn't spray them directly onto the tag, I sprayed them onto a non stick mat and wiped the tag into each colour individually. I then added some Distress ink in Peacock Feathers along the top.....then I spritzed the Dylusions inks lightly in places to add a bit more colour on to the tag. I then embossed the tag with a hexagon pattern. Next, I took some sand paper and sanded all the edges and over the embossed design.

I used the grass looking stamp from the Spring Sprung set by Tim Holtz, I stamped firstly in Peeled Paint and then over stamped this in Gathered Twigs - I've used the alphabet stamp from the School Desk set by Tim Holtz in the background using black ink.....I've also added some rub ons. Using Barn Door distress ink I stamped the flourish from the Spring Sprung stamp set. I stamped the rabbit, again from the Spring Sprung set, trimmed him out, added some Copic highlights using 2 shades of grey. I then coloured some paper using a Promarker then over stamped with the butterfly, trimmed image out and added to tag....last touch, was to add a metal clip.
 

04 April 2013

Gesso play time.

 I get through buckets of gesso and really can't get enough of the stuff but black is one which I have been keen to experiment with for ages and I think I've found a new love.

Layering white gesso on top of black produces a stunning and dramatic background and here I've added just a hint of colour to lift the page.


I used Claudine Hellmuth black gesso to paint the entire page, then using a foam stamp, plastic lid, bubble wrap and store card, I added the white gesso marks.


I also used a Glitz roller doodle stamp with the gesso and the result was perfect. NOTE: clean stamps thoroughly after using gesso as it'll dry on and be impossible to clean off afterwards. 


I also stamped in black ink for a subtle background image. Next time I might try stamping with more black gesso for a more dramatic effect but I doubt I could do it with a detailed stamp. Here I've used a Tim Holtz Stampers Anonymous Artful flight stamp set. 


Claudine Hellmuth mediums come in handy small sets to try out and big bottles if you really want to go mad. Try it for yourself and you'll be pleased with the results.


Jaine x