Hi there peeps! Are you enjoying this little burst of summer? I've managed to drag myself away from the garden for a few hours of crafty time.
I've been playing with the Scribbly Birds set from Dina Wakley. I made a couple of background panels using Dylusions paints, then cut two panels using the Lawn Fawn Lawn Cuts Small Stitched Rectangle Stackables Dies.
I smudged the paints onto the panel, splattered some white, then once that had dried I brayered some white over the top to knock everything back.
I stamped the bird in Versafine Onyx Black, then watercoloured using Distress Inks and fussy cut the image.
Cut-down strips of Tim Holtz Idea-ology Tissue Tape were added to the panels for visual interest.
My second card was made using the same process. I stamped some triangles from Hero Arts Stamps & Cut - Happy onto the panel.
This time I tore the tissue tape into strips to layer onto the panel.
Thanks for popping in, and enjoy this good weather while it lasts!
Shirley x
Showing posts with label Dylusions paint. Show all posts
17 August 2016
19 July 2016
All hearts and flowers.
Good morning all! It's been a while since I last posted for A Sprinkle of Imagination so without further ado let me show you what I have been up to in the room of craftiness!
Thank you for stopping by today. I'll be back soon with some more painty and inky mayhem.
For this card I used The following Dylusions paints: Dylusions paints Cherry pie, Lemon zest, white linen. I started by scraping lemon zest over the card with an old credit card. I repeated this with the cherry pie, with the edge of the card I added some lines with the Cherry Pie. I dried with a heat tool and then scraped over some white linen. I blended some more white linen through the Tim Holtz
splotches stencil. Through the Dina Wakely TCW stencil , grunge hearts, I blended with Cherry pie and Lemon zest.
Onto some card, previously sprayed with Dylusions inks, I stamped with the heart stamp from Finnabair set Trust the magic several times to create my petals. I assembled them together and added some glimmer with a Wink of Stella clear pen. Using the small butterfly from the Finnabair spread your wings set I stamped a couple of butterflies to embelish the card. I finally splattered with my black and white Posca pens.
Crafty hugs,
Clare x x x
29 May 2016
Recycling Backgrounds
I've been recycling a piece of stamped card where the impression hadn't been as clear as I would have liked, and I didn't want to throw it away, so I painted over it to push the text to the background.
The stamp in question was the large text stamp from Tim Holtz Papillon. I sponged Dylusions Paints (Cherry Pie and Fresh Lime) then using London Blue I scraped some paint lines. A splattering of After Midnight and White Linen completed the background.
Once that was dry I stamped Donna Downey Poppies, masking the first one while I stamped the second one, then drew in the stems with a black Posca pen, and sponged some white around the outlines to help define the image.
Drawing stems onto flower head images is a great way to stretch your stamps.
Have a great bank holiday weekend!
Shirley x
22 May 2016
Maude Doodle Dolly
Hi peeps! Have you seen the gorgeous new stamps by Karen Hayselden for Stampotique? I fell in love with Maude Doodle Dolly.
I stamped her on a spare piece of white card, then watercoloured her with Distress Inks and cut her out.
On my tall card base I swooshed some black gesso across to ground where she would be standing, splattered some Distress Inks, then added some ring marks using a bottle top and Dylusions Cherry Pie and After Midnight paint, placing one of the ring marks as a halo.
I added a diecut and sentiment from Hero Arts Happy Stamp and Cut set to finish the card.
Pop on over to the Sprinkle of Imagination store for a look at the rest of the new Stampotique designs and all the other new goodies.
Shirley x
21 May 2016
Fabulous!
Hello my lovelies, I'm here today from A Sprinkle of Imagination to share with you some feathered friends from Stampoutique.
I started off by blending some fresh lime and white Dylusions paint onto a tag. I added some background detail to my tag using contasting paint and ink.
I stamped Kira Nichols Stampotique - Birdy Up onto some water colour card and using Inktense pencils I gave the birds a burst of colour. There are four birds on this stamp but I only used three. I added some little dots using a White Posca pen. I fussy cut out my three little birds and set them aside. The sentiment was from the Dylusions set Say it how it is, stamped on white card and cut into individual words.
I assembled my birds along with the sentiment onto the tag and embellished with some sequins. I added some glossy accents to the birds wings and eyes and the pink bird had a sprinkle of glitter to make a little more fabulous.
Thank you for stopping by today, look forward to seeing you again soon.
Crafty hugs,
Clare x x x
08 May 2016
Rainbow Heart
Onto this I stamped on some Finnibair butterflies and hearts , from Dont forget to fly & trust the magic stamp sets. I drew a freehand heart onto the canvas. Carefully, I painted around my images using Dylusion paints with Turquoise and white.
My daughter is overjoyed with her canvas which is now hanging up in her room. I hope you like it too?
Thanks for stopping by today. I'll catch up with you all soon x x x
Crafty hugs,
Clare x x x
13 April 2016
Colourful Masterboard
Morning, folks! I decided to make a masterboard that I could cut up for cards. I started by sponging my Dylusions paints onto a sheet of A4 card using Mini Blending foam. Next came some stencilling using Tim Holtz Stencils, then then stamping with Dina Wakley Textures using Ranger Archival Ink.
Then I started chopping the masterboard up for card fronts and toppers:
![]() |
148mm sq card (Dymo tape sentiment) |
![]() |
A6 card |
![]() |
Topper on A6 card - this one's my fave! |
![]() |
This could either be a bookmark or a gift tag. |
![]() |
Topper on a 148mm sq card |
Out came the circle stamps from the Finnabair Don't Forget To Fly set. I allocated one stamp per colour, and stamped over all the circles, filling in the gaps with some of the smaller stamps:
And now I've got another masterboard!
Have a crafty day!
Shirley x
16 March 2016
I could while away the hours
Hi I'm here today to share an entry into my large art journal. It must be the time of year as I am feeling a tad florally at the moment and some blooms have just landed onto my art journal pages!
For this project I used Dylusion paints. I mixed crushed grape and fresh lime with some white to
make my colours pastel. I recently have enjoyed designing and carving some of my own stamps onto
speedball easy cut stamp carving blocks. I used one of these to stamp onto my background with the pastel colours. I also stamped one of Nathalie Kalbach grunge stamps in black for a little more interest.
I pencilled on my flowers along with some free falling leaves, leaving these void I began to blend crushed grape and white linen around the pastel openings.
I added some doodling with my Black and white Posca pens. Onto some white card i stamped a Julie Nutting mixed media doll, Megan and coloured her in. On a clean up page, where I had been cleaning off my brushes I stamped my background stamp and then stamped Megans dress over the top and cut out to dress my doll.
I finally stamped my saying using Dylusions alphabet stamp
Thats all from me today, thanks for stopping by,
Hugs,
Clare x x x
19 February 2016
Golden Girl
Hi everyone, and happy Friday! I've been playing with Viva Decor Inka Gold today to make my Golden Girl mixed media card.
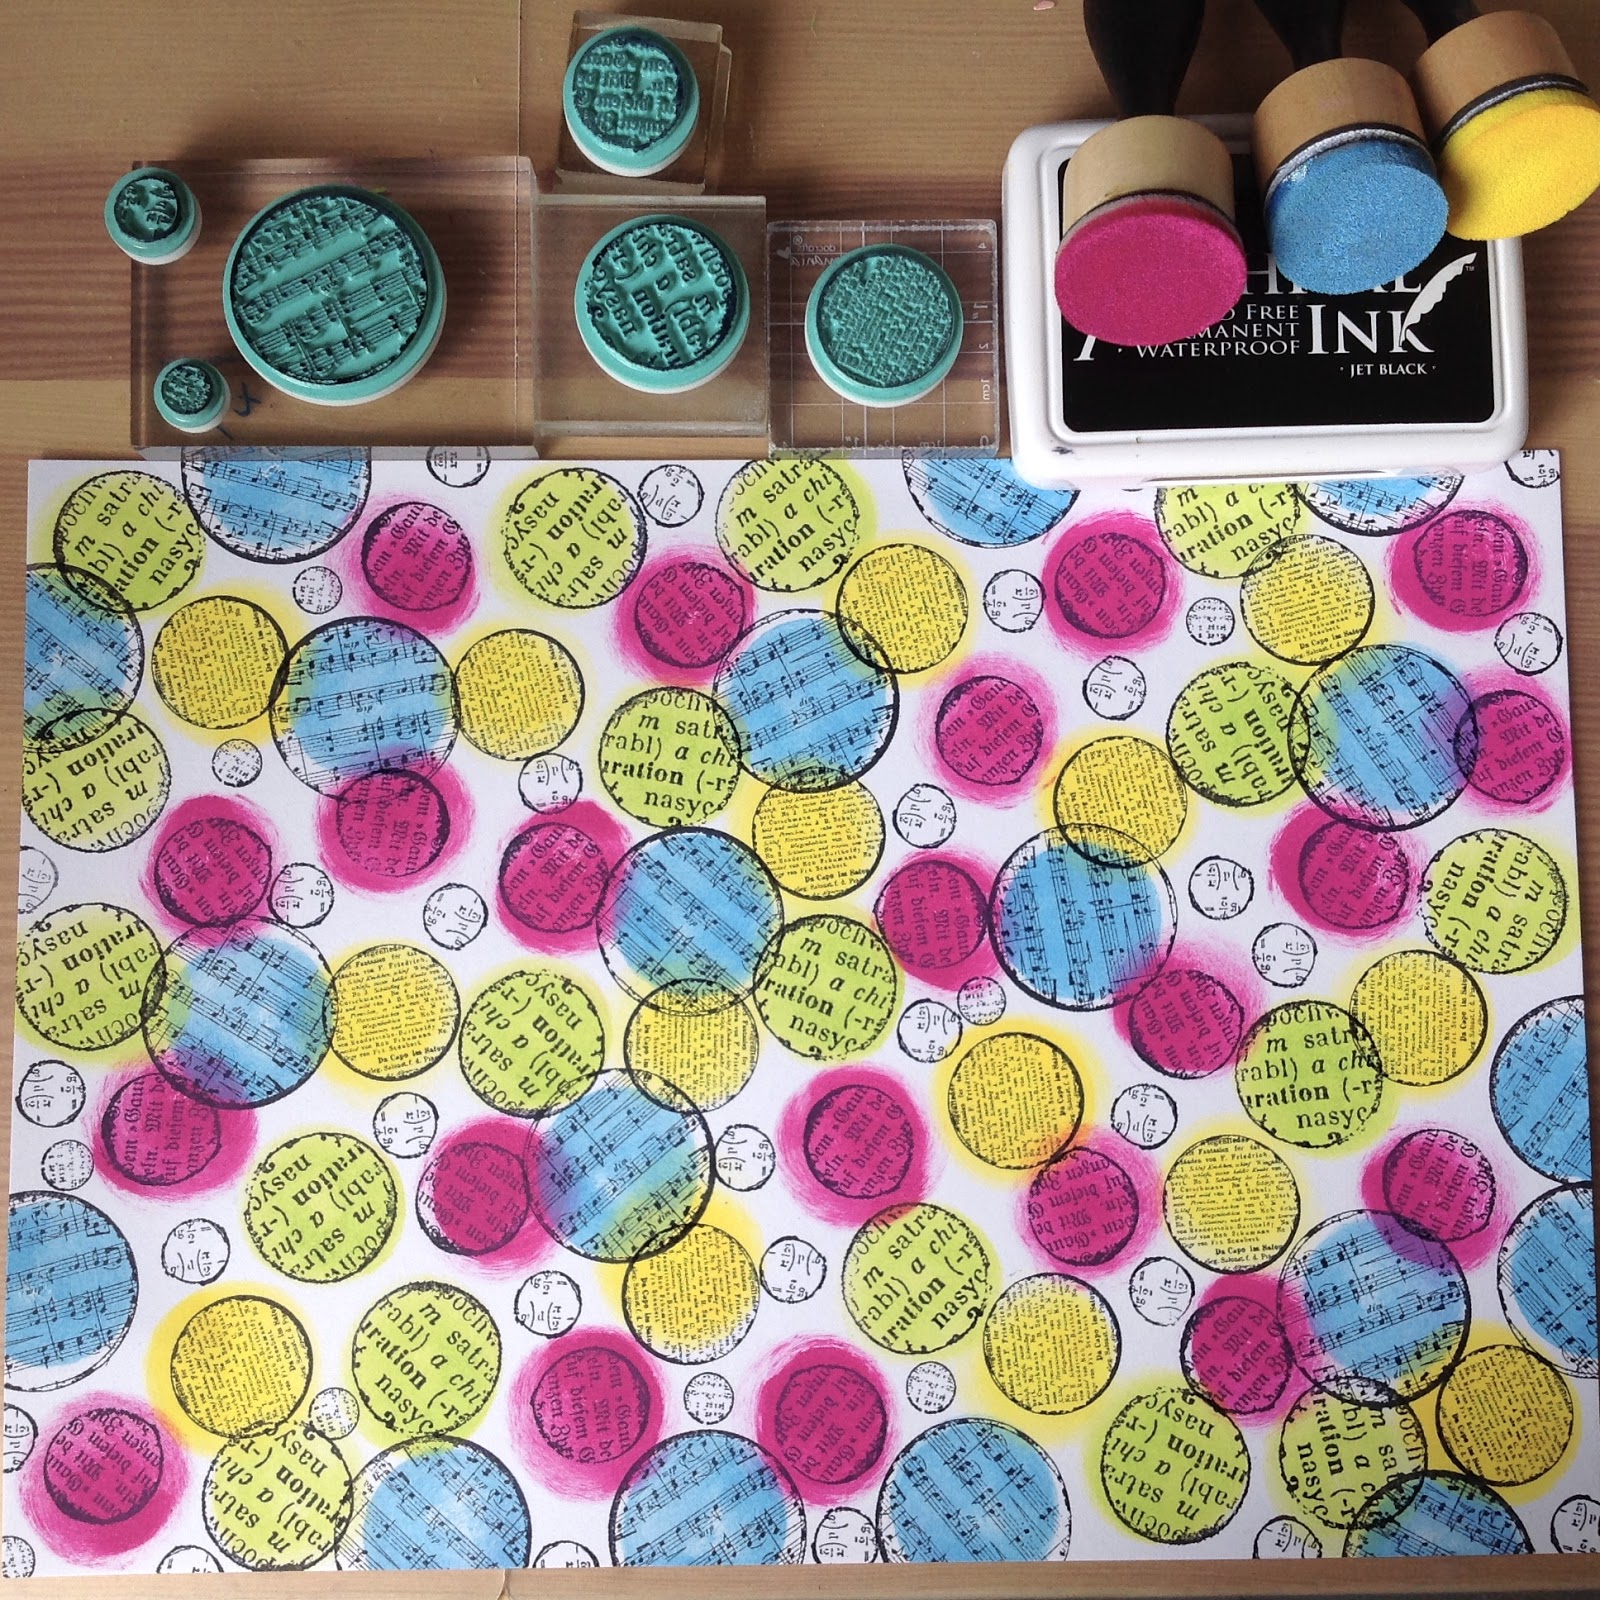
I spread a very small amount of Inka Gold onto an acetate sheet, spritzed it lightly with water then worked the paste into the water to dissolve it, then tapped some Distress Inkpads onto the acetate and spritzed those, then swooshed a piece of card through the puddle a couple of times. And this is what I got:
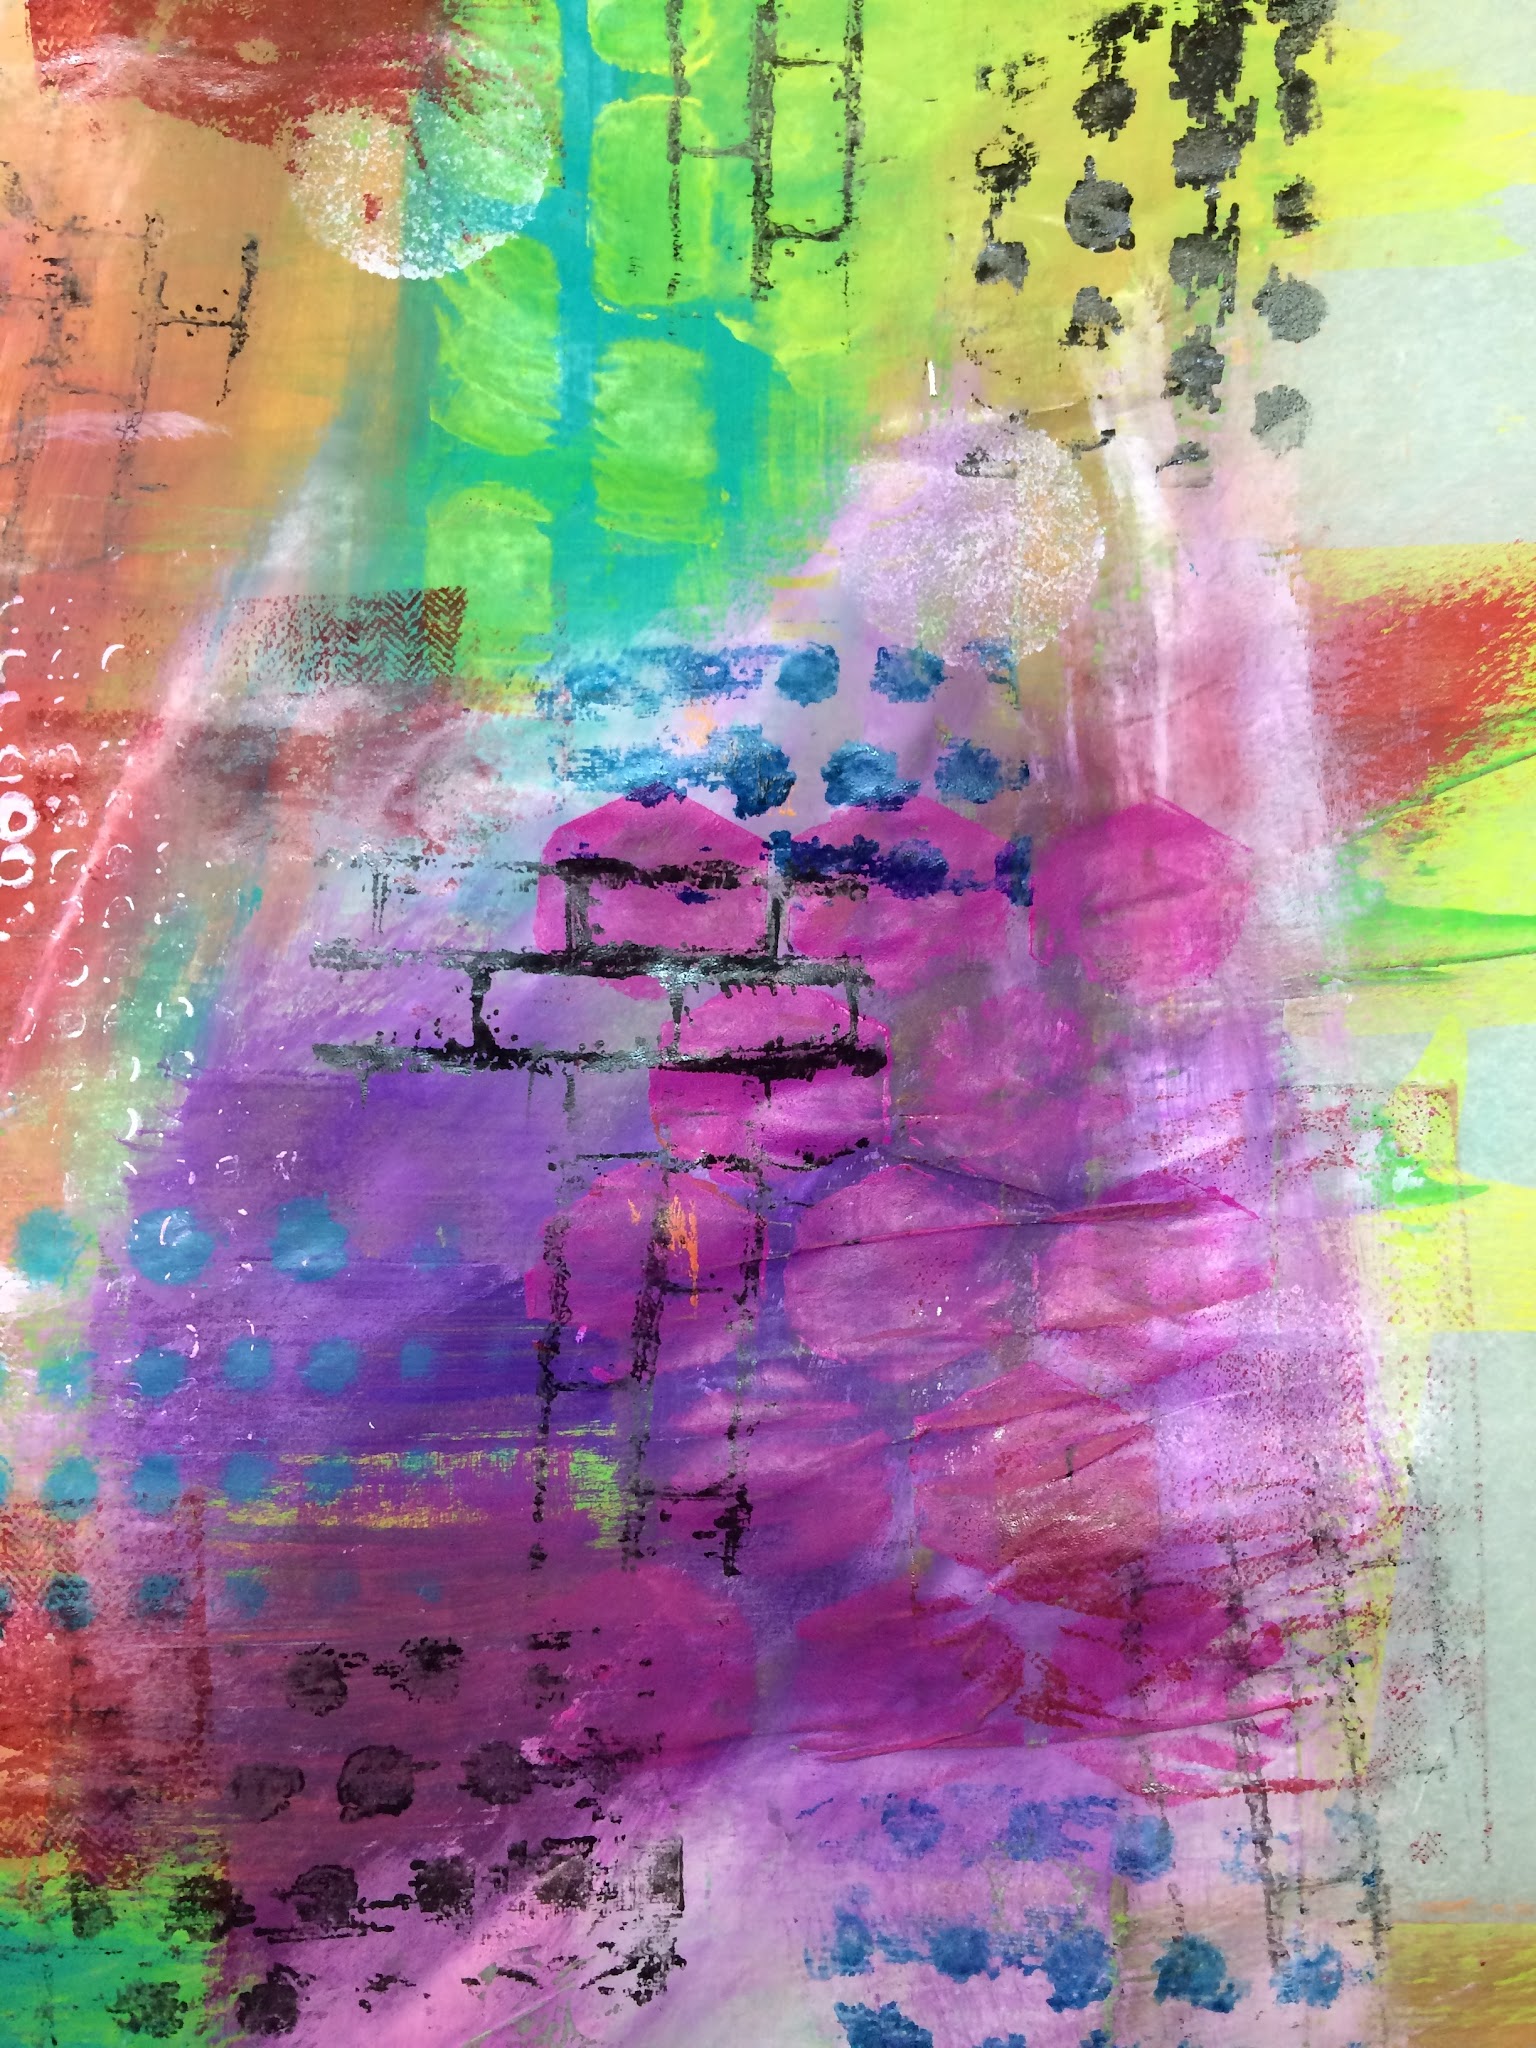
Using a Ranger Sponge Applicator I sponged Dylusions Bubblegum Pink paint through a Donna Downey 12x12 Perforated Dot Flower stencil to get this gorgeous background.
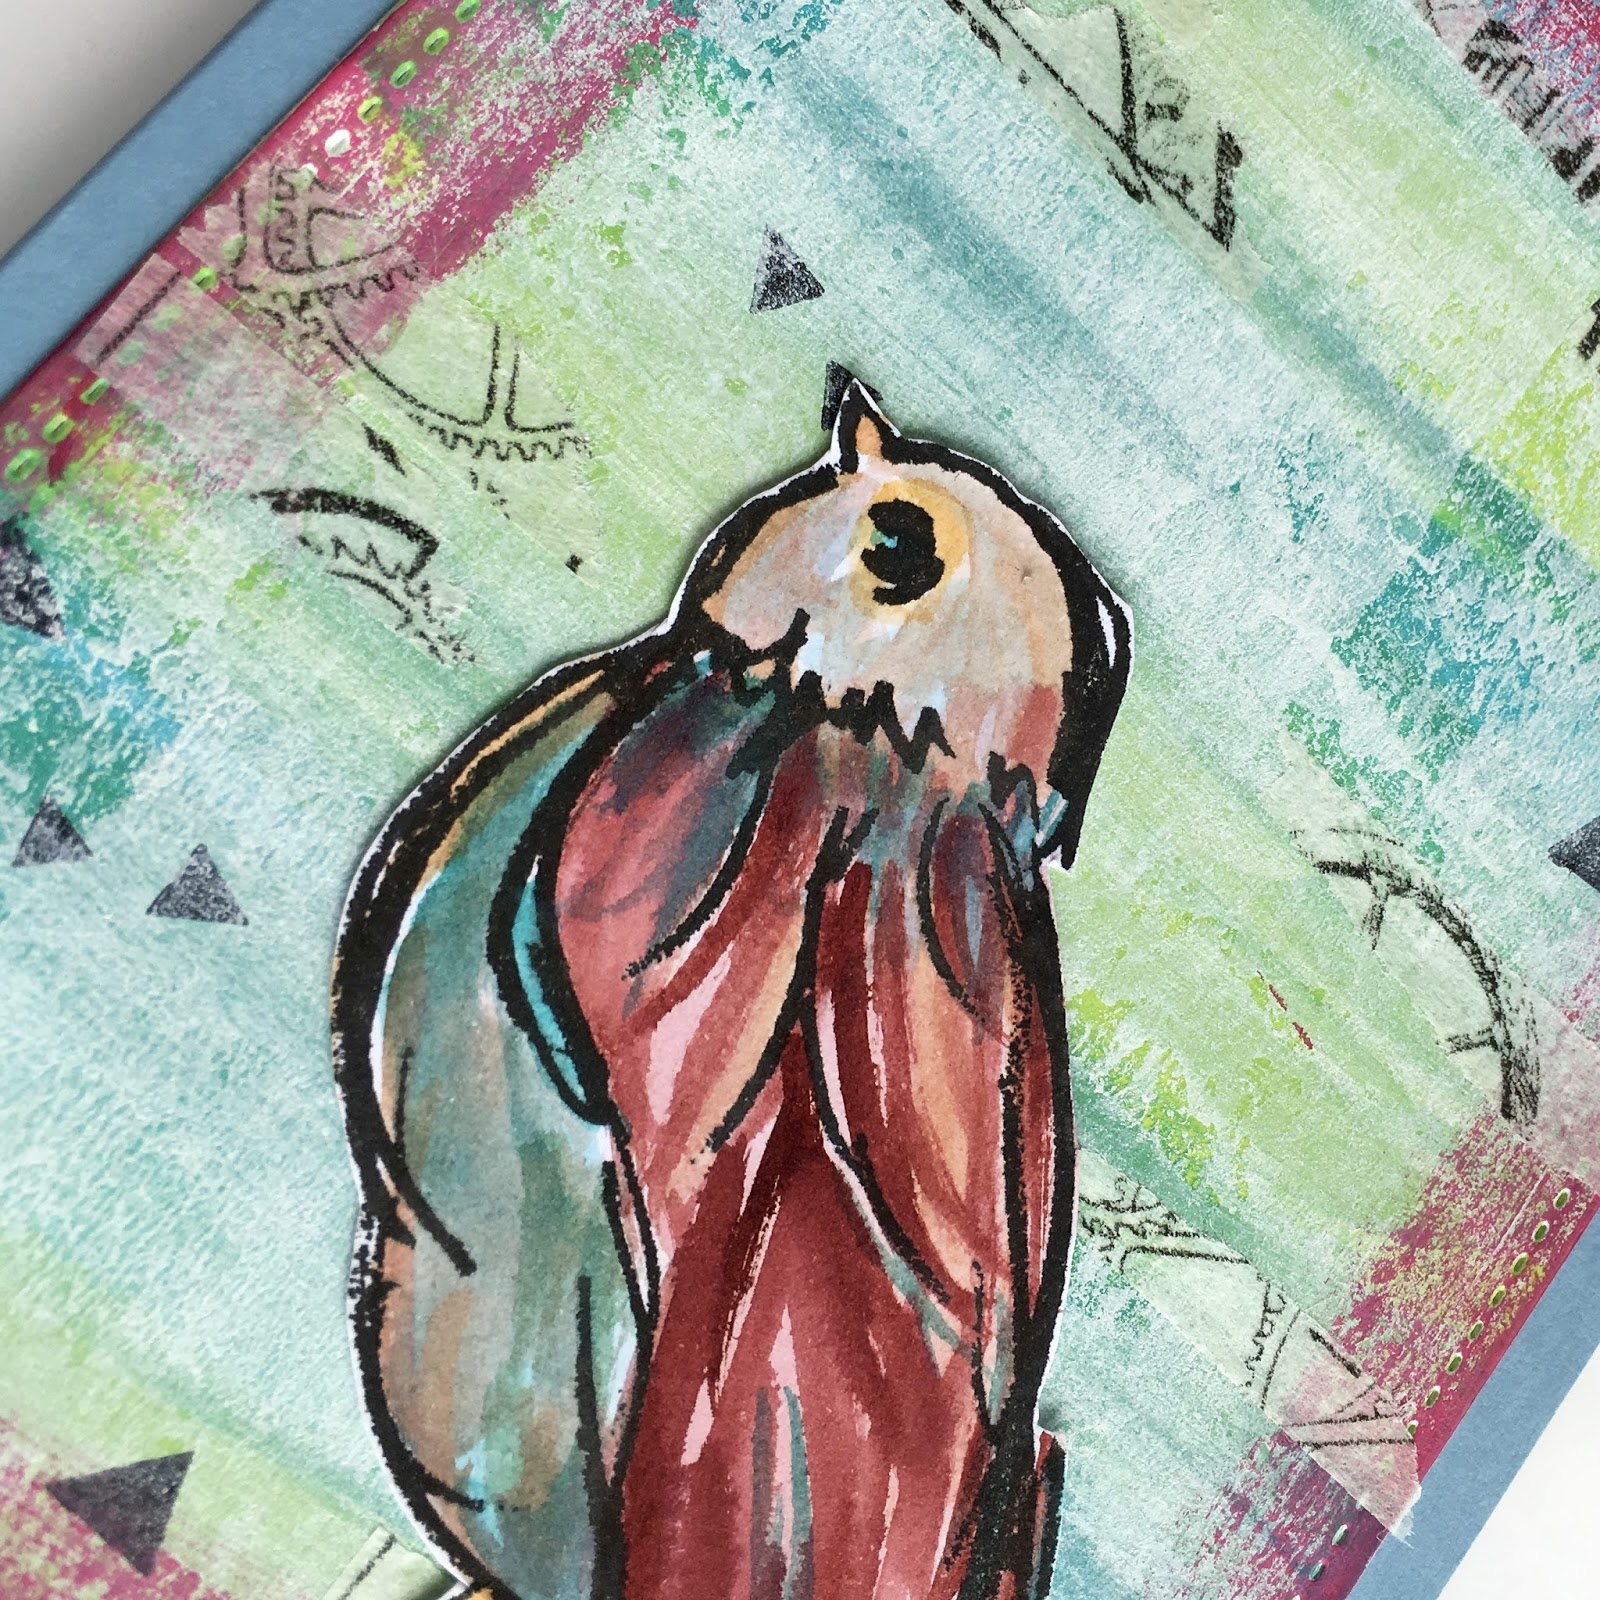
Once I'd stamped the Julie Nutting Mixed Media Doll I painted the dress and crown with a watered down paste of Inka Gold, then coloured her skin, hair and bow with Distress Inks. Look at the shine on her dress!
When I'm fussy cutting images where an inner area needs to be removed, e.g. between arms and body, I often cut straight across the arm following the line of the skirt, cut out the inner area, then realign the arm and stick back together with a bit of 1/8" Wonder Tape on the back and you can't see the join!
Have a great weekend!
Shirley
13 January 2016
Crafting is my happy!
Good morning all, it's all go go go! The new year has started and one of my resolutions is to make sure get plenty of guilt free crafting. I guess you could say I am adjusting to the fact that my children are growing up and need me a little less than before. Of course I am always on hand when they need me but I always seem to make myself feel a little guilty when I've had a couple of hours in the craft room. When I do rejoin my brood in the house it seems that they were all quite happy in the first place and are quite happlily engaged in their pursuits and probably didn't notice that I wasn't around! I guess I shouldn't give myself such a hard time sending myself on a guilt trip after an enjoyable crafting session.
I decided that I would stamp one of Julie Nutting's mixed media dolls onto my jazzy background to make an interesting frock for my doll, I cut out the dress and set aside. I stamped the doll onto white card, coloured with pencils and applied her jazzy dress using Claudine Hellmuth matte medium.
Thank you for taking the time to stop by today.
Crafty hugs,
Clare x
23 August 2015
Finger painting therapy.
During a recent spell of anxiety due to a computer break down (I know, trivial), The only thing to do to relieve the feelings of negativity was to get out my journal.
I had great fun playing with Dylusions paints on the page, using my fingers and not a brush. It felt good and soothed away any anger I was feeling. It even prompted me to get out my Micron pen and hand write some journaling which I normally hate with a passion.
The number stencil is from Tim Holtz.
Jaine xx
20 July 2015
A little triptych
Back in the day shall we say, I created a few triptyches (that's so difficult to say) and I'd forgotten how much fun they were.
I decided to recreate that amusement with a quirky and colourful triptych for this months challenge.
I started out with three chipboard pieces from Tando which were in my stash. I didn't have three the same size but in the end I don't think that really matters. I painted the background with Dylusions paints in Turquoise and cut grass, using a foam roller to blend the paint. I used the same paint colours to stencil through Tim Holtz layering stencils which just helped to add some depth to the background.
The adorable fishes are Dylusions stamps and I used Derwent Inktense pencils to colour them in.
To really make their little eyes pop, I added a dot of enamel accents in the centre. I loved the look of the dots so much I used the white one to add the bubbles here and there.
If you fancy joining in the challenge this month just go to the challenge page here and link up to the linky gallery.
Jaine
Subscribe to:
Posts (Atom)