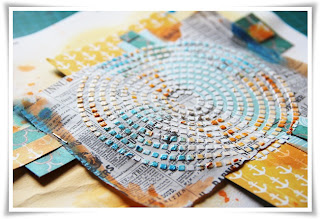
Today I'm going to show you a layout step by step. Hope you have time and patience because there's a lot of photos here:-) First a little sneek peek of the final layout;-)
Step one: Start out by spraying a lot of water on your page, then use the mist of your choice and blend together using more water. I guess I used a bit to much water here and forgot to put the page inn press, so it really curled up. But I knew there were suppose to be many layers on top so I didn't mind starting over.
You should note that the page will curl a bit most of the times, but once placed in the album it will look great either way:-)
Also create some drips of mist by tapping it on to the paper.
Step 2: cut up your papers. By layering them on top of the background you choose the size you like. For this project I used papers from Glitz design Uncharted Waters and a piece of Bazzill Antique Book Paper.
Step three: for this page I made some embellishments from an old book page. Doodle and use some stamps to make them stand out. I also saved the product strip on my pattern paper since it really fits the theme.
Step four: adhere your pattern paper to the background. I like using staples, then I can sneek in more elements between the layers. I also stapled the background to another cardstock to make it curl less.
Step five: paint your bookpage embellishments with ink and water.
Step six: Add molding past trough a stencil and also some paint on top before removing the stencil. Here I have used a stencil from The Crafters Workshop. Also add more mist in drips and paint some of the paper with mist and water.
Step seven: Add embellishments like the bottle from Tim Holtz, the boat from Studio Calico and the book paper embellishments.
I really wanted to use these wooden letters but didn't have any S left, so then a reversed Z had to do the job;-)
Here is my final result! A bright, fun and happy page just like the first summer day of the year when a shoot the picture:-)
Thanks for looking:-)


No comments:
Post a Comment