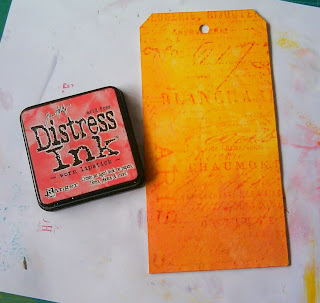
Paula here - Today, I wanted to share some step by step photo's of me just having a play with some Tim Holtz Distress paints, inks and stamps.....excuse the step by step photo's, they were taken on my ancient mobile phone, so the quality is a bit iffy....have to say I wasn't sure what I was going to do when I started to play but tried to take photo's of most of the process .
Step 1
I started off by cutting a tag shape out of some scrap mountboard
Step 2
Shake the Mustard Seed Distress paint bottle and partly cover the tag, as shown.
Step 3
Shake the Rusty Hinge paint bottle and add the colour at the bottom of the tag.....then lightly use a piece of paper towel to blend the colours together.
Step 4
Spritz some water over the tag while the paint is still wet, let it settle for a bit and then dab off with a piece of paper towel. Dry (either naturally or heat set).
Step 5
Take some Worn Lipstick Distress ink and blend along all the edges of the tag and then stamp the text, as shown.
This is where the step by steps finish.....got carried away and forgot to carry on taking photo's!
I then stamped some butterflies onto the tag and slightly smudged the ink.....I then used Picked Raspberry distress ink to go around the tag edges and added a touch of the ink randomly onto the tag too.
I stamped Gog Lin (the little goblin) onto a piece of paper, coloured and cut him out and adhered to the tag...finally, I added the sentiment and highlighted Gog Lin and the sentiment with an orange marker pen.
Ingredients for tag
Tim Holtz Distress Paints: Mustard Seed; Rusty Hinge
Tim Holtz Distress Ink Pads: Worn Lipstick; Picked Raspberry
Tim Holtz Stamp Sets: Way with Words; Papillon


10 comments:
Still the tutorial gets us most of the way. Its lovely. Sam
Magic;-D
A great tag, You make it look so easy! Lol x
Oh I so need me some distress paints, love the background lots x
Lovely! Jo x
What a wonderful tag, love the colours.
Wow, - great blending and I love the background! Fab tag!!
gorgeous Paula, fab colours and blending.
How gorgeous. Love the cheery colour.
This is great Paul and although we didn't get all the pics still easy to see what you did xx
Post a Comment