31 May 2014

Imagine

I found this striking image in a magazine and before anyone had the chance to read it, I'd torn out the page to use in a journal.

Actually I have to go back a step as it all started with the background which is a hand made stamp I'm a bit proud of. I cut it a while ago with a piece of Softcut lino cutting material but the chance to use it didn't come up until now.


I added a strip of gold metalic spotty tape from My Minds Eye which I didn't fully appreciate until I'd taken off the white backing paper and saw how cool it really is.


I painted the word imagine and cut it out to lift it up with foam pads over my background.

Have a good weekend

Jaine x

28 May 2014

Be Still

Hello!
I love using stencils, but more often than not find myself scraping some kind of paste or medium through them to give loads of texture. I decided to challenge myself to use a stencil as a focal point, but with no texture!
I came up with this....
This falling leaves stencil is fab, love the heart shaped look! I've done a step by step so you can see how it all came together.
First, add the background colour. This was done by quickly brushing on stripes of green, red and purple Studio paint (with a little white added in!)
Once dry, I added a little more detail in the same colours, sponging through some sequin waste..
Black stamping next..Jenni Bowlin and 7 Dots stamps..
Next, the focal stencilling. I used white paint.
As it's acrylic paint we're using, even a lightly sponged layer of white will be opaque enough  to cover the darker colours beneath! I wanted to emphasise the leaves further though, so I doodled around them...
Once the basic background is done, you can see where you might want to add a few more details. I thought the black stamping was very 'blocky' on the left hand side, it seemed a bit isolated. I felt it needed a few extra black accents to draw it down into the lower part of the page...
I added printed lines, dots and a few more doodles here and there.
Next, add the images and text...
A stamped fairy, and some rub on words!
So.... adding multiple stamped images together, but only using small parts of them, creates a fab collaged look...
Fine line doodling can make designs 'pop'....
I hope you like it...have a great day!
Love Trish xxx


24 May 2014

A layout for May

When I started my Project Life album at the start of the year, I made a promise to myself I'd also add one layout per month to go in between the pages. I'm not much of a 12 x 12 scrapper, preferring instead to create mini books and journals, but I wanted to venture more into this new area and find a style I liked.


In this layout for May, I've chosen to use Teresa Collins Family Stories collection. I love the colours.


I've also started to write more with a paint brush and cut the words out to add to my work as I love that look and believe me when I say it makes your handwriting look loads better. I normally hate my own writing but this makes it look great, especially lifted up on foam pads.


18 May 2014

Freedom!

Hello!
Did you see the winner of our last challenge? Alisons fabulous entry with all the butterflies inspired me to add a little 3D movement to my project for today. Of course, not having the patience Alison must have had, my 3D movement was limited to just six hearts.......
Stitching them down the middle means you can carefully lift the edges up....
The background is a quick smeared paint base, with white stencilling, black stamping and washi tape added for extra detail. I also melted in some black UTEE crystals, and stitched some decorative elements....
My lettering is some very ancient rub ons... I think I got them at the Post Office years ago! Very impressed they still worked!

I used:
Paint
Black UTEE
Stamps: Background, Heart

Have a nice Sunday everyone!
Trish xxxx


16 May 2014

April Challenge Winner...

good afternoon everyone. 

Wow, Aprils challenge sure was busy.  In the end we notched up over a 100 entries.  That's a lot to look through.  Guessing you really like the old "anything goes" challenges, so thank you for all the interest. It was great to see.


 After much deliberation by the design team and myself we have a winner! 

Alison!! You can see lots of photos of her piece here on her blog. 


Congratulations Alison! 
Anyone with the patience to stick down all those butterflies gets my respect. I know I couldn't be bothered...LOL.

May's challenge..

is now live and we have a fabulous and bright palette for you to play with. So good in fact even I have joined in, and previous DT member Paula Whittaker has joined us with this stunning card. 


Happy Creating! 

15 May 2014

Ignis and the gang

Hi everyone!

I have designed some stamps for Stampotique Originals! The stamps will be on a sprinkle of imagination shelves very soon! Stay tuned!

Ignis and Agatha...


I used:
- black gesso
- gel medium
- Posca pen - white
- crackle accents
- Ink Sprays
- Archival Jet Black
- Stampotique Originals stamps

Magda x

12 May 2014

Find Joy In The Ordinary...

Hello!
A simple painty panel from me today, this is a result of a little experiment!
I wanted to see if I could dye crackle paste....
Turns out, you can!
I created a quick and easy smeared paint background on a Tando panel, using blue, yellow and white paint. A little white paint stencilling through some sequin waste..
I then put a little crackle medium in a foil dish, and added some Bombay Ink. Mixed it together, then applied it through a circle stencil...
I found the colour intensity varied depending on the thickness of the paste, but I really like that effect, as well as the crackle! I did a little doodling, both around the circles, and around the edge of the panel..
Rub On words to finish.....
Another successful messy experiment!
Trish xxx


10 May 2014

A little inspiration.

I've been having a bit of a tidy and thinning out of my work room and after taking down a couple of mini canvases from above my desk which to put it frankly, were so old they bored me silly, I had a gap to fill.

I had the quote going around in my head and after going through some of my papers, I found a sheet of Glitz Design, "Sunshine In My Soul" paper with the cute bird on it and that became my starting point.


It went really well with some of the  Glitz Finnley papers which I also pulled out and used as a mat and for the bird house. The letter stickers were also from the Finnley collection tying in the colours perfectly.


When it came to the canvas itself I just sprayed over some collaged text pages, with a couple of ink spray colours and thinking I'd like to add a leaf stamp to the background I literally spotted a small piece of Softcut (the last little bit I had left) and within a couple of minutes I'd cut myself a leaf stamp.   

The finished canvas is now hanging above my desk as my new point of inspiration and a reminder that I need to buy more Softcut - LOL!

Have a good weekend

Jaine x

07 May 2014

linocut part 3

Hello!

Last time I have told you what materials you will need for your first steps in lino cutting. Today I will tell you how to start working with linoleum.

You will need clean and dry area when cutting the linoleum. If you purchased a size of linoleum you wanted you can start your work, if not, cut the linoleum to the size you want ( you will need a cutting mat and a sharp craft knife ).


If you have an idea what image you would like to cut then you win already. For the start use some simply designs.
There are three different ways to start the work.
1. You can use your sketch as your inspiration - drawing a design onto your linoleum using a pencil,
2. Use a black carbon paper to transfer your design onto the lino block,
3. Simply start to cut without any pencil lines in your linoleum.

Remember that it will be a 'mirror image' when you print it!

For some of you linoleum can be to hard. Put the lino block near a radiator or use a hairdryer to soft it. SoftCut is soft already, don't cut it in a full sun ( my mistake ) because the SoftCut will be oily in touch. Not a nice thing and smelly!

Ok, when everything is ready we can start cutting...


There is really only one and most important thing to remember - WATCH YOUR FINGERS WHEN CUTTING! Always cut away from you.
Other things which can help you:
- cut the lino block in small strokes,
- do not cut too deep - if you will need you can always cut more,
- rub out the pencil marks when finished cutting,
- and really obvious - areas you cut out won't print.

When your lino block is clean and smooth you can start printing...next time I will tell you about this.

Magda x

01 May 2014

Color Bloom Sprays (and a puffin!)

Hello!
My mojo had really gone walkabout this week...until a rather exciting package arrived, a few of the new Color Bloom sprays! Of course I had to have a little play......
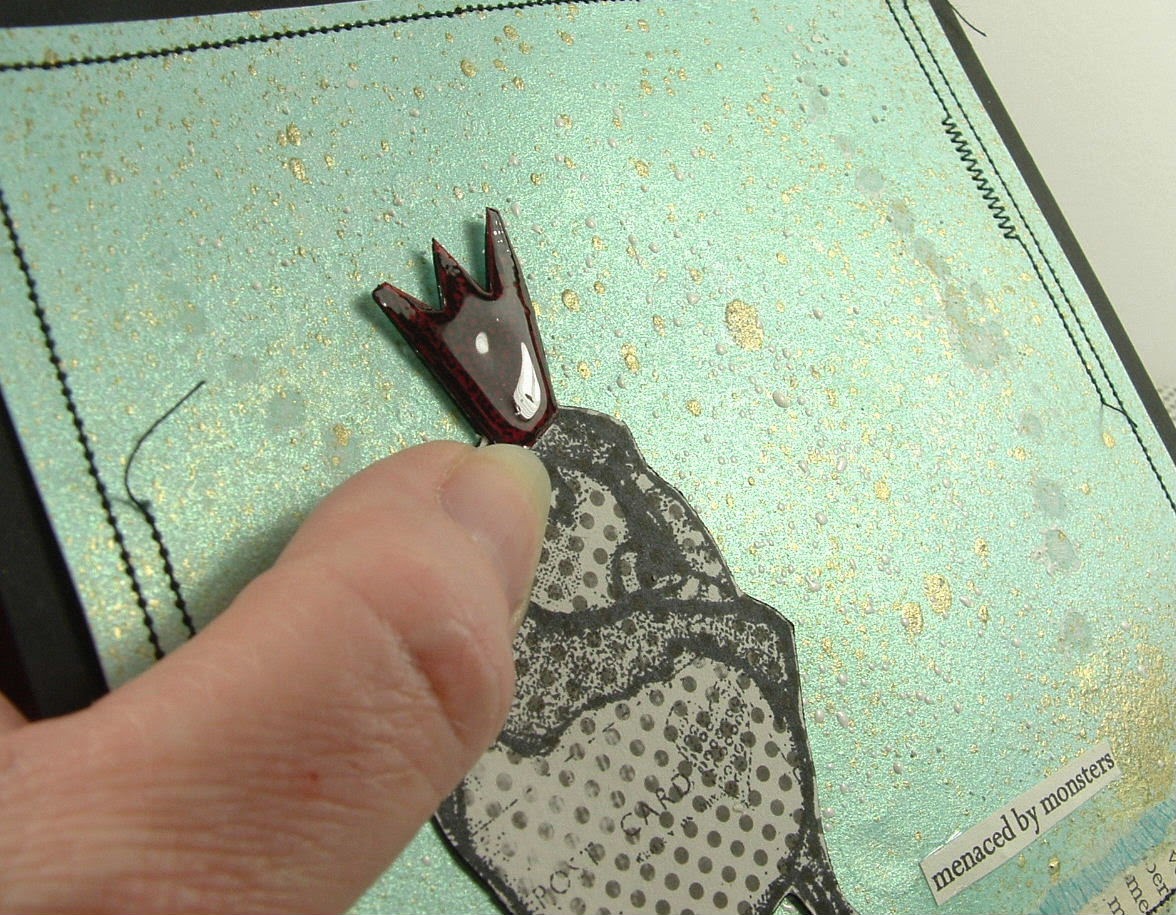
First thing I LOVE about the sprays is the spray mechanism....no more stained fingers! They say the nozzle will not become clogged, fingers crossed on that point. The sprays also have a little ball inside, so when you shake to mix up the mica you can hear the mixing going on! Squeezing the nozzle hard gives a really nice overall coverage. I used the Glistening Waves colour for the background on my panel, with the Lime Wedge as accent splats....
Squeezing the nozzle very gently gives the bigger splat effect. I found that the colour of the Lime Wedge really varied, the green was so much more noticeable when used to give full coverage, the splats (as you can see) are very gold! I added in some white splats of my own, by using white UTEE, and by stamping in white paint, using a Stampotique stamp.
The sheen of the Color Bloom Sprays is difficult to see.....it becomes a bit more obvious if I tile the cardstock...
You can really see the difference between the matt white paint stamping and the mica sheen of the sprays!
I added in a little text paper and some home made washi tape...
I didn't have any blue tape, so painted and stamped a bit of regular masking tape!
My Crafty Individuals Puffin is stamped onto patterned paper. I usually use this paper as a photo prop, but I decided to see what it looks like stamped on....definitely going to do it again! The paper is a dotty one from Bazzill.
I do like adding in different coloured crowns to my creations, and this is no exception! Stamped again onto red card, cut out then glossed with a touch of Glossy Accents.
So, mojo well and truly back now, will be spraying all manner of things!
Have a great day,
Trish xxx


30 April 2014

LO: love who you are...

Hi dear crafters!
My new LO is with foto from my university years :)I had a long hair and even one white strand))))
As background I made few daubs with pink paint and a bank card))) Than took few pages from old book and doily. As a last accents made black spatters.

I used papers Glitz Design (Carpe Diem), glimmer mist Tattered Angels Chalkboard - Seven Seas, washi tapes MME, paints, bradses, dots MME and little chipie Wycinanka

As mask I used the pieces from chipboard))


Threads are also very nice detail :)


hope you liked it
Have a nice day!
Tanya Privalova

28 April 2014

linocut part 2

Hello everyone!

I have always loved prints. Every kind of printmaking! I thought that I would love to try. But where to start? I don't have a huge studio, no space for professional tools etc. That's why I have chosen linocut which is perfect for small spaces and which is really fascinating technique.

Today I will tell you where to start. What you need for the first steps and also give you some tips. I'm not a huge expert, only a few prints in my drawer but with gaining my experience I will write and share more with you.


MATERIALS
There is a lot of materials which probably you will find useful in the future but for now you will need only a few things.

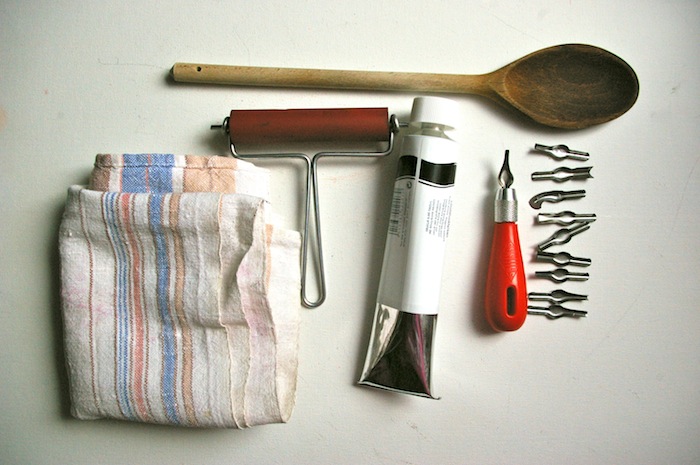
Cutting tool you can find lino cutting sets or high quality linocut tools at shops. Of course for the start buy a cheap handle (plastic or wooden) with replaceable blades. They are good for learning and you will have an opportunity to get used to the different types of blades.
Never throw your blades together because you can damage them.

Lino block – you can buy linoleum in various sizes and thickness. You can buy bigger sheets and then cut them or buy small sizes. It really depends what you want the lino for.
At the shops you will also find SoftCut. The carving material is very smooth and easy to cut. Cleaning the SoftCut sheet is easier then traditional linoleum. It can be washed under a tap after use.

Roller – there are various sizes but for the start and not a big prints you won't need a huge one.

Printing ink – there are two kinds of printing ink: water-based and oil-based. I have chosen water-based for the start because they are easy to clean (using only water) and are safe to use. You will find that there are a lot of different brands of printmaking ink and prices also vary. When buying the inks for linocut always buy ink for relief printing NOT etching inks.

I bought a big tube of cheap ink for learning and smaller one which is more expensive to more advanced prints and of course to see a difference between the two of them. I bought only two colours black and red for the start (I didn't know if printmaking would be for me ;)).

When buying the inks for the first time I think it's enough to buy only a few colours, black and some of the primary colours (you can always mixed them). But for simple print you will need only one colour!

If you use oil-used inks remember to use gloves or special cream for protection. Also you will need a good ventilation. Don't confine yourself in a small room with a lot of oil-based ink ;)
If you are a messy person wear an apron.

Paper – for the start you can use whatever paper you want but I recommend cartridge paper (huge amount for only a few quid). First prints won't be perfect, don't waste you best paper. Remember to use a smooth paper for prints.

A tool for burnishing – you can find a special tool (baren) for that or you can use your hand but I have chosen a wooden spoon. Yes! I took the one from my kitchen drawer ;)

A surface for inking – I use a sheet of glass which I took from a picture frame. Easy to use and to clean. Put something under the glass if your desk is smooth, you don't want to hear this squicky sound when glass in moving when you ink your roller ;)

Cloth – for cleaning tools


I hope I have helped you a little with choices and I hope to see your first prints soon!

Magda x

26 April 2014

It's nest building time.

It's that time of year when the birds come back to the garden and start building their nests. 

I used the cute Darkroom Door Carved birds 1, stamping them onto a piece of scrap patterned paper so they'd take up some of the texture and pattern from underneath.

 I love these birds they're adorable.


It's a good job I'm not a nest builder, mine's tripe.


Have a good weekend, 

Jaine x